Multi Screen Levels
Levels that are bigger than one screen can be created and mixed with one screen levels.
In them the camera follows the player when you walk around while respecting the limits of the level, and it works seamlessly with the rest of the world when transition between levels, while transitioning from coordinates inside the Multi Screen are handled by a new event signal called internal_level_coords_changed.
Goals
Add more variety and freedom to level design while also giving a fresh perspective and "game feel" to the player, allowing for creating different experiences according to the needs of the game's narrative or gameplay design.
How to create Multi Screen levels
The main structure of a multi screen level is the same as an ordinary level. It should follow the same node hierarchy of single screen levels and same requirements for enemies, navigation, etc.
What needs to be adjusted is:
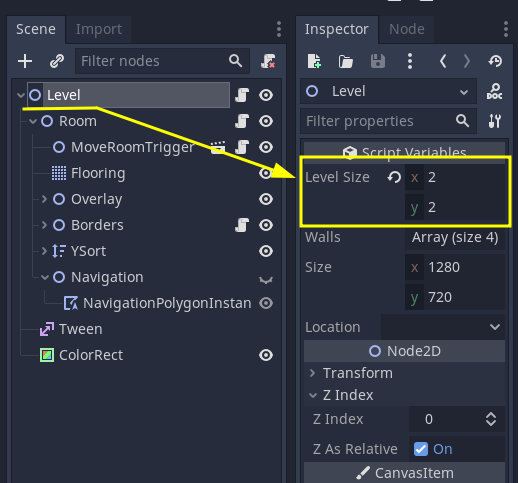
- Set the
level_sizeproperty in the mainLevelnode. It must be set manually, match the actual size of screens that were created in the level and must always be whole numbers.
- Setup CameraAnchors around the levels exits/entrances. See more details below.
And that's all. Notice that while you work on the level in the editor, the MoveLevelTriggers will look wrong, and will look like they only cover the first screen of the level:

That is normal and expected, and you don't need to do anything about it, it will calculate its correct dimensions when the game starts running. It will use the level_size property explained above to do it, so if that property has the wrong value, the MoveLevelTriggers will also be wrong on runtime.
Testing Levels
You can test if the level is working and if the camera anchors are setup in a nice way by pressing F6 to run the level scene directly. You will not be able to transition to other leves, but a player and a camera will be automatically added to the scene and you'll be able to walk around, test the camera anchors, fight enemies or test any other challenge the level design proposes.
Setting up Camera Anchors
We need CameraAnchor so that we can lock the screen to the expected "screen coordinate" whenever the player is approaching any exits to prepare for screen transitions or so that the camera doesn't do any weird movements after entering a Multi Screen level.
While the player is inside any CameraAnchor's area, the camera will lock to the coordinates of that screen, as if it were a single screen level. Once the player leaves a CameraAnchor's area the Camera will be freed again and follow the player's position.
ScreenTransitions without CameraAnchor:
ScreenTransitions with CameraAnchor:
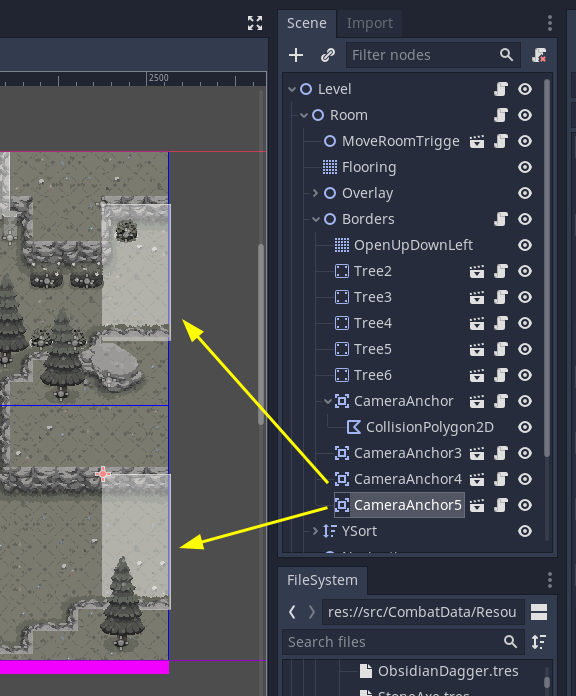
To add CameraAnchors, instance the CameraAnchors Scene using Ctrl+Shift+A or drag and dropping it from the filesystem tab. They can live anywhere in the Level hierarchy, but I think it makes sense to but them inside the Borders node.
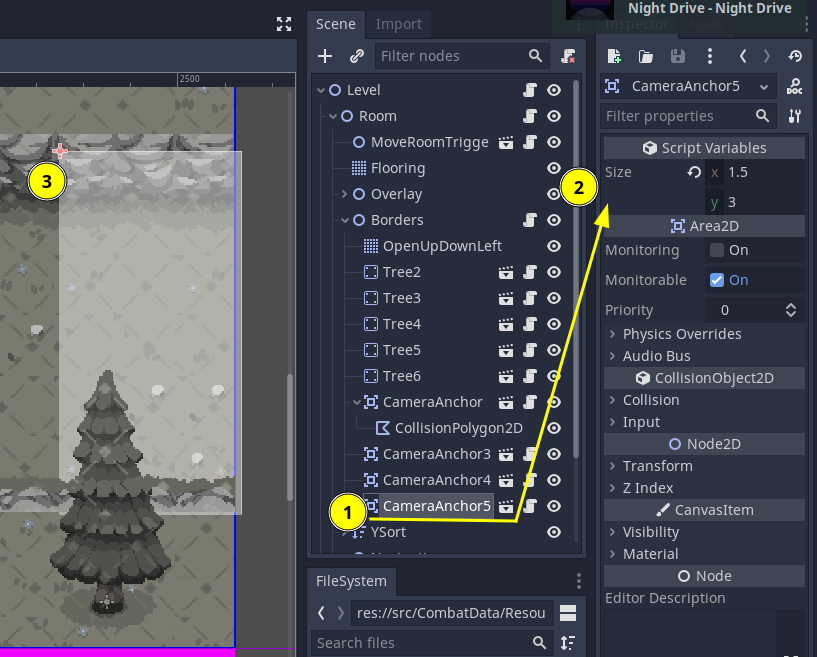
Use the inspector to set their size, and move the node to position them accordingly. Here you can freely use float values for the size, each unit is the size of a tile.
The blue rectangle is a "preview" of where the camera will lock. As you move the node in the editor the "camera preview" will move as the position of the "origin" of the CameraAnchor crosses to a new screen coordinate.
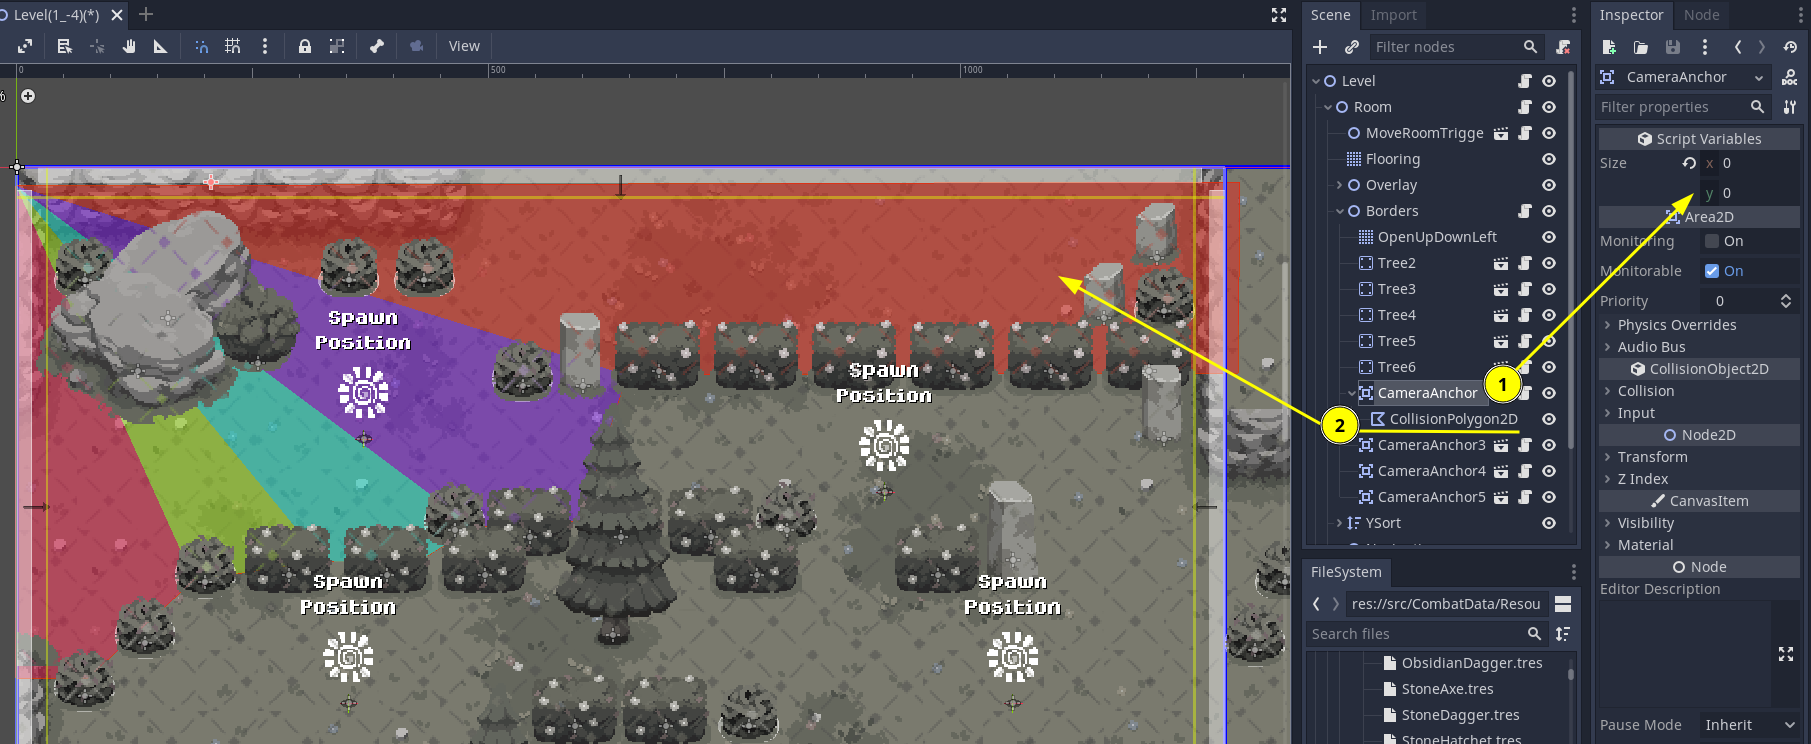
If you need a CameraAnchor with an area that is not a rectangle, you can have it by setting the size to 0 and adding a new CollisionPolygon or CollisionShape node as a child of it. Then you can set your own polygon or any other shape that best applies to the situation.
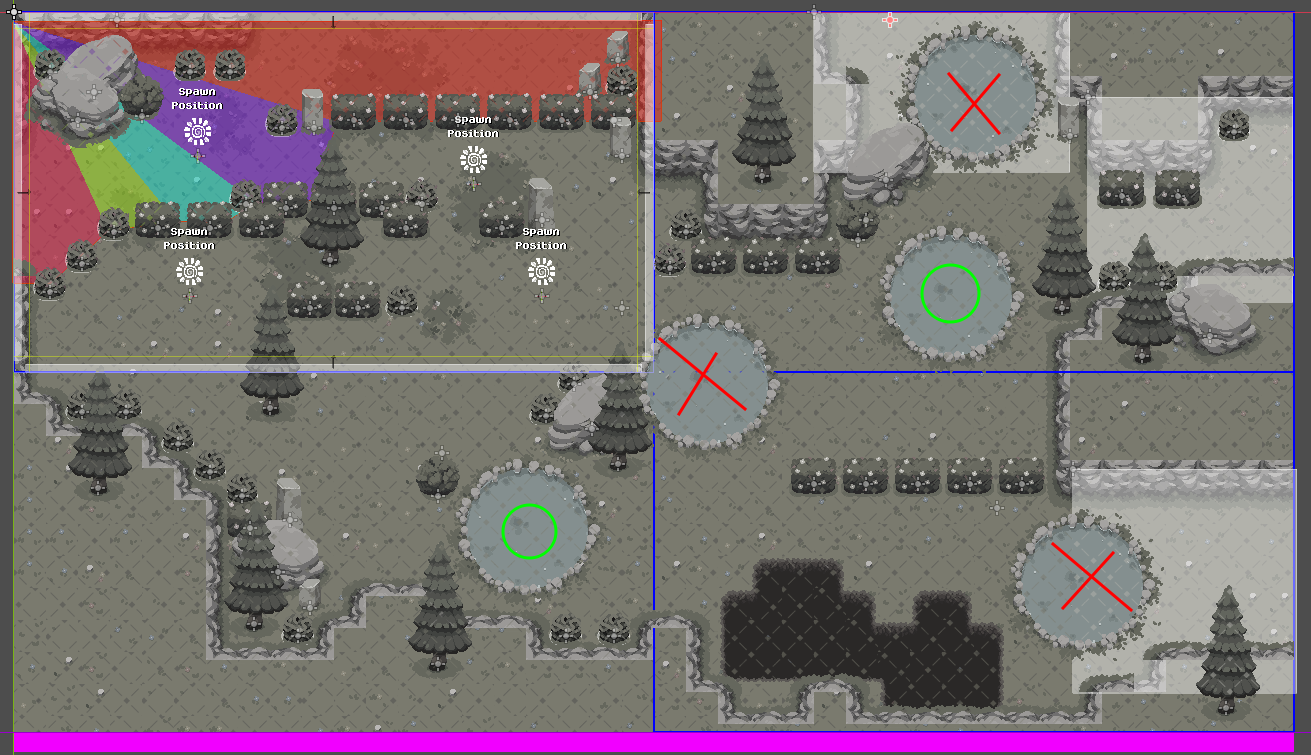
Using Ponds in Multi Screen levels
Do NOT place ponds in intersections between "internal levels", or partially or fully inside camera anchors. Placing them inside or partially inside camera anchors may lead to some weird effects when zooming out when you leave the pond.
Placing them in a way they are in two or more "levels" at the same time doesn't really gives any bugs today, but the player will only be considered as having "changed" levels once it leaves the pond, which might lead to inconsistencies if some code needs to check for player level location or location change.
Here is an image with a few examples of ponds positioning. Ponds marked with a green circle are OK, while ponds marked with a red cross should be avoided:
With what script it communicates
This isn't really one specific script, but many changes that were added to Level.gd, Room.gd, MoveLevelTriggers.gd, GameplayCamera.gd and others, as well as new scripts like CameraAnchor.gd and CameraAnchorDetector.gd.
Most noticeably, there were some changes needed to "sanitize" player position as on Multi Screen levels, it can be beyond the base level size, and must be converted to "single screen" position whenever the player is transitioning between levels. And likewise, these "single screen" positions must then be converted back to "multi screen" position when the player is entering into a multi screen level through any "screen" that isn't its "origin" coordinates.