Introduction
This game is still a work in progress
This website serves as the comprehensive reference for Tribe of the Accord. It is designed to be the main source of truth for all aspects of the game, including game design, technical documentation, onboarding new team members, and providing a full view of the game's development process.
Usage
This document is essential for:
- Newcomers: To get up to speed with the project, understand the codebase, and grasp the game design.
- Developers: To reference technical specifications, coding standards, and implementation details.
- Designers: To understand the game mechanics, design principles, and creative vision.
- Project Managers: To monitor progress, anticipate risks, and manage production schedules.
- Entire Team: To maintain a shared understanding of the project goals and ensure cohesive development.
Feedback is greatly appreciated!
Vision/Statement
"Step into a dangerous, untamed world in this top-down action-adventure. As Adira, a fierce survivalist, must face brutal enemies and wield primal weapons as she embarks on a perilous quest to find her kidnapped father."
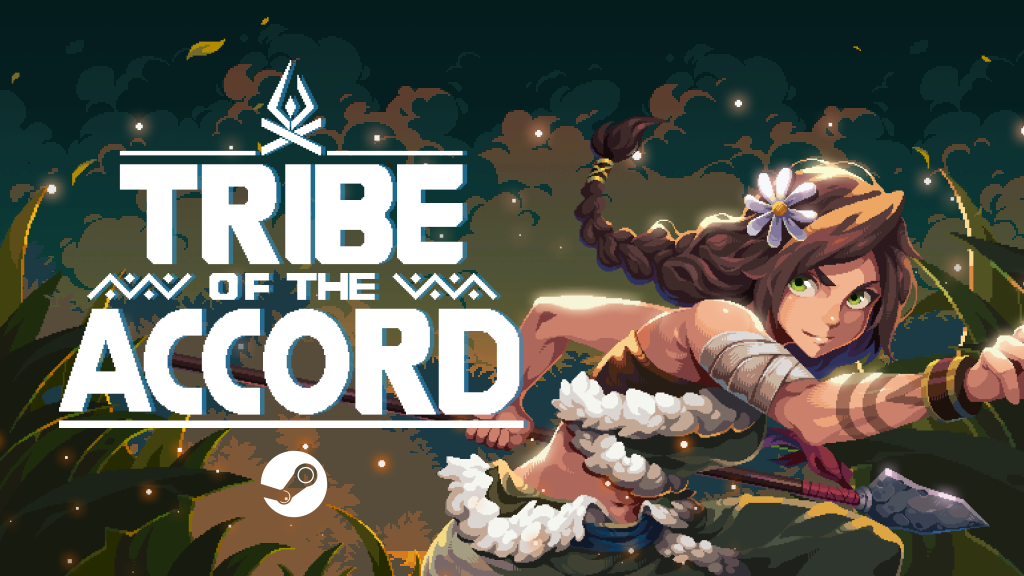
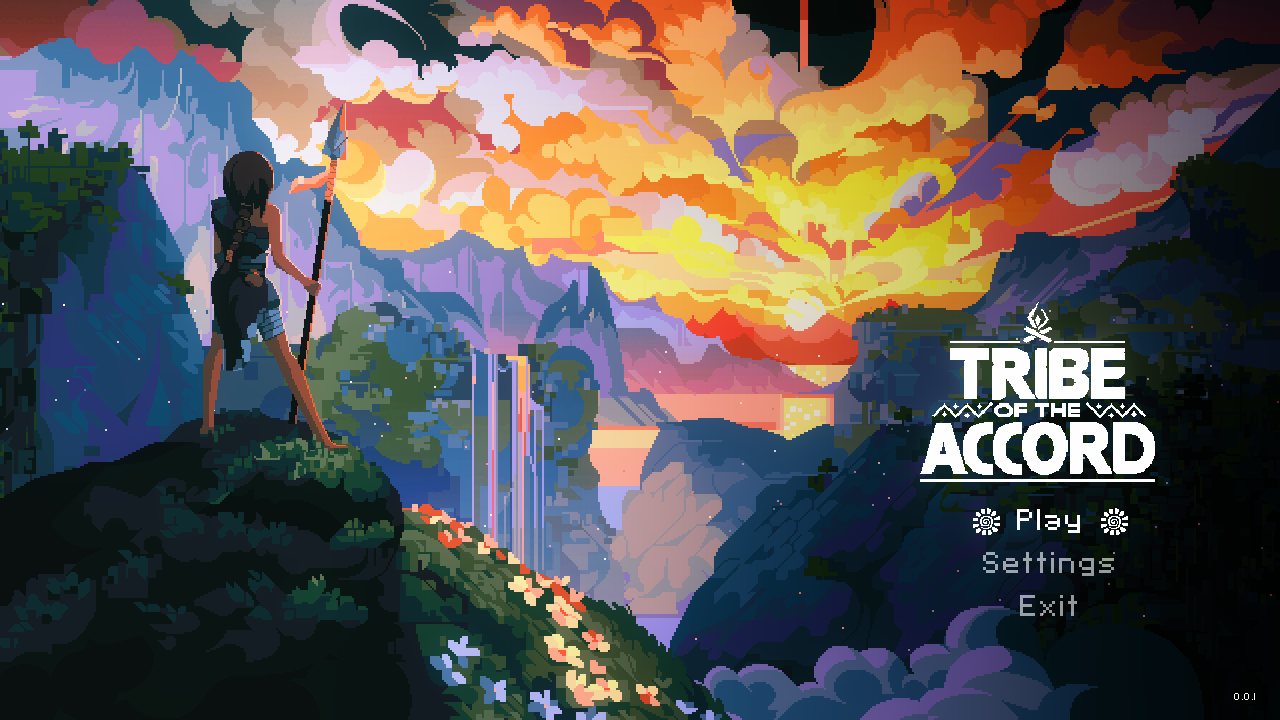
Tribe of the Accord
A pixel-art action-adventure about finding where you belong.
Story
Adira has always longed for more.
Raised in isolation by her overprotective father, she's curious about the outside world, discovering new lands, and forging bonds with tribespeople beyond their own sheltered camp. But when her home is raided and she’s driven out by a vicious warrior tribe, Adira’s curiosity turns into a harsh awakening.
Now alone in the wild for the first time in her life, she must learn to fend for herself if she is to survive and find a place where she truly belongs.
Set in a lush, dangerous Stone Age world, Tribe of the Accord is an action-adventure game where you must master fluid movement and unlock new abilities. These skills are essential to face the perilous wildlife and navigate challenging environments so you can uncover the secrets of your past.
Inspirations
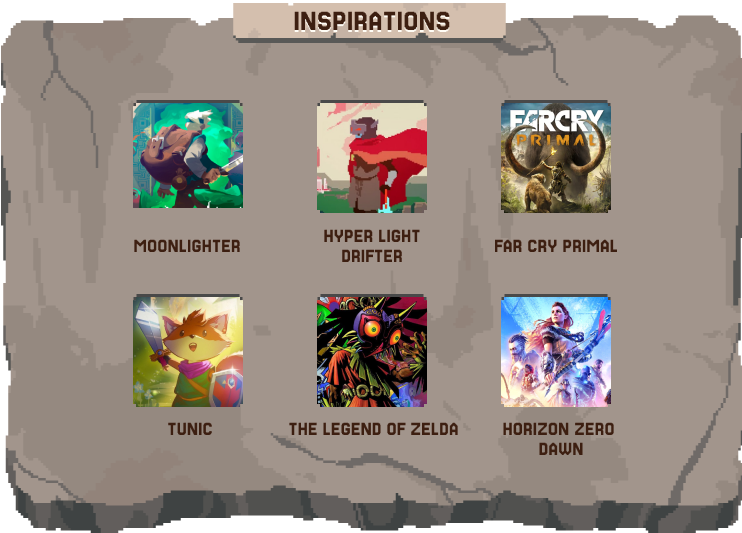
Tribe of the Accord is a passion project inspired by a mix of indie favorites and timeless classics. We are influenced by the rich casts and heartfelt storytelling of beloved JRPGs like Chrono Trigger and the Final Fantasy franchise, the expressive combat and exploration of titles such as Hyper Light Drifter or Legend of Zelda, and the charming pixel art style seen in Moonlighter.
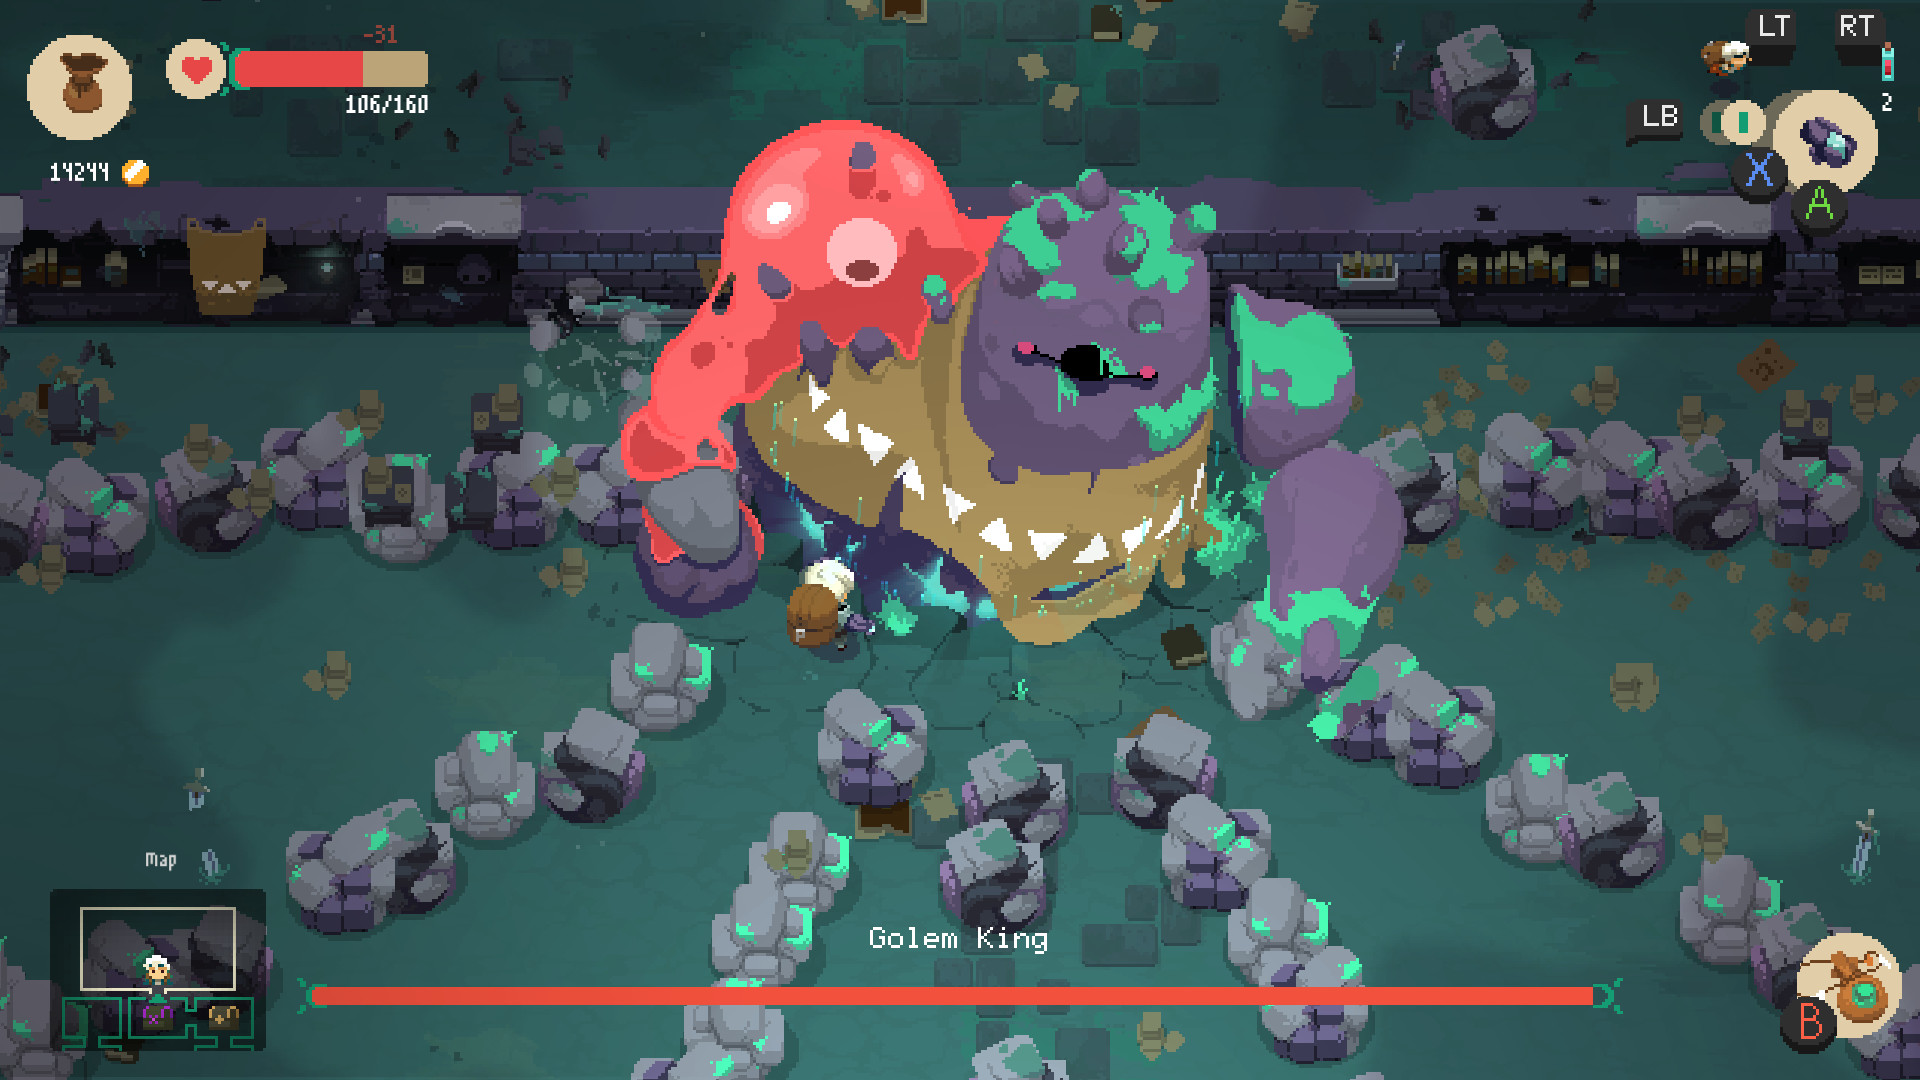
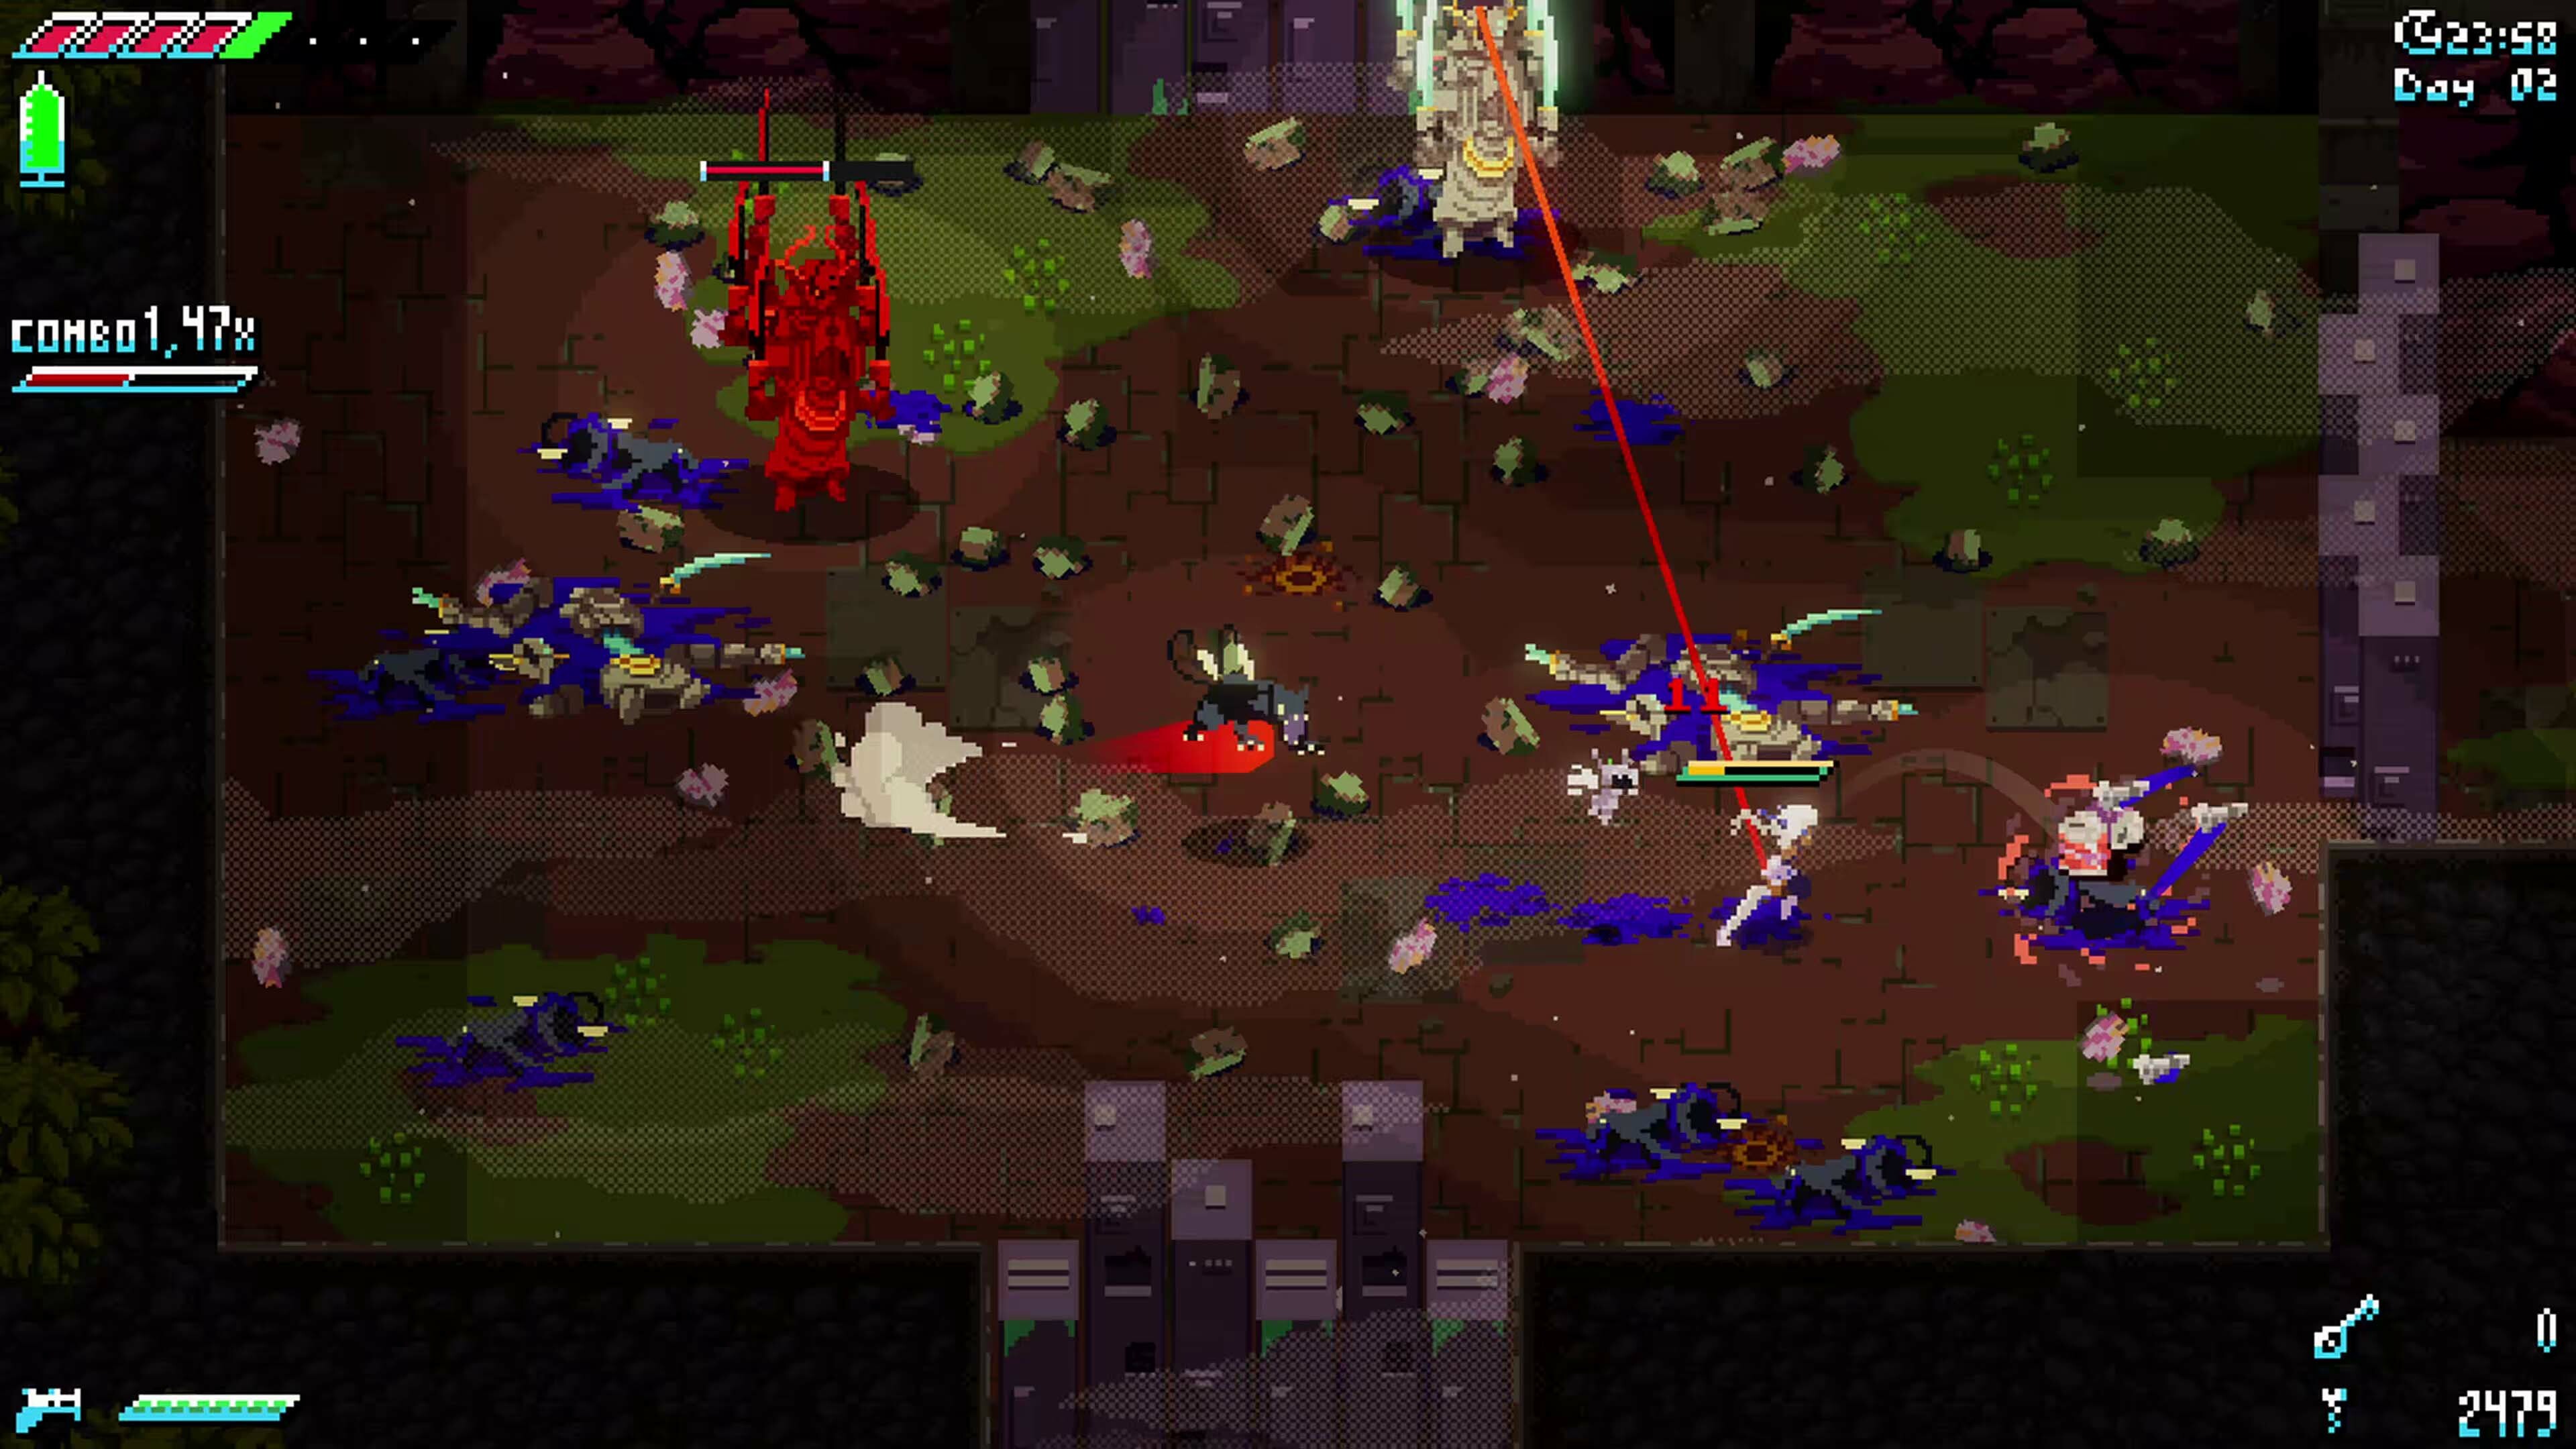
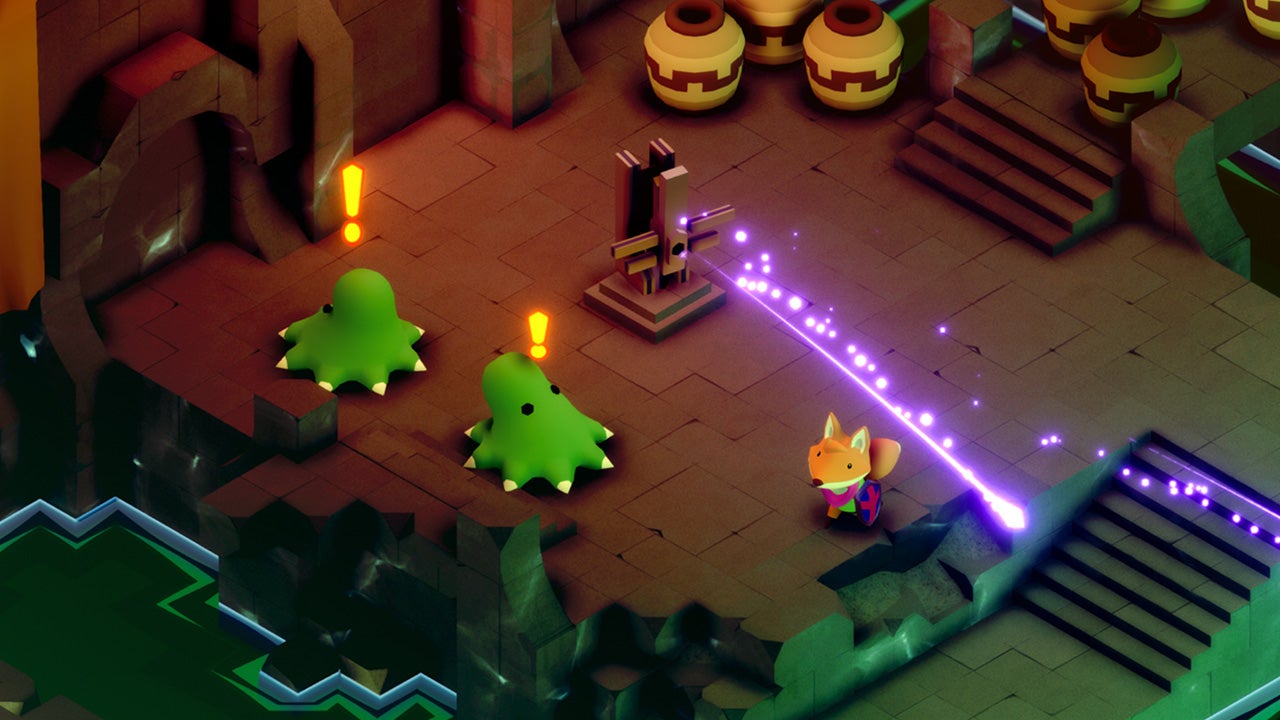
Gameplay
Snappy combat, purposeful exploration, and ability progression are at the core of the Tribe of the Accord experience.
🏹 Face the wild
Combat is responsive and dynamic. Use Adira’s speed and agility to time your strikes, dodge incoming attacks, overcome fierce predators, and defeat towering bosses.
🌿 Explore an untamed world
New abilities open up previously inaccessible areas, rewarding curiosity and exploration with new pieces of lore, upgrades, and surprises off the beaten path.
💪 Acquire new abilities
Adira will learn a diverse range of abilities that fundamentally change your combat strategies and how you interact with the world.
🎭 Characters
In Tribe of the Accord, you'll meet a cast of colorful characters that will shape and challenge Adira’s journey.
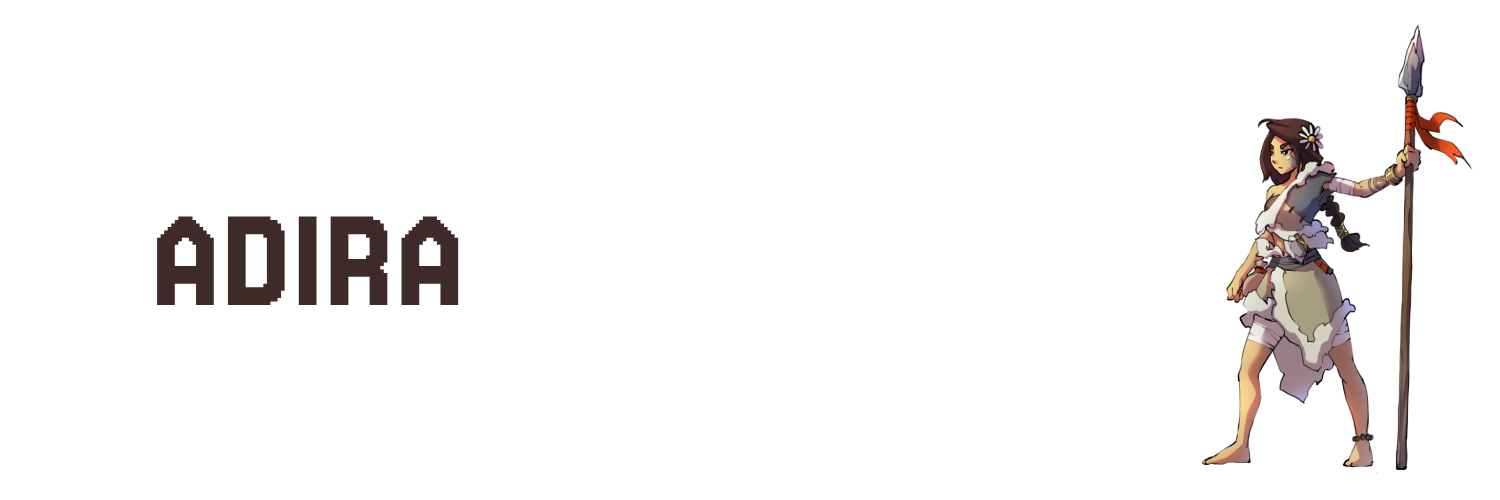
Adira
A bold, headstrong huntress with a fierce spirit and a lot to prove. Adira has always chafed under her father’s strict rules, and longs for the day she’ll explore the world, meet new people and, who knows, maybe even join a tribe.
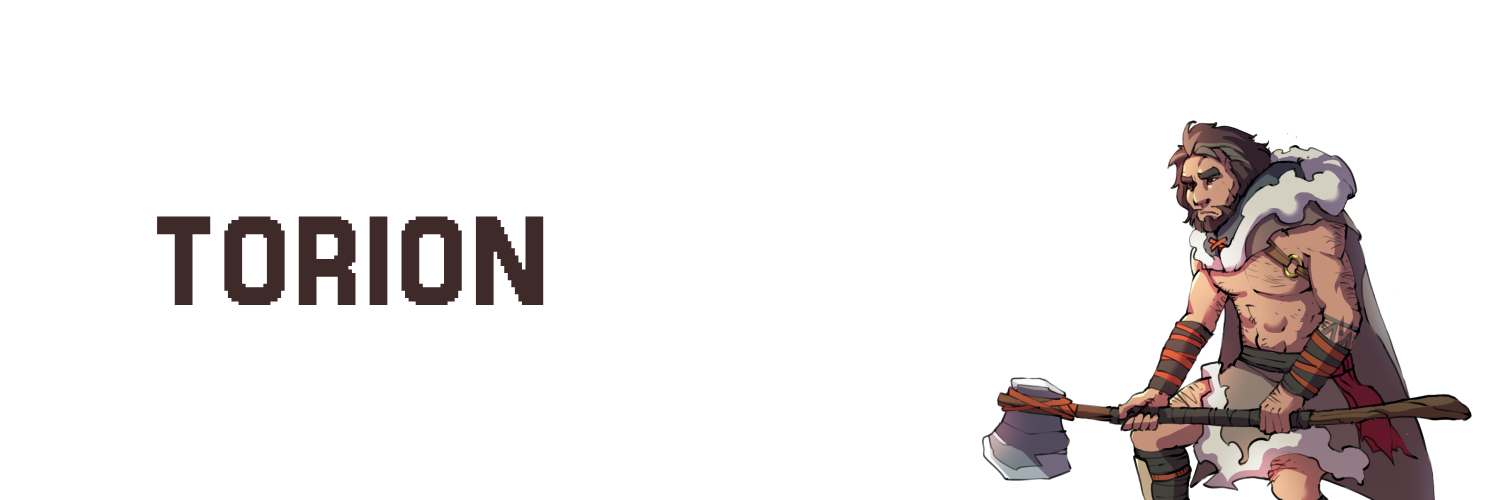
Torion
Stoic and powerful, Torion has survived countless battles and kept Adira hidden from the world—for reasons he’s never dared to reveal.
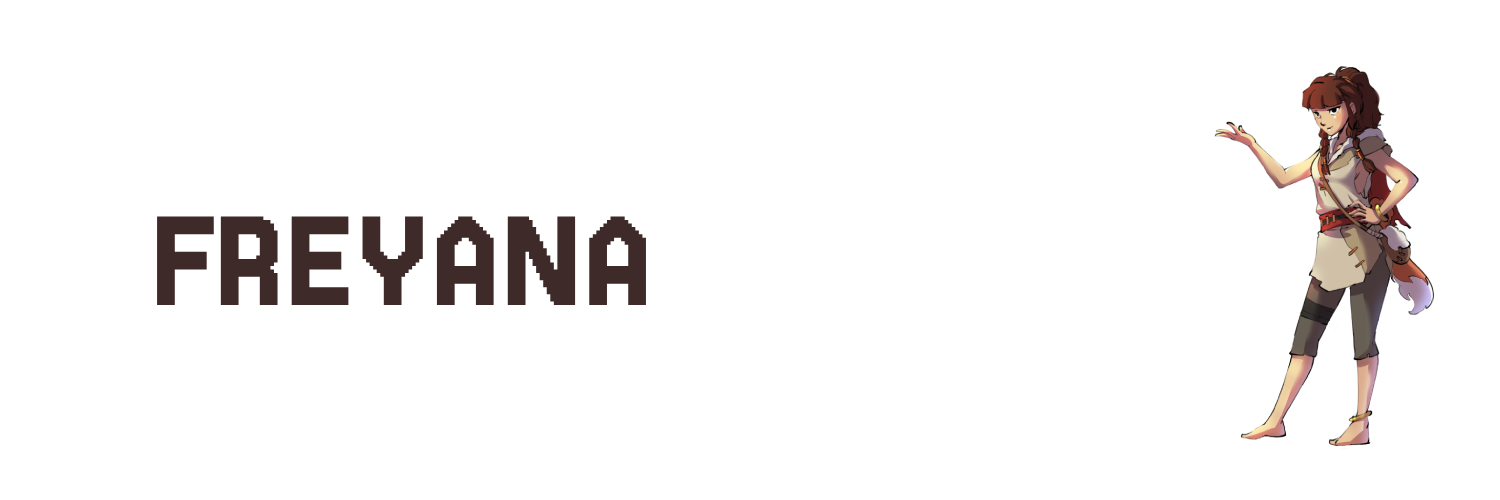
Freyana
Much like Adira, Freyana too has grown isolated from the outside world. But unlike Adira, who dreams of boundless freedom, Freyana is a gentle soul, eager to help those around her with her knowledge of healing and herbalism.
The Ursa
A brutal war tribe forged in blood and bound by pain, the Ursa are a dominant force sweeping all across the land. Their thirst for conquest is only surpassed by their hunger for violence.
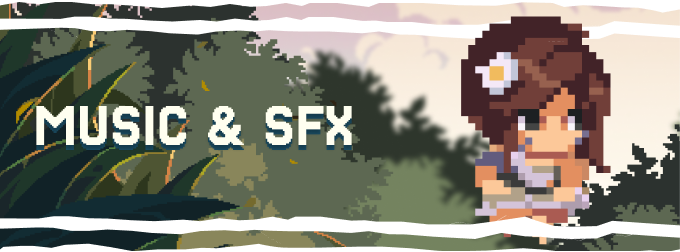
🎵 Music & SFX
Feel the wild come alive!
From the rustle of grass to the thunder of combat, our music and sound design were handcrafted to enhance the atmosphere, heighten the tension, highlight moments of discovery, and pull you deeper into the wild world of Tribe of the Accord.
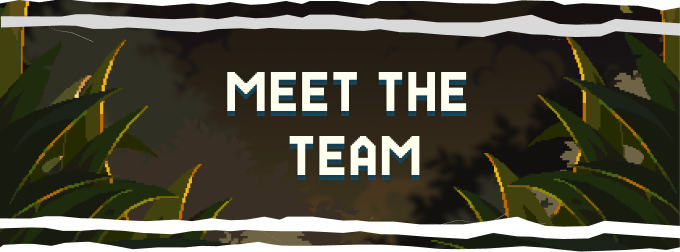
👥 Meet the Team
We're a clan of developers from all over, totally hooked on pixel art, adventure, and getting lost in new worlds.
Tribe of the Accord is the game we've always wanted to play ourselves—you know, the kind with tons of heart and cool stuff to find. It is also a love letter to all the games we grew up loving, and our way of giving something back to an industry that provided us with so many memories.
We're pouring that passion into every single pixel, and we really hope you'll join along for the ride!
Social Media


Preview
Check out the latest recording of the game as it is today.
{% embed youtube id="5611vyefQj4" loading="lazy" %}
This can also be found on the official game landing page.
Target Audience
1. Demographics
- Age Range: 16-35 years old
- Gender: All genders
- Geography: Popular in North America, Europe, and Japan, with growing interest in other regions
- Language: English, with support for multiple languages including Chinese, Japanese, Spanish, French, and Portuguese
2. Psychographics
- Player Interests: Fans of games with snappy controls, rewarding exploration, and intricate world-building. They enjoy games with a rich, vibrant aesthetic and appreciate the sense of discovery and environmental storytelling.
- Gaming Habits: Primarily experienced gamers who invest time into learning the mechanics of a game. They are enthusiasts which is an inherent by-product of following indie games.
- Values and Motivations: Players want to be surprised and challenged without it being too unfair. They value a sense of accomplishment, exploration, and immersion in a beautifully crafted, mysterious world.
3. Experience Level
- Skill Level: Intermediate players. We want it to be challenging but not to a point where it's frustrating. We also don't wnat to hand hold the players.
- Familiarity with Genre: The target audience has a high familiarity with top down action/exploration games, likely having experience with games like Crosscode, Hyper Light Drifter, Unsighted and Tunic. Newcomers to the genre may also find it appealing due to its artistic presentation.
4. Community and Engagement
- Online Engagement: A lot of online engagement comes from people finding out about unknown games through forums, and if it catches on, then the game is massively discussed. Players frequently discuss strategies, share fan art, and talk about game lore.
- Multiplayer vs. Single Player Preference: The game is a single-player experience, which caters to players who enjoy immersive, solitary gameplay. Multiplayer isn’t a factor, but the audience enjoys sharing their single-player experiences with others online through discussion and content creation.
5. Influencers and Trends
- Followed Influencers: Fans of such games follow YouTube or Twitch influencers who cover indie games and exploration games.
- Popular Trends: TBA.
Inspirations
Tribe of the Accord is a passion project inspired by a mix of indie favorites and timeless classics. We are influenced by the rich casts and heartfelt storytelling of beloved JRPGs like Chrono Trigger and the Final Fantasy franchise, the expressive combat and exploration of titles such as Hyper Light Drifter or Legend of Zelda, and the charming pixel art style seen in Moonlighter.
1. Moonlighter
- Genre/Type: Action, RPG, Shop Management
- Key Elements We Want to Take: Art direction
- Why it inspires us: It has aesthetically pleasing art.
2. Hyper Light Drifter
- Genre/Type: Action, Exploration
- Key Elements We want to Take: Gameplay
- Why it inspires us: Hyper Light Drifter has exceptionally smooth gameplay - the combat is simple but is made complex due to the enemy designs and exploring the world feels rewarding.
3. Unsighted
- Genre/Type: Action, Metroidvania
- Key Elements We want to Take: Aesthetics and gameplay
- Why it inspires us: Unsighted has great gameplay and level design that is combined with snappy controls.
4. Tunic
- Genre/Type: Action, Exploration
- Key Elements We want to Take: World design and intrigue
- Why it inspires us: Tunic masterfully combines a mystical world with tight gameplay and mind tingling level design.
Other Inspirations
Minor details from other franchises/games that we want to integrate into the game.
- Final Fantasy 7 - the polygonal character designs.
- Lara Croft - Adira has traits of Lara Craft (Adventurous, Brash and tough).
- Metal Gear Solid - Solid and Liquid Snake relationship (Torion & Lorak).
- The Last of Us - Joel and Ellie’s relationship Love/Hate (Torion & Adira).
- Crash bandicoot - Tribal feel (Masks etc.)
- Original Rayman - The themed locations (Forest, Swamps, etc.), Signs to end the game.
Narrative
Story
Tribe of the Accord takes two forms:
We need to define separate narratives for each for the following reasons:
- Novels thrive on internal monologue, rich prose, and linear narratives. You can explore Adira’s thoughts, detailed world-building, and nuanced relationships deeply.
- Games rely on player agency, interactivity, and visual storytelling. A game needs engaging mechanics, moment-to-moment tension, and player-driven discovery.
Character Profile
A Character Profile document is essential for narrative development because it ensures consistency, depth, and believability across the story. It helps writers, designers, and voice actors align on a character’s background, motivations, personality traits, relationships, and narrative arc. By clearly defining who a character is and how they evolve, it prevents contradictions, strengthens emotional impact, and supports meaningful dialogue and story choices throughout the game.
Tone of Voice
A Tone of Voice document is crucial because it defines how your game communicates — not just what it says. It ensures all narrative elements, dialogue, UI text, marketing copy, and character interactions feel consistent and authentic to your world. This is especially important in a story-driven game like Tribe of the Accord, where mood, setting, and character identity must align. Whether the tone is solemn, playful, primitive, or poetic, having clear guidance helps every team member (writers, designers, marketers) stay true to the voice of the game — creating a unified, immersive experience for players.
Useful links
- Narrative Chapter Summary - Used for storing all summaries of each Chapter
- Dialogue Spreadsheet - Used for storing all dialogue related to the Game
Character Profiles
Characters are the emotional and narrative core of any story. While plot moves the story forward, characters give it meaning. They allow the audience to feel, relate, and invest in what’s happening. Through their desires, fears, and decisions, characters create tension, drive conflict, and deliver growth — all essential elements of compelling storytelling.
🧭 Protagonists & Allies
⚔️ Antagonists
🧩 Character Archetypes
Characters
Adira
Role in Story
Protagonist — a young huntress on a journey of survival, self-discovery, and independence.
Personality
Headstrong, resourceful, and emotionally guarded. Speaks plainly, often with clipped honesty. Deeply loyal but reluctant to show vulnerability.
Motivation
She wants to prove she can survive without relying on others — especially Torion. Her drive stems from feeling underestimated and burdened by expectation.
Conflict
Struggles between independence and connection. Internally, she fears abandonment and weakness. Externally, she's hunted by the Ursa clan and must learn to trust allies.
Relationships
- Torion – Father figure; complicated dynamic of protection vs control
- Freyana – Best friend; opens Adira up emotionally
- Salzo & Dhoron – Mentors with contrasting views of strength and leadership
Arc Summary
Begins as a defiant, isolated survivor. Over time, she learns that true strength comes from connection, not just self-reliance. Ends with greater emotional maturity and a sense of belonging.
Torion
Role in Story
Mentor and father figure — once a fierce warrior, now a protective and emotionally distant guardian trying to shield Adira from the world.
Personality
Stoic, disciplined, and cautious. Speaks with weight and intent. Rarely shows emotion but feels deeply beneath the surface.
Motivation
Wants to keep Adira safe at all costs — even if that means controlling her choices. Driven by guilt from his past and fear of losing her like others before.
Conflict
Struggles to balance protection with allowing Adira to grow. Internally, he wrestles with his past actions and whether he deserves forgiveness or redemption.
Relationships
- Adira – Adopted daughter; torn between his love and his inability to let go
- Ursa Clan – Former family; a history he’s tried to bury and escape
Arc Summary
Starts as a distant, overprotective figure. Through loss and confrontation, he learns to trust Adira’s strength and ultimately supports her autonomy — even if it costs him everything.
Freyana
Role in Story
Sidekick / Deuteragonist — a talkative and emotionally attuned healer who accompanies Adira, offering warmth, support, and a moral counterbalance to Adira’s impulsiveness.
Personality
Overly friendly, emotionally sensitive, and desperate to belong. Freyana is caring and light-hearted on the surface, but deeply insecure underneath. She avoids conflict, often sacrificing her own needs to make others happy.
Motivation
She wants to feel accepted and needed. Her drive to help others stems from a lifelong fear of being unloved or left behind. Healing gives her purpose and identity.
Conflict
Freyana constantly battles between her desire to please and her own unspoken needs. Her fear of letting people down — especially Adira — causes her to overextend herself and lose sight of her own voice.
Relationships
- Adira – Closest friend; deeply admires her bravery but often feels like she has to “keep up” emotionally and physically
- Wayoun – Deceased brother; her greatest loss and source of motivation to become a healer
- Forn (stepfather) – Source of trauma and neglect; his rejection shaped her self-worth
Arc Summary
Starts as a bubbly companion masking her insecurities with humour and kindness. Over time, she begins to assert herself and discover her own agency — not just in helping others, but in choosing what she truly wants from life.
Salzo
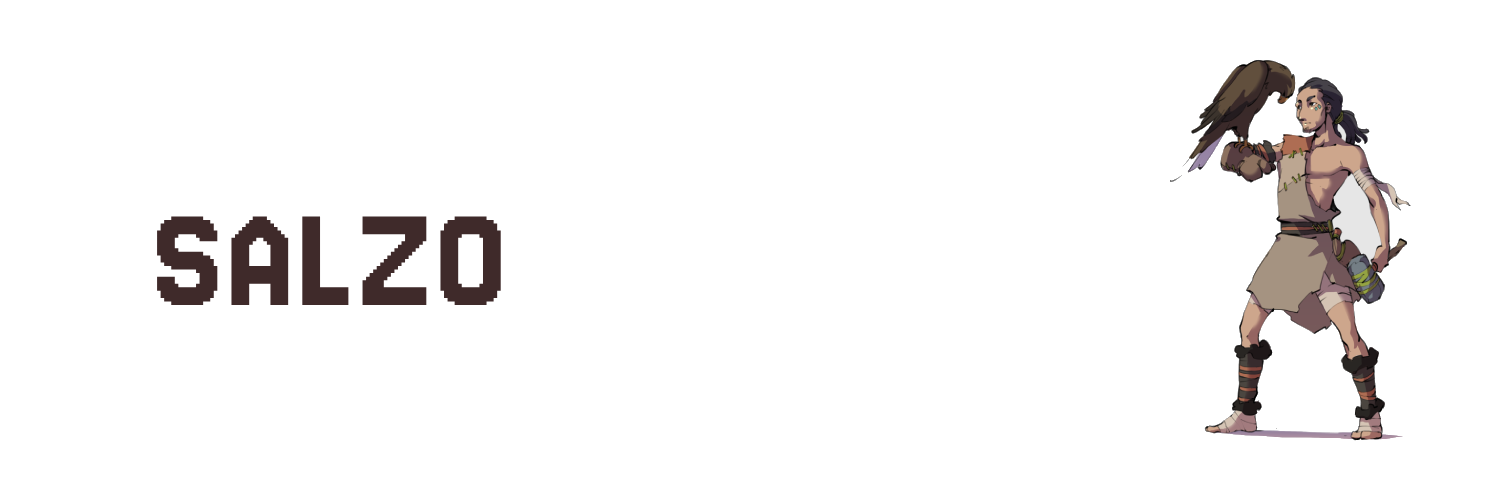
Role in Story
Sidekick / Deuteragonist / Dynamic / Love Interest — a quiet, skilled survivalist and craftsman from the fallen Aquilla (Eagle) tribe, who develops a growing bond with Adira.
Personality
Reserved, observant, and highly intelligent. Salzo is more comfortable with tools and animals than people. He has a dry wit, is practical, and shows affection through actions rather than words. Though non-confrontational, he’s quietly competitive and emotionally driven beneath the surface.
Motivation
Seeks belonging and emotional connection after losing his tribe. His bond with his eagle Keechi symbolizes his yearning for companionship and loyalty. His fascination with Adira gradually becomes a need for validation and emotional intimacy.
Conflict
Struggles between being helpful and overstepping — especially as his fixation on Adira grows. He is torn between staying true to his quiet, supportive nature and trying to prove himself in a world that values strength and aggression.
Relationships
- Adira – Initially captivated by her; his admiration evolves into affection, then obsession
- Dhoron – A source of constant friction; they clash over values and manhood
- Keechi (his eagle) – His most trusted companion; a symbol of trust, solitude, and heritage
Arc Summary
Starts as a supportive, slightly awkward outsider with valuable survival skills. As tension builds, his feelings for Adira complicate his judgment. By the end, he must confront his possessiveness and decide whether he’s truly acting out of love — or loneliness.
Dhoron
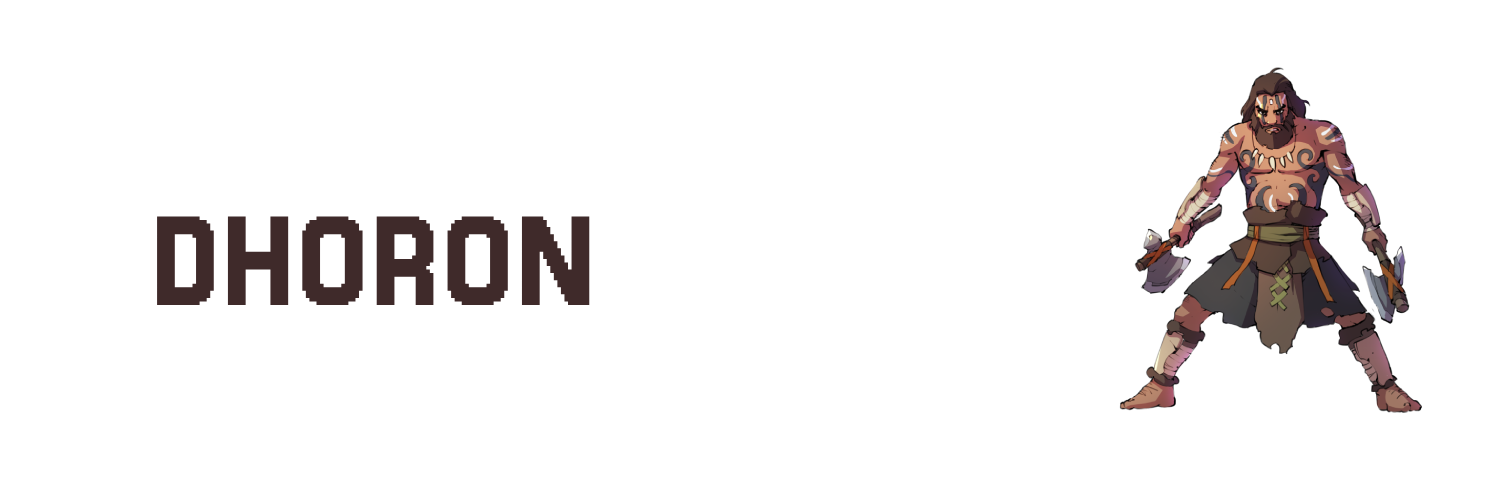
Role in Story
Foil — a hardened warrior and reluctant ally from the fallen Wolf Tribe. He frequently challenges Adira’s ideals and growth, serving as both critic and eventual supporter.
Personality
Gruff, blunt, and confrontational. Dhoron lacks tact and empathy, often coming off as aggressive or antagonistic. He’s fiercely loyal to his people and deeply pragmatic, believing survival comes from strength and caution, not emotion or idealism.
Motivation
Driven by loss and duty — especially the death of his son at the hands of Lorak. He seeks to protect what remains of his tribe and will do whatever is necessary to keep them alive, even if it means rejecting others or appearing heartless.
Conflict
Battles with his resentment toward outsiders, especially Adira, who reminds him of everything he’s lost and what he fears — youthful recklessness, false hope, and unearned leadership. Deep down, he wrestles with guilt and emotional repression.
Relationships
- Adira – A source of constant tension; he sees her as naïve and entitled, but eventually recognizes her strength
- Salzo – A frequent rival; they bicker often, though Dhoron masks his grudging respect
- Lorak – The man who killed his son; Dhoron’s hatred for Lorak is personal, not just political
Arc Summary
Begins as a bitter, closed-off survivalist who resents Adira’s presence. Over time, his respect for her grows, and he reveals a more honourable side — ultimately risking himself to support her cause and confront his past with dignity.
Eremiza
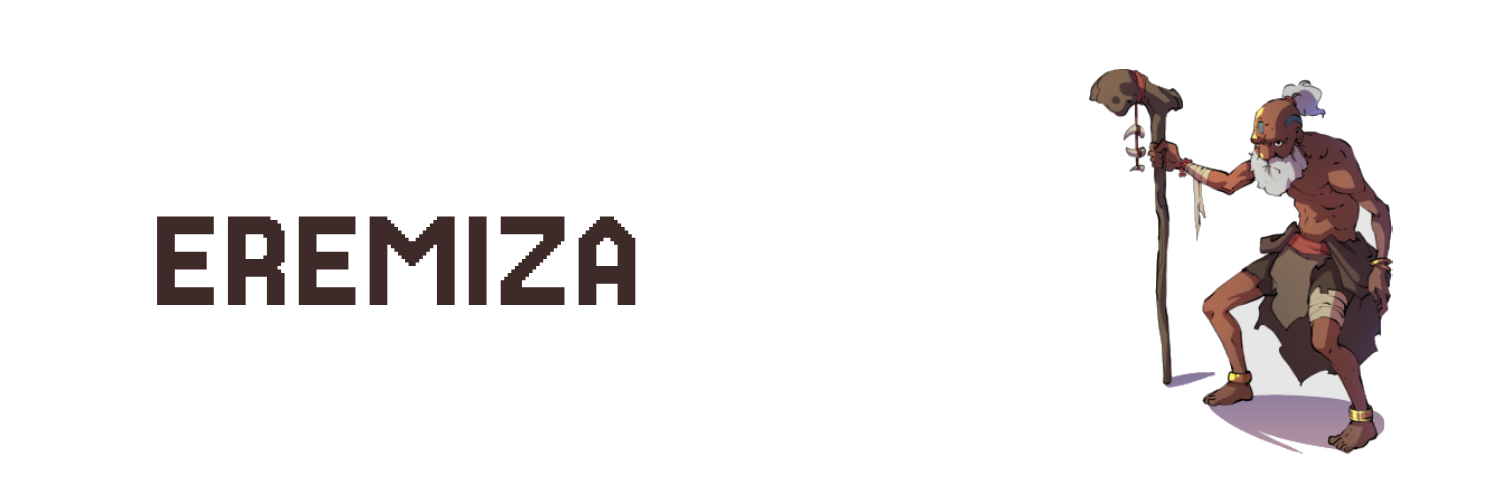
Role in Story
Mentor / Informer / Static — a wise, frail elder and former member of the Ursa tribe who now acts as a peaceful guide and moral compass within the Falls tribe.
Personality
Gentle, thoughtful, and quietly humorous. Eremiza is introspective and riddled with age, yet sharp-minded. He’s patient and slow to speak, but when he does, his words carry weight. Sentimental, with a strong sense of legacy.
Motivation
Seeks peace in his final years and hopes to nurture a community built on compassion, not conquest. He’s driven by a quiet duty to right the wrongs of his past through knowledge-sharing and the guidance of the next generation.
Conflict
Torn between the burden of his history with the Ursa and the need to protect his new tribe. He fears speaking too openly about Torion’s past might unravel fragile alliances. Must balance honesty with wisdom.
Relationships
- Adira – Takes a special liking to her; sees potential and passion reminiscent of Torion, whom he once respected
- Torion – Former ally and friend; he guards his knowledge of Torion's history out of both loyalty and caution
- Falls Tribe – Serves as a quiet mediator and storyteller, respected for his wisdom and neutrality
Arc Summary
Introduced as a reclusive elder with a mysterious past. Gradually becomes a key figure in Adira’s development, offering guidance, cryptic lessons, and private counsel. His influence is subtle but lasting, acting as the moral thread that binds the tribe’s values.
Lorak
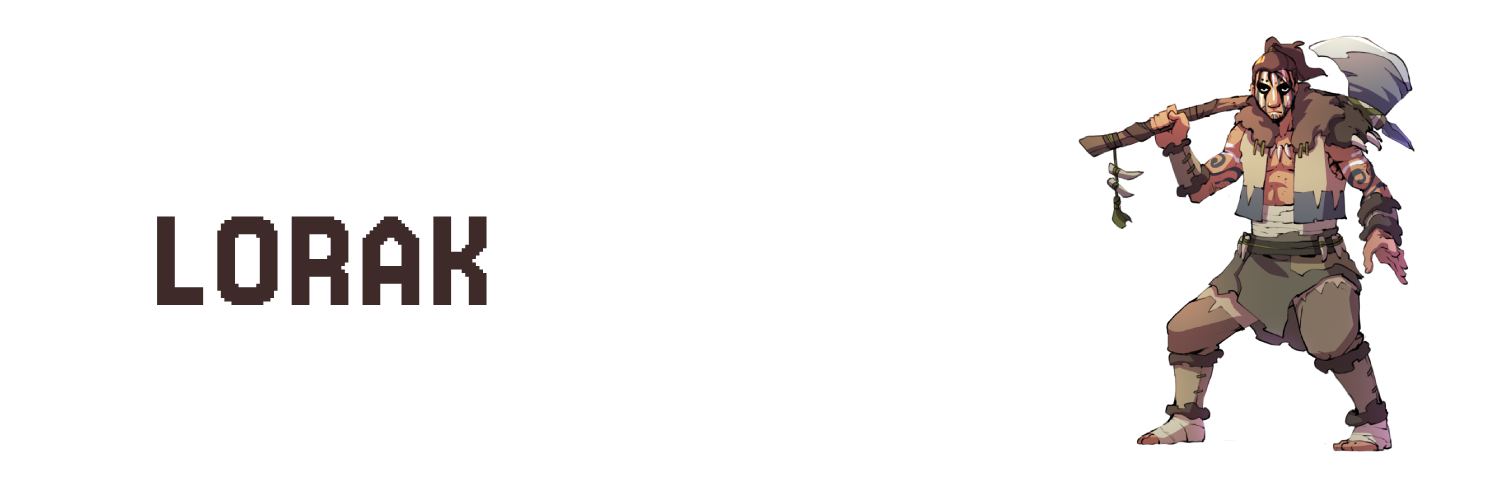
Role in Story
Primary Antagonist — Torion’s younger brother and the brutal enforcer of the Ursa tribe’s values. Fueled by jealousy, pride, and a desperate need for approval.
Personality
Dominating, bitter, and insecure beneath the surface. Lorak hides emotional wounds behind a mask of strength and aggression. He speaks with authority, but his words often reveal envy and desperation for recognition.
Motivation
Seeks validation from his father, Zaskad, and wants to prove he is worthy of leading the Ursa tribe. His greatest obsession is stepping out from Torion’s shadow and being seen as the true Alpha.
Conflict
Torn between duty to his tribe and his festering resentment toward Torion. He convinces himself that Torion’s abandonment was betrayal, but deep down, he’s still seeking his brother’s acknowledgement — or downfall.
Relationships
- Torion – Older brother and lifelong rival; Lorak both hates and admires him, and is haunted by his absence
- Zaskad (The Shaman) – Craves his approval but never receives it, leading to feelings of inadequacy and rage
- Seega – One of the few who truly understands him, but he ignores her counsel in favour of proving himself
Arc Summary
Starts as a confident, violent leader on a quest to reclaim Torion and restore the tribe’s dominance. As the story unfolds, his insecurities unravel, revealing a tragic figure shaped by rejection, obsession, and a thirst for power he may never truly earn.
Zaskad (The Shaman)

Role in Story
Antagonist / Patriarch — the spiritual and authoritarian leader of the Ursa tribe, and father to both Torion and Lorak. A manipulative figure who hides cruelty behind the guise of divine will.
Personality
Dogmatic, prideful, and commanding. Zaskad believes his actions are justified by prophecy and ancestral gods, but in truth, he uses religion to maintain control. He is unyielding, ritualistic, and views emotions as weakness.
Motivation
Wants to ensure the survival and dominance of the Tukcha (Neanderthal) race, believing they are divinely chosen. He sees Torion — not Lorak — as the only worthy successor and is determined to reclaim him to lead the tribe after his death.
Conflict
Struggles with the decline of his power and legacy. His obsession with purity and strength blinds him to the emotional destruction he causes in his sons. Though he speaks of destiny, his true fear is irrelevance.
Relationships
- Torion – Favourite son; Zaskad feels betrayed by his departure but remains fixated on bringing him back to lead
- Lorak – Sees him as inadequate and impulsive, a poor replacement for Torion
- Ursa Tribe – Controls them through fear, tradition, and ritual sacrifice, framing cruelty as holy
Arc Summary
Begins as a dominant tribal figure enforcing a rigid worldview. As Torion defies him and the tribe fractures, his grip loosens and desperation grows. His refusal to adapt ultimately isolates him — revealing the frailty beneath the zealot.
Bruntus

Role in Story
Antagonist Sidekick / Static — Lorak’s loyal but dim-witted companion, a brutish enforcer for the Ursa tribe who serves as comic relief and raw muscle.
Personality
Simple-minded, loud, and fiercely obedient. Bruntus is driven more by instinct than thought, often blurting nonsense or yelling in frustration. Despite his lack of intellect, he is deeply loyal and eager to prove himself in physical contests.
Motivation
Wants to please Lorak and earn approval through physical strength. His world is binary: strength equals worth, weakness deserves mockery or punishment.
Conflict
Lacks independent judgment and is easily manipulated. His blind loyalty leads him into violent or senseless acts, and his inability to understand complex situations can create accidental consequences.
Relationships
- Lorak – Follows him without question; treats him like an older brother or idol
- Igrath & Seega – Fellow Ursa tribe members; Bruntus often misunderstands their tension with Lorak
- Ursa Tribe – Feared and mocked in equal measure; known for winning strength competitions but never trusted with decisions
Arc Summary
Remains largely static — a symbol of the brute force culture of the Ursa. Though he does not grow emotionally, his presence consistently highlights the tribe’s obsession with physical dominance over empathy or intelligence.
Seega

Role in Story
Dynamic Antagonist Sidekick — a former friend of Torion and current member of the Ursa tribe who questions her tribe’s path and quietly resists Lorak’s leadership.
Personality
Loyal, introspective, and quietly conflicted. Seega is sharp-minded and emotionally mature, often masking her doubts with silence or feigned agreement. She’s observant and calculating, with a deep sense of morality buried beneath layers of tribal loyalty.
Motivation
Seeks clarity on why Torion left and what she truly believes in. Torn between allegiance to the tribe she grew up in and a yearning to follow her own conscience.
Conflict
Struggles internally with her loyalty to the Ursa tribe versus her distrust in Lorak’s methods and her lingering feelings for Torion. Her silence makes her complicit, and she knows it — but speaking out could destroy everything she’s built.
Relationships
- Torion – Old flame; deeply affected by his abandonment and torn by his reappearance
- Lorak – Publicly follows him but privately questions his fitness to lead
- Igrath & Bruntus – Colleagues in Lorak’s inner circle; she quietly distances herself from their extremism
Arc Summary
Begins as a seemingly loyal member of the Ursa hunting party, but over time becomes a subtle saboteur. Her choices play a pivotal role in shifting power dynamics within the tribe, and her emotional bond to Torion becomes a catalyst for moral reckoning.
Igrath

Role in Story
Static Antagonist Sidekick — a spiteful member of the Ursa tribe and childhood rival of Torion, driven by vengeance and blind tribal loyalty.
Personality
Loud-mouthed, arrogant, and quick-tempered. Igrath thrives on stirring conflict and asserting dominance, often using mockery or intimidation to mask deep-seated inferiority. He holds grudges like weapons.
Motivation
Wants to see Torion punished and humiliated for leaving the tribe. His sense of identity is built around strength, obedience, and tribal purity — and Torion’s betrayal challenges all of that.
Conflict
Internally driven by unresolved childhood humiliation and physical scarring from a fire during the Aquilla ambush. His obsession with revenge overshadows logic, making him volatile and short-sighted.
Relationships
- Torion – Hates him with intensity; sees him as a traitor who deserves to suffer
- Lorak – Loyal follower; flatters him and reinforces his leadership, though it’s opportunistic
- Seega – Distrusts her wavering loyalty and occasionally challenges her in Lorak’s presence
Arc Summary
A static figure of hatred and aggression. Acts as the first to track and report on Torion’s whereabouts, setting major plot events into motion. Remains unchanging — a symbol of what happens when bitterness consumes purpose.
Drad

Role in Story
Foil Sidekick — a serious and loyal hunter from the Falls Tribe who supports Dhoron and takes part in the mission to track the Ursa.
Personality
Quiet, focused, and disciplined. Drad doesn't speak unless necessary and rarely displays emotion. He is committed to duty and holds a deep respect for hierarchy and tradition.
Motivation
Wants to prove his worth to the Falls Tribe and earn Dhoron's trust as a capable hunter. He sees contribution to the group as his only path to identity and respect.
Conflict
Internally uncertain whether his stoicism makes him invisible or dependable. He struggles with voicing concerns or ideas, fearing it may seem like dissent.
Relationships
- Dhoron – Looks up to him as a leader and role model; quietly seeks approval
- Other Falls hunters – Holds a professional rapport; prefers teamwork over conversation
- Adira – Watches her warily at first, but grows to respect her resilience
Arc Summary
Introduced as a loyal background figure in the Falls Tribe, Drad steadily becomes a reliable presence during missions. While not emotionally expressive, his consistency and quiet bravery make him a trustworthy companion as tensions rise in the war against the Ursa.
Ursa Clan (Enemies)

Role in Story
Antagonistic Faction — the dominant tribal force opposing Adira and her allies. They represent a brutal, patriarchal warrior culture rooted in physical dominance, conquest, and tribal purity.
Personality
As a collective, the Ursa are aggressive, tribalistic, and hierarchical. Their members value strength above all else and are conditioned to suppress emotion in favour of fear, intimidation, and loyalty to the Shaman’s vision. Individual personalities vary, but most enforce the same core values: obedience, violence, and a belief in the superiority of the Tukcha (Neanderthal) bloodline.
Motivation
To expand their territory, eliminate perceived weakness, and assert Tukcha dominance by eradicating or sacrificing members of the Cro race. Their purpose is framed by the Shaman as divine, turning warfare and bloodshed into sacred duty.
Conflict
Internally, the tribe is fractured by favoritism (Torion vs. Lorak), resentment, and personal ambition. While unified on the surface, there are cracks in the ideology — with individuals like Seega beginning to question their values. Externally, they’re in constant conflict with other tribes and settlements that represent empathy, cohabitation, or evolution away from savagery.
Relationships
- Zaskad (The Shaman) – Worshipped and feared; viewed as the divine mouthpiece and judge
- Torion – Former hero turned traitor; his absence haunts their ranks and fuels resentment
- Lorak – Acting commander in the field; feared but not universally respected
- Adira & Allies – Seen as a threat to their purity and authority — especially because she represents the Cro race
Arc Summary
The Ursa begin the story as the overwhelming threat — violent, dominant, and unwavering. As the plot progresses, individuals within their ranks show cracks in loyalty or belief. Ultimately, they symbolize the collapsing reign of an outdated ideology, challenged by the rise of unity, compassion, and change.
🧩 Character Archetypes
These archetypes are foundational roles that characters often fulfill in stories. They help structure narrative purpose and emotional function, while still allowing room for complexity and depth.
🟢 Protagonist (The Hero)
- The central figure the audience follows.
- Drives the story through action, decisions, and growth.
- Example: Adira — determined, flawed, and on a journey of identity and leadership.
🔵 Deuteragonist
- Second-most important character; often supports or contrasts the protagonist.
- Offers emotional grounding or alternative viewpoints.
- Example: Freyana — emotionally supportive, conflicted, and nurturing.
🔴 Antagonist
- Opposes the protagonist’s goals, directly or ideologically.
- Creates conflict and tests the hero’s resolve or morals.
- Example: Lorak — power-driven rival and thematic shadow of Torion.
🟠 Foil
- Contrasts with another character to highlight key traits.
- Not necessarily an enemy — often challenges or complements the hero.
- Example: Dhoron — hardened realist who exposes Adira’s naivety.
🟡 Mentor
- Provides wisdom, training, or life lessons.
- Often guides the hero through internal or external challenges.
- Example: Torion — reluctant guardian. Eremiza — spiritual and emotional guide.
🟣 Love Interest
- Romantic or emotional connection for the protagonist.
- Can introduce vulnerability, tension, or growth.
- Example: Salzo — soft-spoken builder with growing affection for Adira.
⚫ Shadow
- A dark mirror of the protagonist.
- Shows what the hero could become if they give in to fear, pride, or vengeance.
- Example: Lorak — consumed by envy, obsession, and need for validation.
⚪ Trickster / Comic Relief
- Disrupts dynamics with humor or mischief.
- Can also reveal truths others overlook.
- Example: Bruntus — brutish and comical, masking tragic blind loyalty.
⚙️ Static / Informer / Elder
- Does not change significantly but provides key information, context, or moral perspective.
- Anchors the story and guides other characters.
- Example: Eremiza — wise elder and keeper of tribal memory.
Tone of Voice
Narrative - Book
This game is based on Tribe Chronicles, a trilogy that follows Adira and Torion’s complex and challenging journey through a prehistoric world divided between Homo sapiens and Neanderthals, where the perils of nature are just as threatening as the conflicts between tribes.
The Trilogy - Tribe Chronicles
- Novel #1: The journey of discovery, survival, and finding belonging (Adira's growth).
- Novel #2: The moral descent and redemption arc of Torion (a personal war within himself).
- Novel #3: The full-scale war, legacy, and ultimate sacrifice (the fate of the tribes).
Novel #1 - Tribe of the Accord: Adira's Journey
Adira, a young huntress, embarks on a perilous quest after her father is kidnapped, uncovering the brutal divide between tribes and the forces that seek to control them.
Chapters
- Chapter 1
- Chapter 2
- Chapter 3
- Chapter 4
- Chapter 5
- Chapter 6
- Chapter 7
- Chapter 8
- Chapter 9
- Chapter 10
- Chapter 11
- Chapter 12
- Chapter 13
- Chapter 14
- Chapter 15
- Chapter 16
- Chapter 17
- Chapter 18
- Chapter 19
- Chapter 20
- Chapter 21
- Chapter 22
- Chapter 23
- Chapter 24
- Chapter 25
- Chapter 26
- Chapter 27
A physical PDF copy of the novel can be provided upon request.
Novel #2 - Tribe of the Accord: Torion - The Beast Within
Torion, the once fiercest Neanderthal warrior, struggles to survive the ruthless Ursa clan while questioning his place in a land teetering on the edge of war.
Chapters
Not Started
Novel #3 - Tribe of the Accord: The Last Stand
The final clash between tribes looms as Adira and Torion face their ultimate destinies in a battle that will determine the fate of their people.
Chapters
Not Started
Chapter 1
The book begins with Adira spotting a buck in the moorlands and pursuing it despite warnings. She observes tribespeople and contemplates tribe life, but dismisses it due to Torion's isolation. Frustrated, she misses her target. Torion scolds her for disobeying, emphasizing safety. They return to camp, and Adira helps with hunting tasks. An argument ensues about joining a tribe, causing Adira to storm off, hinting at her restlessness and conflicts with Torion. Chapter 1 introduces Adira's desire for adventure, strained relationship with Torion, and yearning for more.
Chapter 2
Adira finds refuge in a hidden den after running through the moorlands. She reflects on her argument with Torion and her longing for belonging. As she contemplates the stars and their significance, she ponders her relationship with Torion. After waking up, she decides to apologize to Torion, but upon returning to the campsite, she finds it deserted with signs of struggle. Discovering cooked food and realizing Torion expected her back, she becomes alarmed. The chapter ends with Adira sensing danger as a mysterious rustling sound reaches her ears, leaving her in suspense about the impending threat.
Chapter 3
Adira hides and eavesdrops on Igrath and Seega's conversation, realizing they may be connected to Torion's disappearance and wondering why they're after her. She observes them arguing by the fire, overhearing Torion's name. Adira contemplates silently escaping but decides to retrieve her spear for protection. Crawling to the camp's edge, she cautiously reaches for her weapon. In a tense moment, she loses her balance and falls with a noise, leaving her uncertain about whether Igrath and Seega will discover her.
Chapter 4
Adira is pursued by the Ursa clan and uses her agility to create distance through the moorlands. She devises a plan to slow them down with traps made from willow branches, finding refuge in a tall tree overlooking the river. Awakening to the Ursa chopping down her tree, Adira leaps from tree to tree, escaping their destruction. Exhausted but resilient, she narrowly avoids danger and finds herself atop a hill as the Ursa are crushed by the falling trees. Adira's relief and determination drive her forward, and she walks through the forest, eventually resting in a pine tree, vowing to rescue her father. Falling asleep with resolve, Adira prepares for the challenges ahead.
Chapter 5
Adira wakes up hungry and decides to search for food, finding a bird's nest and successfully catching a bird and eggs to eat. As she eats, she reflects on Torion, her captive father figure, and places a daisy in her hair as a symbol of her commitment to rescuing him. Encountering an eagle, she shares a connection with the creature and offers it her catch. Despite her moment of peace, Adira acknowledges her injuries and the need to climb down from the tree, preparing herself for whatever challenges lie ahead.
Chapter 6
Adira finds refuge in the treetops but must eventually descend to the forest floor. She gains confidence as she observes a rabbit, realizing that predators are likely distant. She forages for food, reflecting on her survival skills and her relationship with Torion. She ponders about the Ursa clan and considers her father's hidden past. Adira hides from Igrath and other Ursa members in a cave, narrowly avoiding discovery. As she waits, she's bitten by a snake, introducing a new danger to her already precarious situation.
Chapter 7
Adira grapples with the aftermath of being bitten by a snake. Her survival instincts kick in as she seeks a water source to wash out the venom and manages to find a pond. Despite her weakened state, she's determined to keep moving and escape the pursuing Ursa. Adira is led by an eagle to a ledge overlooking the pond, where she decides to jump in to evade the Ursa. She narrowly avoids their detection while underwater and clings to a branch. The eagle's presence offers her some hope, but her exhaustion and the effects of the snakebite become overwhelming. She manages to retrieve the flower she holds dear, but her strength wanes, and she sinks into unconsciousness, uncertain of her fate.
Chapter 8
Adira wakes up in a woodland near a small pond, finding herself tended to by a young girl named Freyana (Frey). Frey treats Adira's wounds and they engage in a conversation. Adira lies about being from a tribe, but Frey sees through it. Adira opens up about Torion being taken by tribespeople, and Frey suggests seeking help from a tribe to rescue him. Adira is hesitant but decides to stay with Frey and learn from her. They bond over a meal, and Adira falls asleep with the determination to save Torion.
Chapter 9
The chapter begins with Adira reluctantly waking up at Frey's cheerful insistence. They tend to Adira's wounds before starting their gathering lesson. Adira expresses her preference for hunting over gathering, but Frey explains her aversion to killing animals. They set off together, and Frey teaches Adira about different plants and their uses. Adira struggles with foraging and feels frustrated and unskilled compared to Frey. She contemplates her usefulness to a tribe and doubts her abilities. However, she stumbles upon a patch of mushrooms and eagerly collects them, hoping to impress Frey. When she shows Frey her haul, she discovers that the mushrooms are poisonous and must discard them.
Adira's frustration boils over, but they are interrupted by Frey's cries for help. Adira rushes to Frey's aid as she is attacked by a boar and drives it away. They have a heartfelt conversation about their respective pasts, and Adira apologizes for her behavior. Frey gifts Adira a fresh daisy to replace the damaged one in her hair. As they return to camp, they hear the Ursa's roar in the distance, signaling danger approaching.
Chapter 10
Adira and Frey hide from the approaching Ursa, taking cover beneath a dense bush. They overhear the Ursa discussing the destruction of the Cro tribe and the hunt for any remaining tribes. Adira convinces Frey that they must leave to escape the Ursa. They make a run for it, navigating through the forest and eventually reaching the edge of the canyons. Despite Frey's reluctance, they enter the dangerous territory. They encounter a pack of Dire Wolves in a cave and are overwhelmed. Just as they are about to be attacked, two shadowy figures intervene, and Adira loses consciousness.
Chapter 11
Adira wakes up to find herself and Frey in a small alcove near a fire. They are rescued by Salzo and Dhoron from a dire wolf den. Adira and Frey introduce themselves and explain their situation to the men. Dhoron is initially skeptical, but Salzo convinces him to help. Adira mentions the Ursa and their destructive nature, and Salzo reveals that their tribe also hides from them.
Dhoron remains cautious about accepting the girls into their tribe, but they decide to travel together at sunrise. Adira reflects on the perception of outsiders and finds comfort in the kindness of those she has encountered. Salzo's eagle, Keechi, takes a liking to Adira. As they rest, Frey expresses her fear of joining a tribe, but Adira assures her they need the tribe's help. Adira contemplates Torion's views on independence and falls asleep to Salzo's soothing song.
Chapter 12
Adira and Frey struggle to keep up with Salzo and Dhoron as they travel through the canyons towards the Shadowy Forest. The intense heat and lack of water make the journey difficult. Upon entering the forest, the group is enveloped in darkness and must rely on Salzo's guidance. Adira accidentally provokes a bear, leading to a tense encounter. Salzo and Dhoron fend off the bear while Adira feels guilty for her mistake. Dhoron sustains injuries, and Frey tends to his wounds. They set up camp to allow Dhoron to rest and recover.
Chapter 13
Adira helps set up camp, gathering sticks for the fire while feeling Dhoron's disapproval. The tension between them escalates as Dhoron belittles Adira's usefulness and rejects her as a member of the tribe. Adira argues that they need to fight the Ursa, but Dhoron insists on prioritizing the safety of their tribe by staying hidden. Adira storms off into the woods, feeling rejected and alone.
Salzo follows her and tries to comfort her, comparing Dhoron's behavior to a defensive hedgehog. Adira realizes that she is the one pushing people away with her spiky exterior. Salzo encourages her not to give up and assures her that the tribe will accept her if she proves herself. They return to the camp, and Adira volunteers to take the first watch. The chapter ends with Adira watching the flames of the fire, determined to earn the trust of the tribe, even if Dhoron still resents her.
Chapter 14
Adira and her group journey through the Shadowy Forest towards the Falls tribe's camp. They encounter Tusky Falls, a remarkable waterfall, and safely traverse its path. Upon reaching the camp, Adira experiences relief and unease about her place. They meet Eremiza, who knew her father Torion, and he explains his vision for a cooperative tribe. Adira agrees to prove herself to the tribe.
At a gathering, Dhoron downplays the Ursa threat, leading Adira to confront him. She agrees to keep the truth quiet. Adira aids Frey, forming a bond, and receives treatment from the tribe's healers. The chapter delves into Adira's emotions about joining the tribe, her frustration with Dhoron's deceit, and her growing connection with Frey.
Chapter 15
Adira adjusts to tribal life, completing chores for her recovery. Seeking information about her father, she visits Eremiza, who provides trivial anecdotes. Restless, she contemplates rescuing her father alone or seeking help from the tribe. Adira spends time with Frey and Salzo, sharing concerns about fitting in. Salzo reveals his background as an Aquilla tribe survivor and offers to support Adira in leaving to save her father.
Adira and Salzo find solace in a hidden clearing, bonding over their struggles. Salzo explains Dhoron's fear of the Ursa and his value for tribe safety. He and Adira grow closer, sharing gratitude and encouraging her to earn the tribe's trust. Adira catches a hare and considers joining the hunters to save her father.
Chapter 16
Adira experiences a disturbing nightmare in which she tries to reach Torion's voice but is unable to find him. She wakes up in a panic and struggles with the fear of forgetting her father's face. Determined to prove herself and contribute to the tribe, Adira decides to join the hunting clan despite the initial resistance from Dhoron, the leader. She confronts Dhoron and Salzo intervenes, persuading Dhoron to let her train with them.
Adira faces harsh training and criticism from Dhoron, who constantly challenges her. She tries to learn the hunting formations but feels inadequate and restricted. Frustrated with Dhoron's insults towards her father, Adira confronts him, and their argument escalates into a physical altercation. Eremiza intervenes, reprimanding both of them and urging them to find common ground. He reveals Dhoron's past pain and emphasizes the importance of seeking resolution. Adira begins to understand the need to choose her battles and find a way to coexist with Dhoron.
Chapter 17
In Chapter 17, Adira continues to follow Eremiza's advice and avoids engaging with Dhoron's provocation. She joins the other hunters for formation practice and impresses Salzo with her confidence. Adira expresses her newfound connection to the tribe during the formations, and Salzo shares his own perspective on the matter. After a rigorous training session, Adira approaches Dhoron and expresses her concern for her father's safety.
Dhoron initially refuses to help but is shaken by Adira's words and storms off. Adira joins the others for the evening meal and reveals her conversation with Dhoron. Later, Dhoron requests a private conversation with Adira and agrees to give her a chance to prove herself by going on a bison hunt. He warns her not to risk the lives of the tribe for her personal interests. Adira accepts the challenge and prepares for the hunt.
Chapter 18
Adira prepares for a bison hunt with the tribe. She sharpens her spear and assures her worried friend Frey that she will be careful. As they reach the Eastern Meadows, Adira is surprised to learn that she will be leading the attack on a weak bison. With hesitation, she takes the lead and calls for the formation of the wolf. However, she soon realizes that Dhoron had misled her, as the bison they targeted was actually the lookout for the herd, and they find themselves in the midst of a stampede. Adira struggles to keep up with the tribe and feels isolated at the edge of the formation.
She decides to trust her instincts and weaves through the herd to get downwind, narrowly avoiding the charging bison. Seeking refuge on a rock formation, she spots Keechi, the eagle, and follows him back to the tribe. Adira regains her composure and leads the hunters to trap and kill the injured bison. Despite Dhoron's criticism, Adira stands her ground and receives praise from the other hunters. They divide the bison's meat and head back to camp, with Adira feeling a sense of accomplishment and newfound confidence.
Chapter 19
Adira experiences acceptance from the tribe after a successful hunt, realizing she's becoming one of them. She refrains from describing the hunt's details to spare Frey's anxiety. During a feast, Salzo reveals that Dhoron is unhappy due to Adira's success. Despite her popularity, Adira believes it's about the meat, not acceptance. Eremiza officially welcomes Adira and Frey into the tribe.
Adira shocks them by mentioning the Ursa threat and plans to gather information, but Frey refuses to join. Adira's determination to rescue her father conflicts with the tribe's safety. Eremiza warns her against the plan, but Adira chooses her father. After clashing with Dhoron and arguing with Frey, Adira decides to leave for her father, feeling she doesn't belong in the tribe, leading to a bitter end between her and Frey.
Chapter 20
Adira readies for the journey to the Ursa settlement in the north, training alongside Dhoron and the hunters. They bond over their shared goal, despite past differences. The tribe gathers for their departure, though Adira notices Frey's absence, leaving her hurt. Adira speaks with Eremiza, who discloses his Ursa past, cautioning her against the rescue mission, which she rejects. Frey surprises Adira by joining the expedition, expressing loyalty.
They reunite with Dhoron and Drad, and with Adira leading, the newly named clan of the Falls sets out, bid farewell by the tribe, on their perilous path towards the Ursa settlement in the north.
Chapter 21
Adira and her companions cautiously advance through the Shadowy Forest, but are suddenly confronted by the voice of the Ursa. They hide as the Ursa hunters approach, attempting to evade them. Adira's plan falters when Drad makes noise, leading to a chase. The group flees through the forest, fearing failure, until Salzo devises a trap to ensnare the Ursa in a pit. Although conflicted about resorting to violence, the plan succeeds.
After a rest, Adira tends to her wound, reflecting on the necessity of violence for survival. Frey expresses concern, urging Adira to prioritize non-lethal options. They discuss plans, with Dhoron emphasizing Adira's pivotal role. Adira takes her watch, bearing the weight of responsibility for her friends and tribe as they prepare for the perilous journey to the Ursa camp.
Chapter 22
The group cautiously advances through the Shadowy Forest, mindful of their presence. As they near the canyons, Adira senses Frey's apprehension, knowing they're about to confront dire wolves. When the wolves charge, Frey panics, but Dhoron's unique communication with the wolves prevents an attack. They navigate the wolf territory cautiously, shielding themselves from growling wolves, and continue on.
After setting up camp in a cave, Adira attempts to mend her strained relationship with Frey. Frey reveals her feelings of burden and fear of losing their friendship. Adira assures her support, though Frey remains distant, finding solace in Adira's presence. Amid their talk, Salzo shares his journey to belonging with the Falls tribe, teaching Adira the importance of understanding others' struggles. As the chapter concludes, the clan plans their navigation, and Adira feels hopeful about reconciling with Frey.
Chapter 23
The group is less cheerful as they approach the canyons, where they locate a vantage point overlooking the Ursa camp, opting for safety and cover. While climbing, Adira is reminded of their mission's gravity as Dhoron becomes stressed. From the peak, they appreciate the landscape before descending to witness the Ursa camp's grandeur. Adira grapples with seeing her father Torion among Ursa hunters but follows Eremiza's advice to stay away.
The group disputes how to proceed, with Adira wanting more information by following the hunters, but Dhoron accuses her of loyalty to the Ursa. Defying their decision, Adira descends alone to catch up with Torion, ultimately witnessing his hunting prowess. However, Igrath appears, taunting her and revealing his injuries while summoning Torion and the others.
Chapter 24
Igrath overpowers Adira and draws the attention of Torion and other Ursa hunters. Torion's cold denial of recognition shatters her hopes, while Igrath reveals Torion as her father and taunts him for betraying the Ursa. Lorak, Torion's brother, confirms this, and Adira briefly fights back against Lorak but fails. Lorak discloses Torion's past as a renowned Ursa hunter, including his involvement in the destruction of the Aquilla tribe and how Torion rescued Adira, a dark-haired girl, from the wreckage.
Adira struggles to accept the truth that Torion killed her family and took her as his own. She pleads with Torion, questioning the revelations, but Lorak insists on the truth, pushing her to confront her father's actions, ultimately leading to Adira's emotional breaking point.
Chapter 25
Adira's rage leads her to attack Lorak, but Torion intervenes, engaging in a fierce struggle. Amid the chaos, approaching mammoths provide a temporary diversion. Adira and Dhoron face attacks from Igrath and Bruntus, but they are rescued by Drad and Keechi. Unfortunately, Drad is killed in the fight.
Navigating through stampeding mammoths, Adira and Dhoron escape Torion's grasp and see him in a new, unsettling light. As they reach the mountains, the injured Ursa hunters emerge, and Lorak warns of impending Ursa pursuit. The chapter ends with the unsettling realization that the Ursa are on their trail.
Chapter 26
Adira grapples with emptiness and guilt as they make their way back to Tusky Falls. Dhoron's injuries lead to tension between them, as he blames Adira for Drad's death. Despite her silent withdrawal, the group takes precautions to avoid leaving a trail for the Ursa. Sheltering in a cave for the night, Adira and Salzo share a watch and grow closer through conversation, discussing her complicated past involving Torion, who is her father.
Although she avoids delving too deep, their bond strengthens. As they continue their journey, Frey expresses loyalty to Adira, reconciling their friendship. Acknowledging their challenges and uncertain future, they prepare to return to Tusky Falls.
Chapter 27
The clan returns to the Falls tribe, met with a mix of anticipation and somberness. The absence of Drad is deeply felt, particularly by his mate Ilya, and Adira's guilt weighs heavily, even considering exile as a means to spare Ilya's pain. Eremiza addresses the tribe, paying tribute to Drad's sacrifice and emphasizing the urgency of the impending Ursa attack. Adira struggles with guilt during the feast but is comforted by Salzo, who reminds her of Drad's sacrifice.
She finds Dhoron mourning alone and expresses gratitude for his role in her growth as a fighter. Determined to face the Ursa, Adira crushes a daisy symbolizing her past and embraces her dedication to the tribe. Joined by Salzo and Frey, they find strength in each other's company as Keechi soars into the sunset, symbolizing Adira's newfound sense of identity and belonging within the tribe.
Narrative - Game
| Section | Description |
|---|---|
| Overview | This document is a loose translation of the book to the game using a collection of story beats from the novel that drive the story forward. |
| Status | Draft |
| Version | 2.0 |
Description
This narrative follows the journey of Adira, a young huntress, as she navigates through a world filled with challenges, allies, and enemies. The story is divided into chapters, each depicting a significant event or turning point in her quest. Players will experience Adira's growth, relationships, and confrontations, all set against a rich, immersive backdrop.
Chapters
Each game chapter will range from 5-15 minutes on average. The total game time will be roughly 3 to 5 hours of gameplay. A breakdown of each chapter can be found below by clicking the links provided.
| # | Title | Description | Duration |
|---|---|---|---|
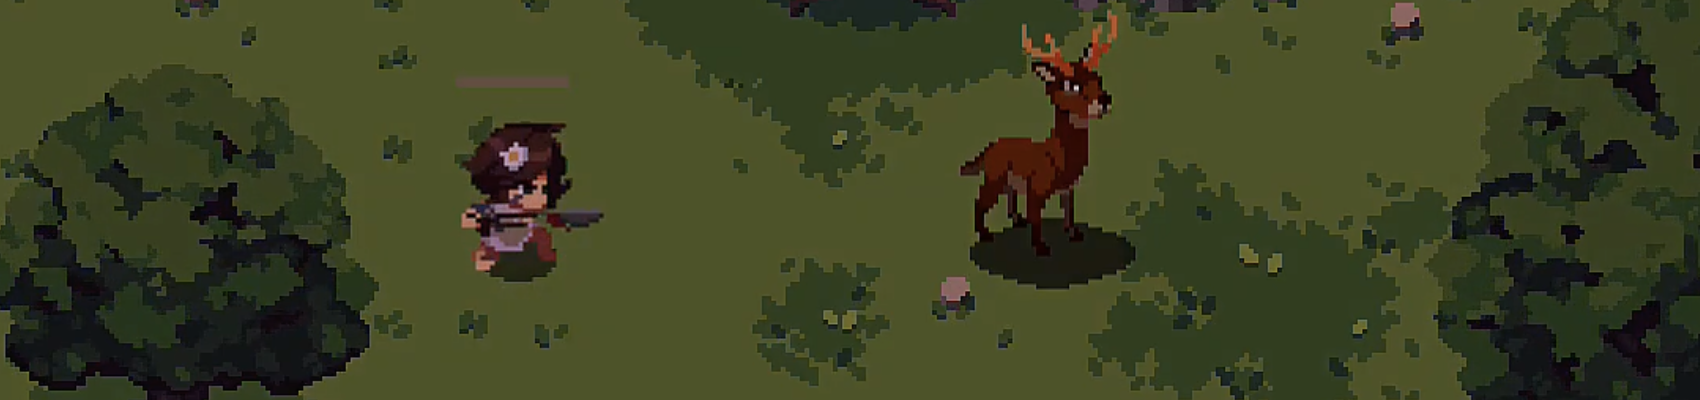
| 01 | A Hunt Begins | Adira hunting a deer, failing, and being confronted by Torion | 10m |
| 02 | The Proud Hunter | Adira leaving to hunt a rabbit to prove her own worth | 15m |
| 03 | Clash and Flight | Adira coming back to find the antagonist Ursas, then being chased and falling down a cliff | 10m |
| 04 | Cliffside Escape | Adira being chased by the Ursa Clan, fleeing and falling down a cliff into water | 15m |
| 05 | A New Friend | Adira meeting her best friend Freyana, learning and saving from clutches | 10m |
| 06 | The Gathering | Adira learning gatherer skills from Freyana + helping Freyana escape a boar | 15m |
| 07 | Into the Canyons | Adira and Freyana ambushed by the Ursa tribe, ending up in the Canyons | 15m |
| 08 | Allies in the Cave | Reaching the Dire Wolf cave + meeting Dhoron and Salzo | 15m |
| 09 | Journey to the Fall’s | Adira and Freyana travelling to the Fall’s village | 15m |
| 10 | Tribe Life | Adira meeting the villagers | 5m to 60m (TBC) |
| 10.1 | Training with Dhoron | Adira and Dhoron’s training | 15m |
| 10.2 | A Moment with Salzo | Adira and Salzo’s special moment | 5m |
| 10.3 | Among the Bison | Adira and the Bison herd | 15m |
| 10.4 | Secrets of the Past | Torion’s past revealed, tension with Freyana, prep for Ursa hideout | 15m |
| 11 | Mountain Trek | Adira and clan travelling through the mountains | 15m |
| 12 | Lone Runner | Adira running away + confronting Torion | 10m |
| 13 | Final Showdown | Adira’s gang reunites + Boss battles with Igrath and others | 15m |
| 14 | The End Credits | Ending/Credits | - |
GDD - Narrative - Chapter 1
- Title: A Hunt Begins
- Description: Adira hunting a deer, failing, and going back home with Torion
- Duration: 10m
What happens?
We meet Adira, a young, tribeless hunter. She’s alone in the wild when she spots a deer — a rare sight in these parts, and a much better catch than the slim pickings her father’s traps usually produce. Against her father’s orders, she abandons the traps to stay with the deer. However, after some tailing it, she needs to run over a leaf carpet — the rustling is too loud, and scares off the deer. The deer leaps away from the scene, and Adira is unable to follow. A disgruntled Adira is found empty-handed by Torion, who is furious at her disobedience. “I was trying to catch a deer,” she says, but Torion ignores her: “There are no deer in these parts. You saw something else.” She tries to argue back, but he will have none of it: “You will come with me back to camp,” he barks. And there’s little she can do about it.
Nightime. Their camp is made of two tents and a bonfire. They live by themselves in the wilderness — tribeless and all alone, save for one another. They sit around the fire, eating something from Torion’s “slim pickings”, while he goes on and on about the importance of patience and timing, of observing patterns and learning your prey’s moves, of using the environment to your favor, of taking advantage of what nature provides, and of mastering every single skill Adira does not possess… which is why he will guide her. Adira is equal parts offended and grateful: although she could see the verbal abuse coming from miles away, she wasn’t quite expecting that last bit. He’s actually willing to teach her. “Let us rest,” he says. “At first light, we hunt.”
How does it drive the story forward?
- Establishes Adira's character, her desires to join a tribe and her relationship with Torion. Sets the stage for the player's journey and introduces the core gameplay mechanics.
What are the key moments in order?
- Scene 1 It's an early morning, and Adira appears for the first time to the Player.
- Scene 2 Adira uses her spear (Equipped from the beginning) to break through a destructible obstacle so she can proceed.
- Scene 3 Adira rolls over a few obstacles to proceed through the level.
- Scene 4 Adira notices the Deer in the middle of the room, the Deer runs off.
- Scene 5 As she tries to walk towards the direction of the Deer, the leaf carpet blocks her path, and she is forced to side track via a different path to continue the pursuit of the Deer.
- Scene 6 As she makes her way through this different path, she notices a few tribespeople talking, and ponders/narrates being part of a tribe.
- Scene 7 Adira chases Deer for 1 more room, and then eventually tries to attack the Deer, but fails and it gets away.
- Scene 8 Torion comes and we hear rumbling, screen shake. Torion's introduction strikes fear into Adira, 'ADIRA!'. Voice is unknown, name is '???'.
- Scene 9 Once they've spoken, Torion leads the way back to the Campsite, fades to black.
- Scene 10 They are seated around the Campfire back at the Campsite where they discuss the hunt together in the morning before Adira sleeps.
What locations are required?
- Moorlands
What music/audio is required?
- Introductory music to Adira with her trying to hunt a deer and failing that layers over time.
- The deer chase.
- Music of Torion turning up angry.
GDD - Narrative - Chapter 2
- Title: The Proud Hunter
- Description: Adira leaves the village to hunt a rabbit on her own, determined to prove her worth after Torion’s disapproval.
- Duration: 15m
What happens?
The next morning, Torion is ready and waiting for Adira, and she has much to learn. He points out she is yet too inexperienced to catch something as big as a deer. That was her mistake. They will start small. Torion helps her find the trails of a rabbit, and while they advance, he teaches her new moves (like the spear attack) and helps her navigate around the area. However, he helps as much as he condescends, and she learns as much as she questions. Adira is flustered, Torion is furious. He won’t be around forever. It’s about time she learned to fend for herself if she is to live on her own… and that’s when she snaps: the only reason she has to learn these things is because they’re on their own; if they lived in a tribe, with other people to help each other, this wouldn’t be necessary. Torion scoffs. So Adira thinks she is good enough without him? She thinks he’s on her way? If she truly believes that, then he would very much like to see what she is capable of.
Boss Battle: fight Torion
After winning, Adira says she’s better than he thinks, he should give her more credit, but Torion is fuming: so she’s beaten her father, a man who would not hurt nor harm her, and she thinks this proves anything? Adira truly is a child who knows nothing of the world, and she would do well to remember that. Torion goes back to camp, while Adira remains in the rabbit’s trail. She will catch it and prove — to herself, more than anyone else — that Torion is wrong, and she is not a child. In the end, she reaches an area deep in the Moorlands where she catches the rabbit. For all the grievances she has for her father, the truth is she can’t wait to show him her catch. He’ll be so proud of her this time. He has to be! Fade to black…
How does it drive the story forward?
- Progresses the main narrative by...
- Reveals key lore or backstory through...
- Evolves character dynamics, especially between...
What are the key moments in order?
- Scene 1 – [e.g., Adira sneaks out early in the morning with her spear]
- Scene 2 – [e.g., She tracks a rabbit and reflects on past hunts with Torion]
- Scene 3 – [e.g., She succeeds in the kill, but hears distant howls…]
What characters are involved?
- Adira
What locations are required?
- Forest | Riverbank | Hunting Trail
What music/audio is required?
- Ambient | Tension | Emotional | Mystery
GDD - Narrative - Chapter 3
- Title: Clash and Flight
- Description: Adira returns to the village only to find it under attack by Ursas; she is spotted and chased, ultimately tumbling down a cliff to escape.
- Duration: 10m
What happens?
We cut back close to camp – a stone’s throw away. Adira is eager to show her catch, but something feels wrong — the air is strangely stale, birds do not chirp… as she moves closer, a shadowy figure moves away from her… “Who’s there?”, she asks, but to no answer. The music tenses up as she approaches camp, where their bonfire has been trampled over; their tents are torn, ravaged and broken. “Father? Torion?”. But again, no answer. Then, she sees a shadow moving and strange voices echoing. “They’re coming!”.
Adira hides behind their tents just in time to avoid two strange, large people wearing bear pelts. Igrath and Seega discuss her father (“He called for a girl when we took him”). When Adira’s about to leave, though, something cracks under her feet and she is seen by them. Seega calls for reinforcements, while Igrath attempts to catch her. “Torion’s girl!,” Igrath shouts. She fights him off just in time to escape the other approaching Ursa. “Get her!”, they shout.
She is chased by the Ursa clan in an action-packed sequence through the woods, ending in a daring escape jumping off a cliff. We fade to black to hear the sound of water…
How does it drive the story forward?
- Progresses the main narrative by...
- Reveals key lore or backstory through...
- Evolves character dynamics, especially between...
What are the key moments in order?
- Scene 1 – [e.g., Adira approaches the village and sees smoke in the distance]
- Scene 2 – [e.g., She witnesses Ursas ransacking the area and hides]
- Scene 3 – [e.g., Spotted by a scout, she runs and eventually slips down a cliffside]
What characters are involved?
- Adira | Ursas (Antagonists)
What locations are required?
- Village Outskirts | Forest Ridge | Cliffside Path
What music/audio is required?
- Tension | Chase | Combat | Emotional
GDD - Narrative - Chapter 4
- Title: I Dream of You
- Description: Injured and pursued, Adira flees deeper into unknown terrain, ultimately falling from the cliff into a river below to narrowly escape the Ursa Clan.
- Duration: 15m
What happens?
We’re taken into a flashback scene: we’re back in the camp, their tents still standing and their bonfire shining bright. Adira stands alone, when Torion arrives and motions for her to follow him.
Adira follows him through the meadows. “Where are we going?,” she asks. “You will see,” he replies.
After a short walk, they arrive at a daisy patch, a place Adira had never known existed. “This is beautiful,” she says, amazed. Then, Torion plucks a flower and reaches out to her. “This daisy is like a little sun,” he says. “It will make you shine bright.”
As he places the flower in her hair…
How does it drive the story forward?
- Progresses the main narrative by...
- Reveals key lore or backstory through...
- Evolves character dynamics, especially between...
What are the key moments in order?
- Scene 1 – [e.g., Adira limps through dense woods, hearing Ursa shouts behind her]
- Scene 2 – [e.g., She finds herself at a dead end above a river canyon]
- Scene 3 – [e.g., Cornered, she jumps — plunging into the water below]
What characters are involved?
- Adira | Ursa Scouts
What locations are required?
- Forest | Cliff Edge | River Below
What music/audio is required?
- Tension | Chase | Emotional | Ambient
GDD - Narrative - Chapter 5
- Title: A New Friend
- Description: Washed ashore and disoriented, Adira is discovered by Freyana, a kind but cautious girl who saves her from danger and brings her to safety.
- Duration: 10m
What happens?
Adira wakes up inside a tent, a girl stroking her hair — in the same motion as her dream-father. Adira is scared and confused, but the girl tries to tranquilize her, saying her flower was lost in the water, she was just trying to give her a new one. But Adira remains wary, and so the girl introduces herself as Freyana — or Freya. She’s tribeless, same as Adira, her home destroyed by a band of warriors clad in bear skins — a description Adira promptly recognises. They’ve both been hurt by the Ursa.
Then, Freya offers Adira a bowl of soup, which helps her recover some strength. Adira is thankful, especially when Freya says she’s going to make more. However, she is running out of ingredients… to which Adira replies she can help. She can pick the ingredients Freya needs while she stays here and tends to the food.
So Freya gives Adira a “quest” of things to forage (like “pick up 5 brown mushrooms”). Adira can now leave their refuge to find whatever ingredients Freya needs, exploring the area and picking up items. But during this outing, in one of the locations, Adira is caught off-guard and bit by a snake. Her father has told her about these creatures and the strength of their poison — she knows she’s going to die.
How does it drive the story forward?
- Progresses the main narrative by...
- Reveals key lore or backstory through...
- Evolves character dynamics, especially between...
What are the key moments in order?
- Scene 1 – [e.g., Adira wakes on the riverbank, weak and injured]
- Scene 2 – [e.g., Freyana appears and defends her from a wild creature]
- Scene 3 – [e.g., They talk cautiously, and Freyana offers to take her somewhere safe]
What characters are involved?
- Adira | Freyana
What locations are required?
- Riverbank | Woodland Shelter
What music/audio is required?
- Emotional | Ambient | Mystery | Somber
GDD - Narrative - Chapter 6
- Title: The Gathering
- Description: Freyana teaches Adira essential gatherer skills, and the two bond while foraging — until a wild boar attacks and they must work together to survive.
- Duration: 15m
What happens?
Poisoned and desperate, Adira goes back to Freya, who immediately notices there’s something wrong with her. Adira reveals the darkest of truths: she’s been bitten, she’s doomed.
And yet, for such a terminal thing, Freya hardly seems moved. She asks Adira what kind of snake it was, and realizes that, as harmful as its poison is, it’s hardly deadly. With some medicine, Adira should be good as new. Adira is ashamed — and conflicted; her father was such a knowledgeable man, with so much wisdom to share — but at least she has the mushrooms they need. Except that she doesn’t. Freya also explains the mushrooms she took may seem like the ones they need, but are actually a venomous kind — and unlike the snake, this one is lethal.
For the first time, Adira actually opens up to Freya: she wanted to be useful, but maybe her father was right. Maybe she is a child after all. A child who knows nothing of the world.
Still, they do need their ingredients, and since Adira also needs to understand foraging, perhaps Freya could take her this time and kill two birds with one stone. She can teach Adira.
This time, Freya takes Adira into the woods, where they pick up things together, while they have the chance to interact and Adira talks about feeling useless, about barely being able to survive on her own. Her father’s been gone for barely a moon and she’s already cheated death at least a few times — how many more until she runs out of second chances? Freya however is not quite so grim. She manages to see the positive side of things, and she feels happier opening up about her past. Her tribe and her family may be gone — claimed by the Ursa’s relentless conquering — but at least she’s here, she has a new friend, and they can help each other out.
Adira is still not convinced, when they’re attacked by a boar. For all of Freya’s resourcefulness, she’s no match for such a savage beast, and it falls to Adira to defend her. The boar is a terrible foe, but Adira manages to win. Finally, a win for Adira. She is strong after all. Perhaps stronger than she herself knows. And for the first time, she doesn’t feel like such a weight. They can go back with their findings and her pride.
And this would make for a great night, if the Ursa weren’t waiting for them back at the refuge.
How does it drive the story forward?
- Progresses the main narrative by...
- Reveals key lore or backstory through...
- Evolves character dynamics, especially between...
What are the key moments in order?
- Scene 1 – [e.g., Freyana shows Adira how to identify edible plants and avoid poisonous ones]
- Scene 2 – [e.g., They begin to trust one another, sharing parts of their past]
- Scene 3 – [e.g., A boar charges them; they survive by outsmarting it together]
What characters are involved?
- Adira | Freyana
What locations are required?
- Forest Glade | Foraging Trail | Boar Den
What music/audio is required?
- Ambient | Emotional | Tension | Combat
GDD - Narrative - Chapter 7
This Chapter has not been started
- Title: Into the Canyons
- Description: While traveling together, Adira and Freyana are ambushed by Ursa scouts; in the chaos, they are forced to flee into the treacherous canyon lands.
- Duration: 15m
What happens?
[A prose-style breakdown of the story beats in this chapter. Focus on character choices, dialogue, revelations, and any impactful changes to relationships, world state, or lore.]
How does it drive the story forward?
- Progresses the main narrative by...
- Reveals key lore or backstory through...
- Evolves character dynamics, especially between...
What are the key moments in order?
- Scene 1 – [e.g., Adira and Freyana travel through a sunlit clearing, unaware they are being watched]
- Scene 2 – [e.g., Ursa scouts strike suddenly; a frantic escape begins]
- Scene 3 – [e.g., The girls leap into a narrow canyon to lose their pursuers, unsure where the path leads]
What characters are involved?
- Adira | Freyana | Ursa Scouts
What locations are required?
- Woodland Pass | Canyon Entrance | Cliff Path
What music/audio is required?
- Tension | Chase | Ambient | Mystery
GDD - Narrative - Chapter 8
This Chapter has not been started
- Title: Allies in the Cave
- Description: Adira and Freyana take refuge in a cave, only to discover it’s inhabited by two strangers — Dhoron and Salzo — who offer unexpected help.
- Duration: 15m
What happens?
[A prose-style breakdown of the story beats in this chapter. Focus on character choices, dialogue, revelations, and any impactful changes to relationships, world state, or lore.]
How does it drive the story forward?
- Progresses the main narrative by...
- Reveals key lore or backstory through...
- Evolves character dynamics, especially between...
What are the key moments in order?
- Scene 1 – [e.g., Adira and Freyana, exhausted, enter the cave to hide]
- Scene 2 – [e.g., They are startled by Dhoron and Salzo — who were tracking Ursa movements]
- Scene 3 – [e.g., After a tense exchange, they decide to travel together]
What characters are involved?
- Adira | Freyana | Dhoron | Salzo
What locations are required?
- Canyon Cave | Inner Chamber
What music/audio is required?
- Ambient | Mystery | Tension | Emotional
GDD - Narrative - Chapter 9
This Chapter has not been started
- Title: Journey to the Fall’s
- Description: With new allies in tow, Adira and Freyana journey toward the Fall’s village — a hidden settlement that may offer safety, guidance, and deeper truths.
- Duration: 15m
What happens?
[A prose-style breakdown of the story beats in this chapter. Focus on character choices, dialogue, revelations, and any impactful changes to relationships, world state, or lore.]
How does it drive the story forward?
- Progresses the main narrative by...
- Reveals key lore or backstory through...
- Evolves character dynamics, especially between...
What are the key moments in order?
- Scene 1 – [e.g., The group sets off across varied terrain, learning more about each other]
- Scene 2 – [e.g., Dhoron shares vague hints about the Fall’s people and their role in resisting the Ursas]
- Scene 3 – [e.g., As they approach the village border, Adira begins to sense the magnitude of what lies ahead]
What characters are involved?
- Adira | Freyana | Dhoron | Salzo
What locations are required?
- Canyon Exit | Valley Path | Fall’s Village Border
What music/audio is required?
- Ambient | Emotional | Mystery | Hopeful
GDD - Narrative - Chapter 10
This Chapter has not been started
- Title: Tribe Life
- Description: Adira and her companions arrive at the Fall’s village, where she encounters new faces, customs, and a way of life very different from her own.
- Duration: 5m to 60m (TBC)
What happens?
[A prose-style breakdown of the story beats in this chapter. Focus on character choices, dialogue, revelations, and any impactful changes to relationships, world state, or lore.]
How does it drive the story forward?
- Progresses the main narrative by...
- Reveals key lore or backstory through...
- Evolves character dynamics, especially between...
What are the key moments in order?
- Scene 1 – [e.g., The group is welcomed cautiously by the Fall’s tribe]
- Scene 2 – [e.g., Adira observes their peaceful way of life and feels out of place]
- Scene 3 – [e.g., She begins to form new connections — and tensions stir under the surface]
What characters are involved?
- Adira | Freyana | Dhoron | Salzo | Village Elder | New NPCs
What locations are required?
- Fall’s Village | Communal Grounds | Elder’s Tent | Surrounding Fields
What music/audio is required?
- Ambient | Emotional | Mystery | Hopeful | Somber
Chapter 11
This Chapter has not been started
Chapter 12
This Chapter has not been started
Chapter 13
This Chapter has not been started
Chapter 14
This Chapter has not been started
Branding
Work in progress
Branding
Work in progress
Moodboard
Work in progress
UX Design
The game UX designer’s job is to take the existing rules and mechanics of the game and make sense of them for the end-user. This means helping players get a handle on what they are actually supposed to be doing in the game.
- Researching player needs, preferences, and behaviors to inform design decisions
- Creating wireframes, prototypes, and other design documents to communicate and iterate on design ideas
- Collaborating with game developers, artists, and other team members to ensure that game mechanics, user interfaces, and other design elements are consistent and cohesive
- Designing user interfaces and menus that are intuitive, easy to use, and visually appealing
- Creating game tutorials and onboarding experiences that effectively introduce players to game mechanics and controls
- Testing and evaluating designs with players to identify areas for improvement and make iterative changes
- Considering accessibility and inclusivity in design decisions to ensure that games are playable by as many people as possible
Consistent UX in a video game is crucial for several reasons:
-
Improved Player Experience: Consistency in design ensures players can intuitively understand the game’s interface and mechanics without constant learning or confusion. This helps create a smooth, immersive experience that keeps players engaged.
-
Reduced Cognitive Load: When UI elements and interactions behave consistently, players can focus on the game itself rather than struggling with inconsistent controls or navigation. It prevents frustration by allowing players to predict how the game will respond to their actions.
-
Enhanced Accessibility: Consistent design helps accommodate a wide range of players, including those who may have accessibility needs. Clear, repeatable design patterns make it easier for players to navigate and interact with the game in familiar ways.
-
Brand Identity & Aesthetic Cohesion: A consistent UX reinforces the game’s theme and visual identity, giving the entire experience a cohesive feel. This adds to the game’s professionalism and can enhance its emotional impact on players.
-
Smoother Learning Curve: Players can quickly learn and master the game mechanics if interface and interaction patterns remain the same throughout. This allows for more complex gameplay without overwhelming the user.
UX Principles
These are the UX principles we'd like to apply to Tribe of the Accord in the context of the 'User' AKA Player of the game.
Controls and Feedback
- Intuitive and simple controls.
- Clear feedback on player actions (visual and audio).
- Contextual action prompts (only when needed).
- Smooth, non-sluggish and responsive player movement/attacks.
- Vibration or haptic feedback to reinforce player actions (for controllers).
- Use audio cues to differentiate between enemy types or attack patterns.
- Provide visual or haptic feedback when low on health.
User Interface and HUD
- Minimal and non-intrusive HUD.
- Visual hierarchy to focus on key elements (e.g., enemies, objectives).
- Avoid overcrowding the screen.
- Provide clear and consistent visual distinction between interactive and non-interactive elements.
- Ensure important information is always visible (e.g., health bars, focused weapon, items).
- Use consistent iconography and symbols for items and actions.
- Offer a quick-access inventory or action wheel for frequently used items.
- Provide clear labels for game settings, with explanations of each option.
- Ensure responsive menus with fast navigation.
- Create scalable UI elements for different screen sizes or resolutions.
- Create consistent UI shaped around a defined branding and theme.
Camera and Navigation
- Camera follows player smoothly without disorienting movements.
- Offer an in-game map with markers for important locations.
- Implement dynamic lighting to guide players subtly without over-explaining.
- Provide visual or audio cues for off-screen threats or important events.
Progression and Difficulty
- Clear mission objectives and progress tracking (e.g., maps, quest logs).
- Enable auto-saving to reduce frustration from lost progress.
- Reward exploration with secrets, items, or lore.
- Balanced difficulty progression (avoid spikes).
- Gradual introduction of new mechanics and abilities.
- Maintain a consistent difficulty curve, ensuring steady challenge without sudden spikes.
- Provide clear goals and sub-goals to prevent confusion during quests.
- Include a "New Game+" or replayability feature to enhance long-term engagement.
- Provide clear distinctions between quest types (main vs. side quests).
- Implement vibration or haptic feedback to reinforce player actions (for controllers).
Accessibility
- Allow key rebinding and control customization.
- Include accessibility options like colorblind mode and audio adjustments.
- Independent volume controls for sound effects, music, and voice.
- Include an option to pause or slow down the game for accessibility or more casual play.
- Fonts should be legible with multi-lingual support for those who speak languages other than English - Example font
Audio and Visual Cues
- Audio cues for important in-game events.
- Provide visual indicators for invincibility frames or damage immunity during specific actions.
- Use clear visual or audio alerts when a critical event occurs (e.g., boss battles).
Onboarding and Tutorials
- Gradual introduction of new mechanics and abilities.
- Avoid 'sign-post' tutorials and instead rely on environmental cues for teaching.
- Provide optional hints or tips for challenging puzzles or tasks if the User stalls.
Game Flow and Immersion
- Forgiving design with checkpoints and recovery options.
- Clear fail states and quick recovery options.
- Allow players to skip cutscenes or dialogues if they choose.
- Implement clear loading indicators to manage player expectations.
- Use consistent pacing to prevent too much downtime or overwhelming action.
- Ensure fast and efficient loading times to maintain immersion.
- Support multiple save slots to give players flexibility.
Story and Engagement
- We need to strike a good balance ratio between storytelling (non-engagement) and action (engagement), with action being the focus.
- Allow players to review story cutscenes, dialogue, or important info in a log or journal.
- Provide a "New Game+" or replayability feature to enhance long-term engagement.
Performance and Optimization
- Ensure consistent framerate and performance across platforms.
- The User should not feel that the game is stuck/frozen at any point.
UX - Viewport
The viewport of the game is 16:9, which means the game can scale up to different screen sizes at that same ratio.
- 1280x720
- 1920x1080
- 3840x2160
All artwork is designed with a total of 640 pixels wide and 360 pixels height. All game assets are designed in a 640x360 view but then upscaled by 2.
Tilesets are designed using 32x32 tiles. Meaning you can place a total of 20 tiles wide and 11.25 (rounded up to 12) tall. These are scaled up to be 64x64 sized tiles on a viewport 1280x720.

All pixel art work should be defined in these proportions to avoid 'mixels'.
The term "mixels" refers to the mixing of different pixel sizes or resolutions in pixel art, which can result in an inconsistent and jarring visual appearance. Pixel art typically relies on a uniform pixel size to maintain a cohesive and clean look. When mixels occur, certain elements of the design may appear larger, sharper, or blurrier than others, disrupting the overall aesthetic.
UI
Work in progress
Tribe of the Accord - Material Theme Colors
Color Shades
| Shade | Primary - #B85D49 | Secondary - #906F68 | Tertiary - # 877548 | Neutral - #7E7573 | Neutral-Variant - #857370 |
|---|---|---|---|---|---|
| 0 | |||||
| 5 | |||||
| 10 | |||||
| 15 | |||||
| 20 | |||||
| 25 | |||||
| 30 | |||||
| 35 | |||||
| 40 | |||||
| 50 | |||||
| 60 | |||||
| 70 | |||||
| 80 | |||||
| 90 | |||||
| 95 | |||||
| 98 | |||||
| 99 | |||||
| 100 |
Light and Dark Theme Variants
| Color Name | Light Theme Hex Code | Light Theme Color Preview | Dark Theme Hex Code | Dark Theme Color Preview |
|---|---|---|---|---|
| Primary | #873727 | #FFB4A4 | ||
| Surface Tint | #994533 | #FFB4A4 | ||
| On Primary | #FFFFFF | #5D180B | ||
| Primary Container | #B55A47 | #B55A47 | ||
| On Primary Container | #FFFFFF | #FFFFFF | ||
| Secondary | #805349 | #F3B9AD | ||
| On Secondary | #FFFFFF | #4B261F | ||
| Secondary Container | #FFCCC1 | #5A332B | ||
| On Secondary Container | #5F372E | #FFC4B7 | ||
| Tertiary | #6B5F00 | #E8D563 | ||
| On Tertiary | #FFFFFF | #383100 | ||
| Tertiary Container | #BDAC3E | #BDAC3E | ||
| On Tertiary Container | #262000 | #262000 | ||
| Error | #BA1A1A | #FFB4AB | ||
| On Error | #FFFFFF | #690005 | ||
| Error Container | #FFDAD6 | #93000A | ||
| On Error Container | #410002 | #FFDAD6 | ||
| Background | #FFF8F6 | #1A1110 | ||
| On Background | #221A18 | #F0DFDB | ||
| Surface | #FFF8F6 | #1A1110 | ||
| On Surface | #221A18 | #F0DFDB | ||
| Surface Variant | #F8DCD7 | #55423F | ||
| On Surface Variant | #55423F | #DBC1BB | ||
| Outline | #88726E | #A38C87 | ||
| Outline Variant | #DBC1BB | #55423F | ||
| Shadow | #000000 | #000000 | ||
| Scrim | #000000 | #000000 | ||
| Inverse Surface | #382E2C | #F0DFDB | ||
| Inverse On Surface | #FFEDE9 | #382E2C | ||
| Inverse Primary | #FFB4A4 | #994533 |
Example
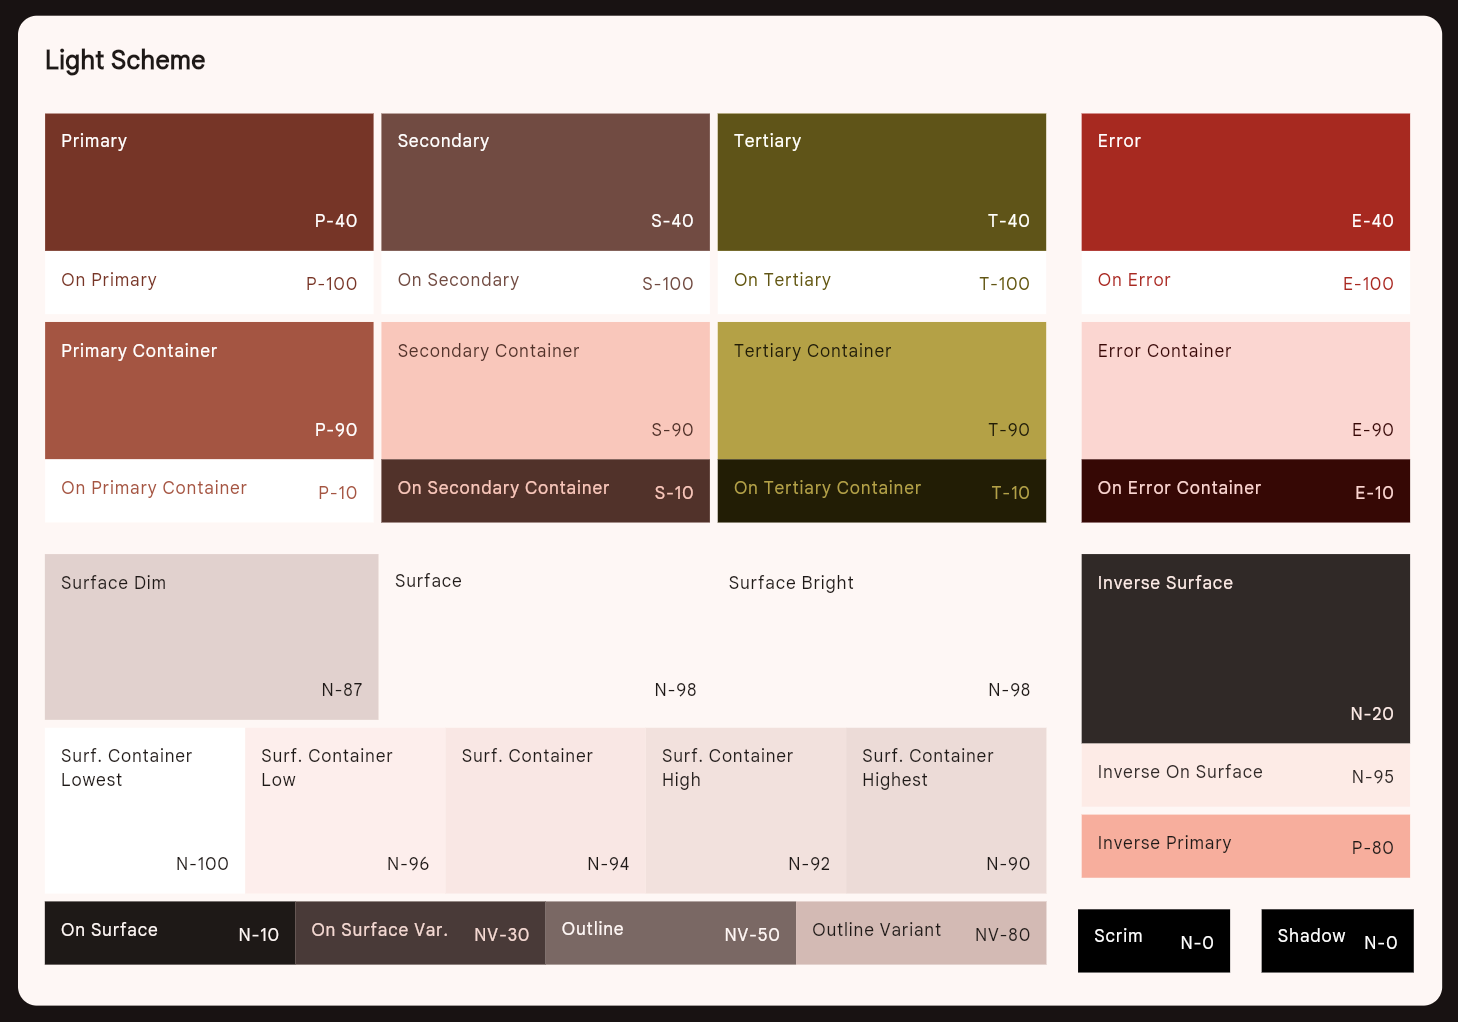

New Colour mappings
Hex Code A is the SimpleBox Theme remapped to the new Tribe of the Accord Colour palette (Hex Code B).
| Hex Code A | Hex Code B | Godot Reference A | Godot Reference B |
|---|---|---|---|
Color( 0.196078, 0.160784, 0.278431, 1 ) | Color( 0.168627, 0.141176, 0.137255, 1 ) | ||
Color( 0.278431, 0.231373, 0.470588, 0.2 ) | Color( 0.254902, 0.227451, 0.219608, 1 ) | ||
Color( 0.301961, 0.65098, 1, 0.2 ) | Color( 0.839216, 0.458824, 0.384314, 1 ) | ||
Color( 0.29, 0.36, 0.69, 1 ) | Color( 0.360784, 0.25098, 0.227451, 1 ) | ||
Color( 0.301961, 0.65098, 1, 1 ) | Color( 0.721569, 0.364706, 0.286275, 1 ) | ||
Color( 0.278431, 0.231373, 0.470588, 1 ) | Color( 0.254902, 0.227451, 0.219608, 1 ) | ||
Color( 1, 0.976471, 0.823529, 1 ) | Color( 0.854902, 0.768627, 0.564706, 1 ) | ||
Color( 1, 0.976471, 0.823529, 0.2 ) | Color( 1, 0.937255, 0.811765, 1 ) |
This table now includes the correct mapping of the hex codes in the fourth column in the Color format so you can update it.
Style Kit
Work in progress
Getting Started
Work in progress
Game Design Principles
Work in progress
Game Design Principles
Work in progress
Getting Started
Work in progress
GDD - Genre
| Section | Description |
|---|---|
| Overview | This Game Design Document (GDD) aims to provide a comprehensive blueprint of the genre of the game Tribe of the Accord. |
| Status | Draft |
| Version | 1.0 |
Description
'Tribe of the Accord' is categorized as an 'Action Adventure' video game set in a Stone Age environment. The story centers on Adira, a young girl raised by Torion. The game follows a linear narrative that highlights Adira's growth into an independent survivalist. Players undertake quests, engage in dialogues, and witness the evolving relationship between Adira and her father, Torion, as they follow the narrative depicted in the novel adaptation.
Here are the main features that align it with the action-adventure classification:
-
Exploration and Navigation:
- The game involves exploring a vast, interconnected world filled with various themed locations. Players must navigate through different regions, discovering secrets, hidden areas, and new paths.
-
Combat and Action Mechanics:
- It includes real-time combat with a variety of wild enemy creatures and clan members. Players use melee weapons, ranged attacks, and special abilities to defeat foes. The combat is fast-paced and skill-based, requiring quick reflexes and strategic thinking.
-
Puzzle-Solving:
- The game incorporates puzzles that players must solve to progress. These puzzles often involve environmental interactions, finding keys, or manipulating objects to unlock new areas.
-
Character Progression:
- Players can upgrade their character, enhancing abilities and acquiring new skills and weapons. This progression is often tied to exploration and combat, rewarding players for their efforts.
-
Story and Lore:
- Tribe of the Accord features a narrative that unfolds as players explore the world. The story is conveyed through visuals, environmental storytelling, and interactions with NPCs, creating a rich and immersive experience.
-
Atmospheric and Aesthetic Design:
- The game’s visual and audio design contributes to its immersive experience. The atmospheric soundtrack and distinctive pixel art style create a unique world for players to engage with.
-
Non-linear Gameplay:
- Players can often choose the order in which they tackle various regions or objectives, adding a level of freedom and personalization to the gameplay experience.
These elements combine to create a gameplay experience that blends action, exploration, puzzle-solving, and storytelling, which are hallmarks of the action-adventure genre.
GDD - Progression & Rewards
| Section | Description |
|---|---|
| Overview | This Game Design Document (GDD) aims to provide a comprehensive blueprint of the Progression and Rewards that players will acquire in the game Tribe of the Accord. |
| Status | Work In Progress |
| Version | 3.0 |
Health & Currency Systems
System Overview
Tribe of the Accord features two complementary but independent resource systems that govern player survivability and progression.
- Health System — Vital: Organic regeneration through natural materials gathered in the world.
- Currency System — Fragments: Tangible collectibles earned via hunting, combat, and exploration.
These systems are thematically intertwined through nature’s cycle—life gives, death returns—while remaining mechanically distinct to preserve clarity.
Below is a non-resource gathering system:
- Ability System — Narrative based: Progression-based unlockable abilities/charms that allow the Player to do more.
Health System — Vital
Concept
Health is restored through materials drawn from nature rather than medicine or magic. Players collect Amber Fragments from the environment and living creatures, gradually forming concentrated restorative items such as Vital Seeds and Vital Hearts. Each item represents preserved life energy.
Collection & Sources
| Source | Item | Description |
|---|---|---|
| Bushes & Small Enemies | Amber Fragment | Common drops that naturally accumulate during exploration or minor combat. Five fragments condense into a single Vital Seed. |
| Medium Enemies & Chests | Vital Seed | Guaranteed reward that immediately restores one Health PIP. |
| Bosses & Chests | Vital Heart | Full Health PIP replenishment; typically discovered as boss rewards or within a hidden/secret chest. |
Players gather amber fragments passively while exploring or fighting, allowing steady progress toward guaranteed healing upgrades without a dedicated grind.
Item Hierarchy
| Tier | Name | Description | Function |
|---|---|---|---|
| Tier I | Amber Fragment | Small piece of hardened sap that carries potential energy. | Cannot heal on its own; five fragments automatically form one Vital Seed. |
| Tier II | Vital Seed | Concentrated resin pearl created from five fragments. | Restores one Health PIP on use and can be activated mid-combat. |
| Tier III | Vital Heart | Large crystallized core of pure resin found whole in the world. | Fully replenishes all Health PIPs; rare and often secured within chests. |
Each tier scales in rarity and potency so players naturally advance toward higher-value heals as they explore deeper regions without crafting interfaces or manual conversions.
Healing Behavior
- Amber Fragment: A dormant resource that automatically accumulates; once five are collected, they convert into one Vital Seed in the inventory.
- Vital Seed: Instant-use consumable that replenishes one Health PIP and can be triggered at any time.
- Vital Heart: Full-health restoration item that is used instantly upon activation, refilling all Health PIPs; preserved as a complete artifact rather than crafted.
- Healing items never function as currency—they are sacred, life-bound resources.
Visual Direction
| Item | Palette | Glow | Animation |
|---|---|---|---|
| Amber Fragment | Warm amber-orange | Faint flicker | Gentle pulse when on the ground. |
| Vital Seed | Rich gold tone | Constant soft glow | Brief shimmer when picked up. |
| Vital Heart | Deep orange core | Radiant aura | Bright flash with a resonant hum. |
Currency System — Fragments
Concept
Fragments operate as the singular, universal currency representing the physical remnants of life’s cycle. Each Fragment can be formed from bone, chitin, or hardened resin, and while the color varies to reflect its origin, every piece shares identical value and shape. Fragments are spent exclusively on combat-oriented Boons, and there is no crafting or conversion, players simply collect and spend them.
Collection & Sources
| Source | Fragment Type | Typical Tier | Drop Notes |
|---|---|---|---|
| Insect & Arachnid creatures | Chitin Fragment | Tier I | Frequent drops during skirmishes; color-shifted to chitin tones. |
| Mammalian creatures | Bone Fragment | Tier I | Reliable source of currency during hunts. |
| Bushes | Resin Fragment | Tier I | Environmental pickups that encourage exploration. |
| Large beasts / Boss encounters | Mixed Fragment Drops | Tier III | Guaranteed high-value reward bundles. |
Fragments auto-collect on contact, incrementing a visible counter in the HUD. They can spawn singular or in multiples off the back of a player action.
Fragment Tiers
| Tier | Name | Description | Value | Drop Frequency |
|---|---|---|---|---|
| Tier I | Fragment | Base shard of bone, chitin, or resin—color varies but value remains equal. | 1 | ~70% |
| Tier II | Refined Fragment | Larger shard composed of a fused mix of bone, chitin, and resin. | 10 | ~25% |
| Tier III | Core Fragment | Magnified version of the refined shard, radiating energy. | 100 | ~5% |
Tiers drop naturally—no merging, refinement, or conversion mechanics.
Spending & Progression
| Type | Description | Example | Where Acquired |
|---|---|---|---|
| Boons | Temporary buffs or situational combat powers. | Boon of Endurance — short-term defense boost. | Spirit Shrines or wandering Shaman. |
Fragments can only be spent (never traded between types) and symbolize the world giving back through limited-time Boons.
Economic Flow
- Defeat enemies or explore to collect Fragments.
- Accumulate currency with totals displayed in the HUD.
- Locate shrines or traders (Later in game) to spend Fragments on Boons.
- Receive temporary combat-focused upgrades that encourage deeper engagements before the effect fades.
This reinforces a clear feedback loop: Explore → Earn → Empower → Explore deeper.
Visual Identity
| Tier | Design | Color Palette | Glow |
|---|---|---|---|
| Tier I | Small, matte shard | Bone white, chitin teal, or root variants. | Minimal flicker |
| Tier II | Larger, refined piece | Interwoven bone, chitin, and resin hues | Steady glow |
| Tier III | Polished core with radiant veins | Deep gold-orange with layered material veining | Soft pulsing aura |
Pickup feedback includes a subtle “tink” sound, dust particles, a small flash of light, and a smoothly incrementing HUD counter with a fade-in “+Fragments” notification.
System Separation & Balance
| Rule | Purpose |
|---|---|
| No crossover between systems | Health and currency remain completely independent. |
| Resin ≠ Fragment | Healing items cannot be sold, and Fragments cannot heal. |
| Separate UI channels | Health items appear in the Consumables tab; Fragments live in the HUD counter. |
| Independent reward loops | Exploration favors healing materials; combat emphasizes currency fragments. |
Design Goals
| Goal | Implementation |
|---|---|
| Clarity | Simple, non-overlapping systems. |
| Immersion | Resources derived from organic and believable origins. |
| Satisfaction | Every pickup has meaning; no filler items. |
| Minimal UI friction | Auto-pickup, single counter for currency, small inventory footprint for healing. |
Quick Summary
| System | Resource | Purpose | Source | Complexity |
|---|---|---|---|---|
| Health | Resin / Vital | Healing and survival | Nature (plants, bees, beasts) | Simple (collection only) |
| Currency | Fragments | Temporary combat empowerment | Combat and exploration | Simple (collection + expenditure) |
Abilities
These are all of the abilities that Adira will acquire during the playthrough. Abilities are defined as gameplay mechanics that change the moment to moment gameplay and allow players to have more options when interacting with the game.
Spear is the primary weapon of Adira, and the abilities are shaped around this weapon.
1.1. Charged Spear Attack
| Section | Description |
|---|---|
| Description | The Charged Spear Attack allows the player to charge their spear by holding the attack button, gathering energy for a powerful forward thrust. The attack can pierce through multiple enemies or objects, dealing increased damage. |
| Gameplay Role | The Charged Spear Attack is a combat ability that rewards players for timing and precision. It is useful in combat, offering players a versatile tool for dealing with crowds, breaking barriers, or defeating stronger enemies. |
| Unlock Conditions | TBA till narrative is finalized. But we want this ability to be unlocked 10-20% into the game |
| ------------------ | ------------- |
| Control/Inputs | Hold (X) or (Square) to charge attack. Charge up time is 2 seconds |
| Modifiers | TBA |
| ------------------ | ------------- |
| Art & Animation | This section describes the art and animation that would be needed for the ability. |
| Initiation | (once SPEAR THROW is done and input has been registered) Adira will give a hard tug on the rope. |
| Activation | The player pulls the spear back, and the spearhead begins to glow faintly. As the charge increases, the glow intensifies, and particles of energy surround the spear tip. The player’s stance becomes more focused and tense. |
| Execution | Upon release, the player thrusts the spear forward in a quick, powerful motion. The spear leaves a trail of glowing energy behind it as it moves forward. Enemies hit by the attack show a brief impact flash. |
| Cooldown | After finishing the move, Adira returns to an idle stance. |
| ------------------ | ------------- |
| Technical Specs | These are the technical foundations for the ability. |
| Range | 200, Subject to playtesting |
| Damage | 50, subject to playtesting |
| Cooldown Time | No such cooldown time. |
| Energy Cost | 30, subject to playtesting |
| Hitbox Details | As per the animation of the charged speed |
| ------------------ | ------------- |
| Audio Specs | These are the sound effects we would need for the ability. |
| Activation | A faint humming noise that increases in intensity as the charge builds up. |
| Execution | A sharp, stabbing sound as the spear thrusts forward, followed by a satisfying impact noise if it hits enemies or objects. A smooth slicing sound when the spear passes through multiple enemies or objects. |
| Impact | A skidding sound as it comes to a halt |
| ------------------ | ------------- |
| VFX | These are the visual effects we would need for the ability. |
| Activation | A circular smoke forms around Adira starts forming around Adira. |
| Execution | The smoke circulates and converges towards the center and a small dust cloud appears before she launches off. The launching has some speed lines as well. |
| Impact | Every time an enemy is hit, it makes a jabbing sound. |
| ------------------ | ------------- |
| Special Case | The attack is cancelled if the button is released before the charge is complete. |
| Fail Cases | TBA, subject to playtesting. |
| Synergies | TBA |
| ------------------ | ------------- |
| Ability Progression | Abilities could have gameplay related upgrades, they will be listed here. |
| Upgrade 1 | The hookshot pull damages enemies. |
| Upgrade 2 | Chain hookshot. |
| Upgrade 3 | The hookshot lands you behind enemies. |
1.2. Spear Throw
| Section | Description |
|---|---|
| Description | The Spear Throw ability allows the player to hurl their spear over a distance to hit enemies, interact with environmental objects, or trigger distant switches. |
| Gameplay Role | Primarily a combat tool, this ability also serves as a method of interacting with objects from a distance. It is ideal for targeting enemies before they close in on the player, and for solving puzzles that require hitting objects or switches in hard-to-reach places. |
| Unlock Conditions | TBA till narrative is finalized. We want this to be introduced at the start or 10% into the game. |
| ------------------ | ------------- |
| Control/Inputs | Use analog stick to activate aiming mode, choose direction to shoot using analog stick, RT to shoot. |
| Modifiers | TBA |
| ------------------ | ------------- |
| Art & Animation | This section describes the art and animation that would be needed for the ability. |
| Initiation | Right after the analog stick is moved, Adira will pull her spear back and get in the throwing position. |
| Activation | Upon activation, the player character plants the spear into the ground or designated point. |
| Execution | Upon release, the character throws the spear in a fluid motion while moving a little forward so it feels like she is using her body's momentum. The spear flies in a straight line with a trail of energy behind it. |
| Cooldown | After the throw, the character briefly returns to an idle stance. |
| ------------------ | ------------- |
| Technical Specs | These are the technical foundations for the ability. |
| Range | 400, Subject to playtesting |
| Damage | 50, subject to playtesting |
| Cooldown Time | After throw, until Adira returns to idle animation which would be around 0.5 seconds. After that, she can't throw the spear until she goes and collects it from the enemy. |
| Energy Cost | 20 points, subject to playtesting |
| Hitbox Details | The tip of the spear is the only hitbox, but the rest of the spear does not have a hitbox. |
| ------------------ | ------------- |
| Audio Specs | We will need some juicy sound effects to land the punchyness of the spear throw because it is one of the core abilities. |
| Activation | A slight whoosh while pulling the spear back. |
| Execution | A fast swoosh as the spear flies through the air. 2 slightly different SFX for each to have some variety. |
| Impact | This will need multiple effects - a thud for when the spear hits the ground or an enemy that has frontal defence. A meat cleaving sound for if it hits flesh of an enemy. 2 slightly different SFX for each to have some variety. |
| ------------------ | ------------- |
| VFX | What is said about the audio can also be said about the VFX - we need it JUICY. |
| Activation | NO VFX needed. |
| Execution | Speed lines around the spear. |
| Impact | Small dust cloud or sparks and a small pinch on the impact location if the spear has the potential to stick in, depending on the surface. Add variation for smokes to have variety |
| ------------------ | ------------- |
| Special Case | If, during the Activation phase of the animation, players are hit by enemies/traps, they will be stopped. |
| Fail Cases | If the player throws the spear into the pit, it is an immediate fail state and the spear will return to the nearest surface where the player has to collect it from. Subject to change based on playtesting. |
| Synergies | TBA |
| ------------------ | ------------- |
| Ability Progression | Abilities could have gameplay related upgrades, they will be listed here. |
| Upgrade 1 | An ability that stuns every enemy if Adira charges it enough. |
| Upgrade 2 | TBA. |
| Upgrade 3 | TBA. |
1.3. Pole Vault
| Section | Description |
|---|---|
| Description | The Pole Vault ability allows the player to leap over gaps, obstacles, or enemies by using their spear as a vaulting pole. It serves both as a traversal tool and an evasive maneuver in combat. |
| Gameplay Role | Primarily used for traversal, enabling the player to cross wide gaps or evade enemy attacks. It can also be used to quickly reposition in combat scenarios. |
| Unlock Conditions | TBA till narrative is finalized. We want this to be introduced 20-30% into the game. |
| ------------------ | ------------- |
| Control/Inputs | Press B or RT (subject to change based on further design decisions). Need to be running/moving to activate. Input doesn't work if not moving. |
| Modifiers | TBA |
| ------------------ | ------------- |
| Art & Animation | This section describes the art and animation that would be needed for the ability. |
| Initiation | (once moving) Adira will stab the spear in front of her and jump towards it while launching herself into the air. |
| Activation | Upon activation, the player character plants the spear into the ground or designated point. |
| Execution | The player character vaults over the gap or obstacle, with a smooth, high-reaching leap animation. The player flips mid-air for added style. Maybe we could have 2-3 flip variations for variety. |
| Cooldown | After landing, the player regains their stance, transitioning smoothly back to their walking or combat-ready position. |
| ------------------ | ------------- |
| Technical Specs | These are the technical foundations for the ability. |
| Range | 100, but Subject to playtesting |
| Damage | NA |
| Cooldown Time | 0.5 seconds, subject to playtesting. Adira can instantly roll the moment she lands. We won't tutorialize it, but it will be a mechanic for those who want to discover it |
| Energy Cost | 20 points, subject to playtesting |
| Hitbox Details | There will be i-frames/avoid frames on the pole-vault for small-large enemies. The pole vault will be blocked by aerial enemies or XL sized enemies. In case of enemy attack, Initiation and Cooldown are the only times Adira can be hit. |
| Damage | NA |
| ------------------ | ------------- |
| Audio Specs | We will need some juicy sound effects to land the punchyness of the pole vault because it is going to be one of our biggest HOOKS. |
| Activation | A crunchy thud as the spear is planted into the ground or object. |
| Execution | A soft whoosh sound as the player leaps into the air. |
| Impact | A light landing thud as the player touches down on the other side. |
| ------------------ | ------------- |
| VFX | What is said about the audio can also be said about the VFX - we need it JUICY. |
| Activation | A dust cloud kicks up when the spear is planted, and a brief wind trail follows the player as they vault. |
| Execution | Speed lines/mist around Adira's body when she is twisting. |
| Impact | Small dust clouds or sparks appear upon landing, depending on the surface. |
| ------------------ | ------------- |
| Special Case | If, during the Activation/Execution phase of the animation, players collide with walls, aerial enemies or XL sized enemies, they will be stopped. One addition can be that they get stunned in such cases and open to attack. This is to limit people from blindly spamming the ability outside of stamina needs. |
| Fail Cases | If the player pole vaults into a pit, it is an immediate fail state. Subject to change based on playtesting. |
| Synergies | TBA |
| ------------------ | ------------- |
| Ability Progression | Abilities could have gameplay related upgrades, they will be listed here. |
| Upgrade 1 | TBA. |
| Upgrade 2 | TBA. |
| Upgrade 3 | TBA. |
1.4. Spear Hookshot
| Section | Description |
|---|---|
| Description | The Spear Hookshot allows the player to throw their spear with an attached rope, which can latch onto objects or enemies. Depending on the size and weight of the target, the player can either pull the object towards them or get pulled towards the object, enabling traversal or getting into advantageous positions against enemies. |
| Gameplay Role | This ability serves both as a traversal/puzzle solving tool and combat instrument. It enables players to pull distant objects/enemies towards them or vice versa depending on the size of the target. It can also be used in combat to pull enemies toward the player or vice versa. |
| Unlock Conditions | TBA till narrative is finalized. But we want this ability to be unlocked 40-50% into the game |
| ------------------ | ------------- |
| Control/Inputs | Once the spear is thrown, press B or RT after spear lands. Subject to change based on playtesting. If the input is do the spear hits a valid object, it latches on and initiates either a pull or a drag, depending on the object’s size. |
| Modifiers | TBA |
| ------------------ | ------------- |
| Art & Animation | This section describes the art and animation that would be needed for the ability. |
| Initiation | (once SPEAR THROW is done and input has been registered) Adira will give a hard tug on the rope. |
| Activation | After initiation, Adira will pull herself towards target or get pulled. If she gets pulled, she does a twist/flip like movement. (reference Sekiro's grapple mechanic) |
| Execution | Upon target reaching Adira/Adira reaching target, depending on the object/enemy size, the moving object would come to a stop in a decelerating motion right in front of the target object. |
| Cooldown | After decelerating, the character/object returns to an idle stance. |
| ------------------ | ------------- |
| Technical Specs | These are the technical foundations for the ability. |
| Range | 400, Subject to playtesting |
| Damage | NA, subject to playtesting |
| Cooldown Time | After hookshot, until Adira returns to idle animation which would be around 0.5 seconds. After that, she can't throw the spear until she goes and collects it from the enemy. |
| Energy Cost | 20 points, subject to playtesting |
| Hitbox Details | The tip of the spear is the only hitbox. The rest of the spear shall not be considered a hitbox. |
| ------------------ | ------------- |
| Audio Specs | These are the sound effects we would need for the ability. |
| Activation | A slight whoosh while pulling the spear back. |
| Execution | A fast swoosh as the spear flies through the air. 2 slightly different SFX for each to have some variety. |
| Impact | This will need multiple effects - a thud for when the spear hits the ground or an enemy that has frontal defence. A meat cleaving sound for if it hits flesh of an enemy. 2 slightly different SFX for each to have some variety. |
| ------------------ | ------------- |
| VFX | These are the visual effects we would need for the ability. |
| Activation | NO VFX needed. |
| Execution | Speed lines on moving object. |
| Impact | NA |
| ------------------ | ------------- |
| Special Case | If, during the Activation phase of the animation, players are hit by enemies/traps, they will be stopped. |
| Fail Cases | If the player throws the spear into the pit, it is an immediate fail state and the spear will return to the nearest surface where the player has to collect it from. Subject to change based on playtesting. |
| Synergies | TBA |
| ------------------ | ------------- |
| Ability Progression | Abilities could have gameplay related upgrades, they will be listed here. |
| Upgrade 1 | The hookshot pull damages enemies. |
| Upgrade 2 | Chain hookshot. |
| Upgrade 3 | The hookshot lands you behind enemies. |
Ideas/Systems
These are some ideas that are not set in stone.
- Charged Spear Is Faster When Part Of A Combo
- Dodging At The Perfect Time With Spear Equipped Gives You A Speed Boost
- Dodging At The Perfect Time With Axe Equipped Gives You A Damage Boost
- A Consumable Allows Adira To Increase Damage Every Time She Hits Without Getting Hit
- Maybe Gloves Or Something Can Be An Upgrade That Allows Her To Grip On To Stuff That In Turn Allows Her To Climb Stuff
- Weapon Switch Should Have A Axe Sound And A Spear Sound
- Bosses can use your buffs/debuffs.
GDD - Bosses
| Section | Description |
|---|---|
| Overview | This Game Design Document (GDD) aims to provide a comprehensive blueprint of Bosses in the game, Tribe of the Accord. |
| Status | Draft |
| Version | 1.0 |
Description
This document will detail all the necessary requirements/vision for the bosses, including but not limited to attack patterns, references, animation requirements, etc.
Before we get into design, here are the basic principles we must follow while designing every boss:
- Every boss needs to be a test of skill of some sort.
- Every boss needs to have a narrative hook - with a beginning, climax, and end.
- Every boss should be a change of pace compared to the previous boss.
Boss List
Below is the list of bosses that we have decided to include as of now. This list is subject to change based on how the narrative develops.
- Torion
- Igrath
- Boar
- Dire Wolves
- Dhoron
- Bison (it will be a stampede during Dhoron’s hunt)
- Mammoth
- Bruntus (club weapon)
- Igrath
Boss Animations
- Idle
- Walk
- PreCharge/Telegraph
- Run/Charge
- Attack #1
- Attack #2
- Attack #3 (Bosses would support up to 3 different attacks)
- Hurt
- Stagger
- Death
- Taunt (When first seeing the boss and the player will feel intimidated)
- Angry (Could be a roar/some form of frustration from the boss that things aren’t going as planned for them, used as a transition between phases)
Sequence of Boss Battle
sequenceDiagram
    participant Player
    participant Boss
    participant StateMachine
    participant BehaviorManager
    participant HealthSystem

    Player->>+Boss: Enters boss arena
    Boss->>Player: Taunt (Dialogue or Animation)
    Boss->>StateMachine: Enter Idle State
    StateMachine->>BehaviorManager: Trigger Phase 1 Behavior

    loop Phase 1
        BehaviorManager->>Boss: Select Attack (Attack 1, Attack 2, etc.)
        Boss->>Player: Execute Attack
        Player->>Boss: Counter-Attack/Damage
        Boss->>HealthSystem: Update Health
        HealthSystem-->>BehaviorManager: Check Health Threshold
        alt Health > 50%
            BehaviorManager->>StateMachine: Continue Phase 1
        else Health <= 50%
            BehaviorManager->>StateMachine: Trigger Phase Transition
        end
    end

    StateMachine->>Boss: Play Phase Transition Animation
    StateMachine->>BehaviorManager: Trigger Phase 2 Behavior

    loop Phase 2
        BehaviorManager->>Boss: Select Attack (Combo Attacks, Enhanced Moves)
        Boss->>Player: Execute Attack
        Player->>Boss: Counter-Attack/Damage
        Boss->>HealthSystem: Update Health
        HealthSystem-->>BehaviorManager: Check Health Threshold
        alt Health > 0%
            BehaviorManager->>StateMachine: Continue Phase 2
        else Health <= 0%
            BehaviorManager->>StateMachine: Trigger Death Sequence
        end
    end

    StateMachine->>Boss: Play Death Animation
    Boss->>Player: Boss Defeated (End Encounter)
1. Detailed Boss Breakdowns
1.1. Torion
- Location: Campsite
- Narrative Hook: He is a classic dad who wants to teach Adira the ways of life, but she chooses to defy him to prove her worth every time.
- Personality traits: He is calm and collected and only moves when necessary. He is a precise fighter.
- Personality type references:
- Endeavor (My Hero Academia)
- Thors (Vinland Saga)
- Kratos (God of War 2018)
- Boss mechanic references:
- Honda Tadakatsu (Nioh) because of the spear
- The Hanged Man (Hyper Light Drifter)
- Number of phases: 2
- Boss Attributes:
- Total Enemy Health: 200
- Light Damage: 20
- Medium Damage: 40
- Heavy Damage: 60
Individual attacks:
Phase 1
1. Spear Thrust (Basic Melee)
- Description: Thrusts spear in player’s direction.
- Telegraph: Pulls spear backwards.
- Range: Medium-Long linear towards player.
- Activation Range: Short-Mid.
- Damage: Moderate.
- Dodge: Dodge away, diagonally, or to the side.
2. Around the World
- Description: Spins in a circle with the spear, damaging anything in range.
- Telegraph: Pulls spear in the opposite direction of the spin.
- Range: Short, around the enemy along with some forward momentum.
- Activation Range: Short.
- Damage: Light.
- Dodge: Dodge away.
3. Half Around the World (Heavy Attack)
- Description: Lunges towards the player and swings the spear horizontally.
- Telegraph: Running towards player and lunge.
- Range: Towards the player.
- Activation Range: Mid.
- Damage: High.
- Dodge: Roll away from the attack.
Phase 2
4. Spear Thrust + Half Around the World + Speed up (Combo)
- Description: Combines spear thrust and around the world sequentially with each attack and is faster - so less telegraph time + attacks are faster.
- Telegraph: Follows respective attacks telegraphing in combination.
- Range: Moderate if one of the two lands, high if both land. Combo is dodgeable even if one hit lands.
- Activation Range: Short-Mid.
- Damage: Low per hit, but fired in a rapid sequence.
- Dodge: Move laterally to avoid the hits.
5. Repeated Around the World
- Description: Torion will spin multiple times and follow Adira wherever she goes. Can chain repeatedly.
- Telegraph: Follows respective attacks telegraphing but with more buildup.
- Range: Light if hit lands once. Combo can't be escaped from if caught in.
- Activation Range: Mid.
- Damage: Low per hit, but fired in a rapid sequence.
- Dodge: Move laterally to avoid the hits.
Behavior:
Torion is a calm fighter, so he will only walk around the arena and launch attacks when Adira is in range.
What we want the player to be challenged on:
- Basic movement
- Weapon range
- Dodge roll
1.2. Igrath
- Location: Campsite/Final Location
- Narrative Hook: He is the main antagonist of this game, and when Adira finds Igrath for the first time in the story, Torion is missing. Psychologically, this will immediately indicate to the players that Igrath is pretty strong if Torion, who is extremely strong himself, had gone missing. With the addition of good music, VFX, and unique animations, Igrath could be perfect as the first and the narratively last boss of the game.
- Personality traits: He is a bit of an anarchist, very erratic with his actions, and that should reflect in his movements too. His attacks should be more vicious and lack technique.
- Personality type references:
- Mugen (Samurai Champloo)
- Trevor (GTA 5)
- Arkham (DMC3)
- Boss mechanic references:
- Godfrey (Elden Ring) because of the axe
- Nosk (Hollow Knight) for the erratic movement
- Number of phases: 3 (only 1 will be available for the first fight at the campsite)
Individual attacks:
Phase 1
1. Axe Slash (Basic Melee)
- Description: Swings axe in a wide arc in front of it.
- Telegraph: Swings the axe in the opposite direction for buildup.
- Range: About 180 degrees towards the player.
- Activation Range: TBA.
- Damage: Moderate.
- Dodge: Dodge away or to the side.
2. Reverse Hit (Stun)
- Description: Uses the other end of the axe for a quick attack.
- Telegraph: Pulls back the axe.
- Range: Vertically in front of the boss towards the player.
- Activation Range: TBA.
- Damage: Light, but causes a short stun.
- Dodge: Dodge away or diagonally in his direction to sneak in a back attack.
3. Axe Smash (Heavy Attack)
- Description: Lunges towards the player and swings the axe in a vertical smash.
- Telegraph: Running towards player and lunge.
- Range: Towards the player.
- Activation Range: TBA.
- Damage: High.
- Dodge: Roll to the side right before the axe hits the ground.
4. Retaliate (Light Attack)
- Description: If a player rolls behind and is being greedy with attacks, Igrath turns back and immediately does an axe slash.
- Telegraph: Sprite shake.
- Range: About 270 degrees towards the player.
- Activation Range: TBA.
- Damage: Light.
- Dodge: Roll away from the attack.
Phase 2
5. Axe Slash + Axe Smash + Speed up (Combo)
- Description: Combines axe slash and smash simultaneously with each attack and is faster - so less telegraph time + attacks are more frenetic.
- Telegraph: Follows respective attacks telegraphing.
- Range: Moderate if one of the two lands, high if both land. Combo is dodgeable even if one hit lands.
- Activation Range: TBA.
- Damage: Low per hit, but fired in a rapid sequence.
- Dodge: Move laterally to avoid the hits.
6. Reverse Hit Stun + Axe Slash
- Description: Combines reverse hit stun + axe slash/smash. This is a commit attack.
- Telegraph: Same as reverse hit stun.
- Activation Range: TBA.
- Damage: Moderate if you don’t get caught in the stun, high if both attacks land. If caught in stun, can’t avoid the second attack.
- Dodge: Run or roll to stay ahead of the sweeping beam.
Phase 3
7. Reverse Hit Stun + Axe Slash + Axe Smash + Shockwave with Phase 2 speed (Combo)
- Description: Axe attack from before happens 2 times in a row without breaks where Igrath tracks Adira. Third attack causes a shockwave.
- Telegraph: Same as the Axe attack, but it takes a little longer.
- Range: Moderate if one of the two lands, high if both land. Combo is dodgeable even if one hit lands.
- Activation Range: TBA.
- Damage: Moderate per hit, high if taking all 3 hits.
- Dodge: Move laterally to avoid the hits.
8. Axe Slash + Axe Slash + Axe Smash + Shockwave with Phase 2 speed (Combo)
- Description: Axe attack from before happens 2 times in a row without breaks where Igrath tracks Adira. Third attack causes a shockwave.
- Telegraph: Same as the Axe attack, but it takes a little longer.
- Range: Moderate if one of the two lands, high if both land. Combo is dodgeable even if one hit lands.
- Activation Range: TBA.
- Damage: Moderate per hit, high if taking all 3 hits.
- Dodge: Move laterally to avoid the hits.
Behavior:
Igrath is going to challenge Adira at all ranges. TBA abilities of the game.
What we want the player to be challenged on:
TBA
1.3. Boar
- Location: TBA but near Freyanna
- Narrative Hook: The boar will threaten Freyanna, and Adira will have to save her from the Boar.
- Personality traits: It's an agile animal and can change directions quickly.
- Personality type references: - N/A
- Boss mechanic references:
- Commander Gaius (Elden Ring)
- FengXi (Wo Long)
- Number of phases: 2
Individual attacks:
Phase 1
1. Tusk Slash
- Description: Swings tusk in a wide arc in front of it.
- Telegraph: Swings the tusks in the opposite direction for buildup.
- Range: About 120 degrees towards the player.
- Activation Range: TBA.
- Damage: Moderate.
- Dodge: Dodge away or to the side.
2. Tusk Poke
- Description: Uses tusk to poke at the player.
- Telegraph: Pulls back the tusk.
- Range: Vertically in front of boss towards the player.
- Activation Range: TBA.
- Damage: Light, but causes a short stun.
- Dodge: Dodge away or diagonally in his direction to sneak in a back attack.
3. Charged Attack
- Description: Lunges towards the player and swings the tusk in a vertical smash.
- Telegraph: Backward lean.
- Range: Towards the player.
- Activation Range: TBA.
- Damage: High.
- Dodge: Roll to the side right before the tusk hits the ground.
Phase 2
5. Tusk Slash + Tusk Poke Combo
- Description: Combines tusk slash + tusk poke and is faster - so less telegraph time + attacks are more frenetic.
- Telegraph: Follows respective attacks telegraphing.
- Range: Moderate if one of the two lands, high if both land. Combo is dodgeable even if one hit lands.
- Activation Range: TBA.
- Damage: Low per hit, but fired in a rapid sequence.
- Dodge: Move laterally to avoid the hits.
6. Repeated Charge
- Description: Chains multiple charge attacks together.
- Telegraph: Same as charge.
- Activation Range: TBA.
- Damage: Moderate if you don’t get caught in stun, high if both attacks land. If caught in stun, can’t avoid the second attack.
- Dodge: Run or roll to stay ahead of the sweeping beam.
Behavior:
TBA
What we want the player to be challenged on:
TBA
1.6. Bison
- Location: TBA but near Fall's Village
- Narrative Hook: The bison will be part of the test that Dhoron gives to Adira, and she'll be compelled to prove Dhoron wrong.
- Personality traits: It is a relatively slow animal, and while Adira can dodge it easily, its attacks hit hard.
- Personality type references: - N/A
- Boss mechanic references:
- Commander Gaius (Elden Ring)
- FengXi (Wo Long)
- Number of phases: 2
Arena Data
Since the fight will be taking place inside a stampede, we can have the arena be stuffed with bisons running across. Ideally, we can have a group of bisons running in vertical and horizontal directions so we can have enough patterns.
Individual attacks:
Phase 1
1. Horn Poke
- Description: Thrusts horns towards the player.
- Telegraph: Rears back to charge.
- Range: Vertically towards the player.
- Activation Range: TBA.
- Damage: Moderate.
- Dodge: Dodge away or to the side.
2. Dust Kick
- Description: Uses horns to hurl dust at Adira and stun her.
- Telegraph: Rears backward.
- Range: Short towards the player.
- Activation Range: TBA.
- Damage: Light, but causes a short stun.
- Dodge: Dodge away or diagonally in his direction to sneak in a back attack.
3. Bison Charge
- Description: The traditional bison charge - it will roughly follow the player until the bison gets exhausted.
- Telegraph: Backward lean.
- Range: Towards the player.
- Activation Range: TBA.
- Damage: High.
- Dodge: Roll to the side right before the bison hits the ground.
Phase 2
5. Herd Control
- Description: Emits a roar triggering changes in patterns of running bisons.
- Telegraph: Roars at the player.
- Range: N/A.
- Activation Range: TBA.
- Damage: N/A.
- Dodge: Dodge the patterns.
6. Repeated Charge
- Description: Chains multiple charge attacks together.
- Telegraph: Same as charge.
- Activation Range: TBA.
- Damage: Moderate if you don’t get caught in stun, high if both attacks land. If caught in stun, can’t avoid the second attack.
- Dodge: Run or roll to stay ahead of the sweeping beam.
Behavior:
TBA
What we want the player to be challenged on:
TBA
1.6. Bruntus
- Location: TBA but in Ursa camp
- Narrative Hook: Bruntus will not have the narrative weight but will be a huge obstacle before Adira can get to Igrath/Torion.
- Personality traits: It's an agile animal and can change directions quickly.
- Personality type references: - N/A
- Boss mechanic references:
- Troll (God of War)
- FengXi (Wo Long)
- Number of phases: 2
Individual attacks:
Phase 1
1. Club Jump Attack
- Description: Grabs club with both hands, jumps towards Adira, and smashes the club into the ground.
- Telegraph: Bruntus raises the club above his head.
- Range: It will be a radius where the dodge roll should be a comfortable dodge.
- Activation Range: TBA.
- Damage: High.
- Dodge: Dodge away.
2. Club One Arm Smash
- Description: A vertical smash that has an extremely wide range.
- Telegraph: Lifts club into the air with one hand.
- Range: Vertical towards the player.
- Activation Range: TBA.
- Damage: Moderate.
- Dodge: Dodge away or diagonally in his direction to sneak in a back attack.
3. Club Two Arm Smash
- Description: Lunges towards the player and swings the club in a vertical smash with a shockwave.
- Telegraph: Lifts club into the air with both hands.
- Range: Vertical towards the player.
- Activation Range: TBA.
- Damage: High.
- Dodge: Roll to the side or away right before the club hits the ground.
Phase 2
5. Repeated Club One Arm Smash
- Description: Chains multiple club attacks together.
- Telegraph: As per attack.
- Activation Range: TBA.
- Damage: Moderate for every attack, but once locked, the player can't escape the combo.
- Dodge: Run or roll to stay ahead of the sweeping beam.
Behavior:
TBA
What we want the player to be challenged on:
TBA
GDD - Combat
| Section | Description |
|---|---|
| Overview | This Game Design Document (GDD) aims to provide a comprehensive blueprint of the core combat mechanics of Tribe of the Accord. The focus is on creating engaging and dynamic combat encounters that challenge the player's skills and offer a sense of progression and reward. |
| Status | Draft |
| Version | 1.0 |
Description
1. Combat Mechanics
1.1 Basic Elements
- Movement
- Attack
- Interact
- Dodge/Roll
We will go for a quad directional combat system (4 Directions).
1.2 Melee Combat
- Primary weapon: Axe/Spear
- Basic attacks: Combo system with every subsequent hit causing more damage
- Charged attacks: The spear already has a running thrust, the axe can be a wider swing or a complete 360 degree spin.
- Parrying: Timed block mechanic for deflecting enemy attacks or a similar mechanic where timing your counter right feels super rewarding.
1.3 Equipment and Items:
- Secondary weapons: Bow and arrow, bombs, traps and tools
- Consumables: Health potions, buffs, temporary weapons
1.4 Enemy Variety:
- Basic enemies: Melee attackers, ranged attackers, and shielded enemies
- Mini-bosses: Larger and more powerful enemies with unique attack patterns
- Bosses: Epic encounters with distinct phases and mechanics
2. Combat Encounters
2.1 Encounter Design
- Placement of enemies: Strategic positioning to create interesting challenges
- Environmental hazards: Traps, obstacles, and hazards that affect both the player and enemies
- Puzzle integration: Combat encounters intertwined with environmental puzzles to encourage creative solutions
One thing to consider would be stagger states and internal poise numbers. Every enemy should have a limit to where if they take a certain amount of damage, they get staggered. We have discussed environmental staggering as well but that has yet to be implemented.
We also have to consider a cooldown for attacks. We can’t have enemies repeatedly attacking us without taking a break.
Based on this document, here are the proposed example behavior traits of some enemies for combat.
-
RABBIT
- No internal stagger number which basically means if you hit it, it gets staggered. It pounces once and then has a cool down of 2 seconds before it does another pounce.
-
WILD BOAR
- It has a stagger which takes about 2 or 3 hits. It charges towards you in a linear direction and if you are in its way, it damages you. If you dodge and it hits a wall, it gets staggered. If it doesn’t hit a wall, it keeps going for a little distance and then halts for 2 seconds before turning around towards you and starting to charge.
-
DIREWOLF
- It has a pounce combo that you have to dodge. It will pounce on you 3 times before it takes a rest, but even when it takes a rest, it maintains a distance that you have to cover up before attacking it. It has a cooldown of about 3-5 seconds before it does another combo. It’s internal stagger is again 2 hits worth of damage.
2.2 Player Reaction
This is something we will have to discuss. But we need to figure out how the player reacts to difference damages and whether it is in the production scope to make it variable or do we just make it a - damage hit + few moments of i-frames
3. Player Progression
3.1 Experience and Leveling:
- Experience points: We could have a skill tree that unlocks various moves or craftables rather than just stat increases.
3.2 Skill Trees:
- Axe/Spear: Enhance axe/spear techniques and combos
- Archery: Better archery skills (like piercing arrows, triple arrows etc)
- Traps and tools: This can be a stat based thing where we can incrementally use stat boosting
3.3 Equipment Upgrades:
- Crafting system: Collect materials to craft and upgrade weapons, armor, and items
- Unique items: Discover rare and powerful equipment through exploration and quests
4. User Interface:
4.1 Heads-Up Display (HUD):
It is always good to take into account things like screen shake, low health red vignette.
4.2 Combat Feedback:
- Visual and audio cues for successful attacks, blocks, and dodges
- Damage indicators to show hits taken and dealt or a health bar.
5. Progression and Rewards
5.1 Quests and Objectives:
- Main storyline quests
- Side quests and optional challenges
5.2 Exploration:
- Hidden treasures: Secret areas with valuable loot
- Lore collectibles: Discoverable items that reveal the game world's backstory
5.3 Achievement System:
- Reward players for completing specific challenges and milestones
- Unlockable cosmetics and bonuses
GDD - Controls
| Section | Description |
|---|---|
| Overview | This Game Design Document (GDD) aims to provide a comprehensive blueprint of the player input through keyboard and joysticks in the game Tribe of the Accord. |
| Status | Ready for Adoption |
| Version | 2.0 |
Description
1. Controller/Joystick
1.1. Gameplay
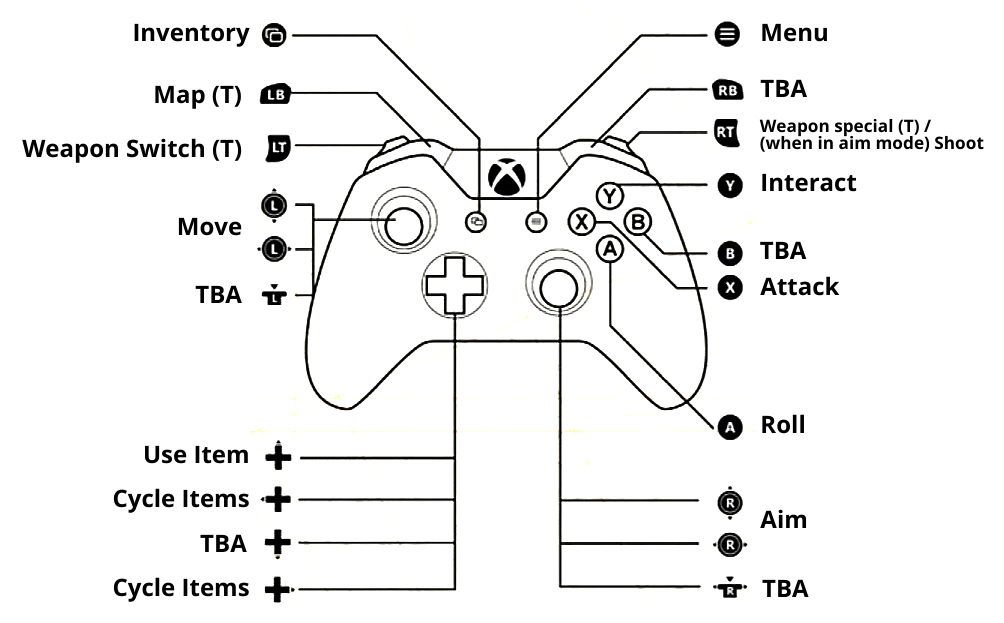
1.2. UI
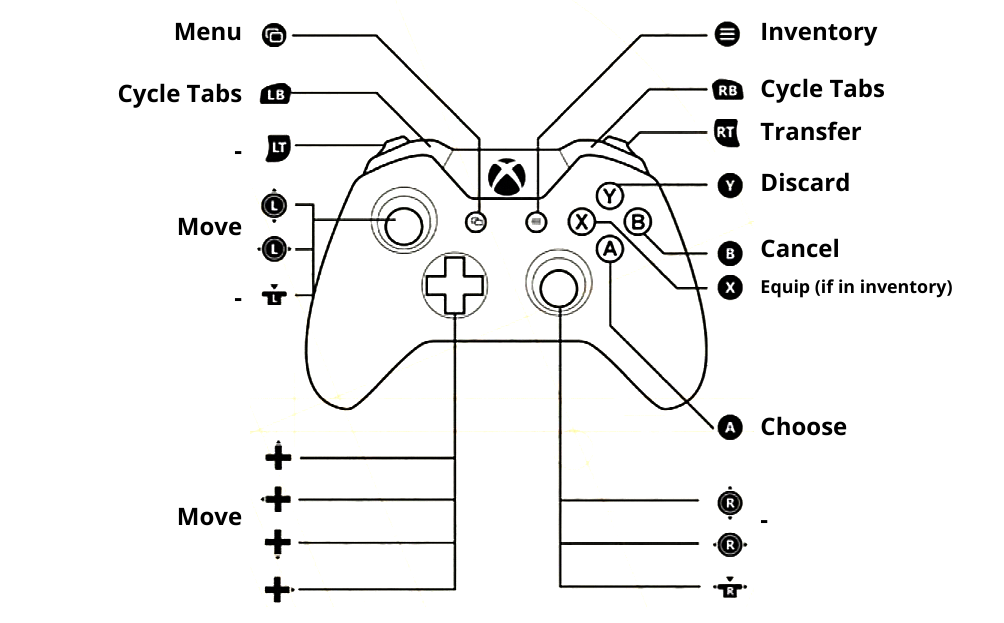
2. Keyboard
2.1. Gameplay
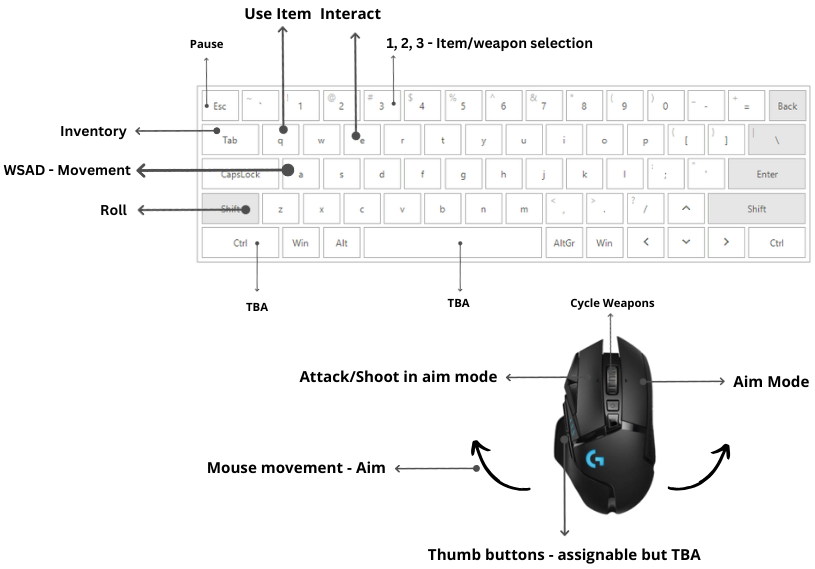
2.2. UI
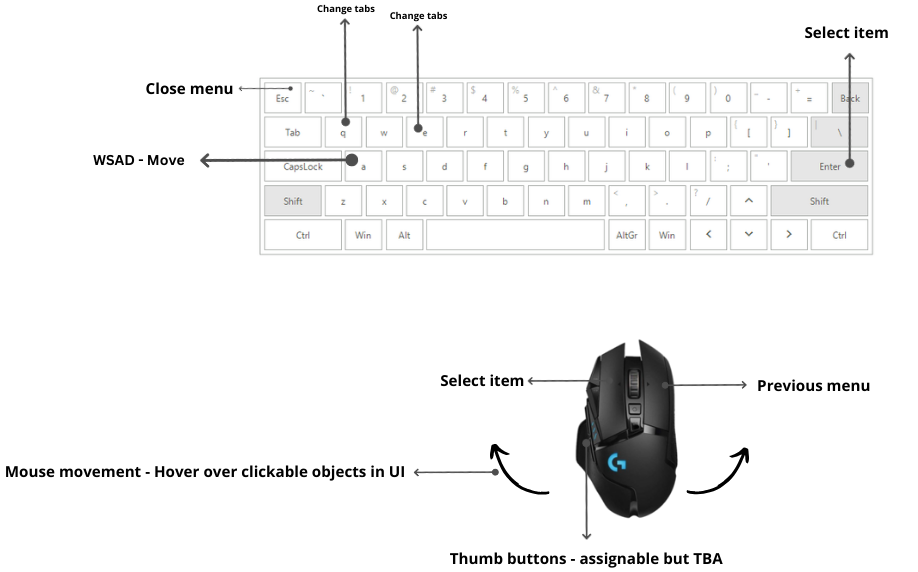
3. Events
3.1. Gameplay
-
Menu: This input action will open the in-game menu.
-
Inventory: This input action will open Adira's inventory.
-
Use Item: This input action will make Adira consume the currently selected item in the GUI (when you are NOT in the inventory).
-
Aim Mode: This input action will trigger Aim Mode when Adira is using an aimable/throwable weapon. If pressed again, Aim Mode will be disabled. Used only for Keyboard & Mouse.
-
Shoot: This input action will trigger a shoot action when Adira is aiming with an aimable/throwable weapon. This includes throwing a javelin.
-
Move: This input action controls character movement. Each input will move Adira in a different direction (Up, Down, Left, Right).
-
Aim: This input action is for when Adira is in Aim Mode. It will control where she is aiming. To shoot, the player will need to press the "Shoot" action.
- When using a controller, the player will use the right stick to aim.
- When using a keyboard, the player will use the normal move keys to aim.
-
Change Move Stance: This input action changes Adira's walk/run stance. When Adira is running, this action will switch her to walking, and vice versa. (This does not work in cutscenes and some scenes where you may be forced to walk for dramatic effect.)
-
Cycle Weapons: This input action cycles through the acquired weapons (shown in the GUI). One input will go forward and the other backward in the array of available weapons.
- Keyboard
- 1 - Fists
- 2 - Spear
- 3 - Axe
- Keyboard
-
Cycle Items: This input action cycles through the acquired consumable items (shown in the GUI). One input will go forward and the other backward in the array of available items.
-
Roll: This input action will make Adira roll in the direction she is facing, walking, or running.
-
Attack: This input action will make Adira attack (punching, slashing, striking) in the direction she is facing, walking, or running.
-
Interact: This input action will make Adira interact with something in the game scene.
-
Map: This input action will open the map, but it can be closed via the Cancel action.
3.2. UI
-
Menu: This input action will close the in-game menu (if it is currently opened).
-
Inventory: This input action will close Adira's inventory (if it is currently opened).
-
Move: This input action changes between options. Each input will move the selector in a different direction (Up, Down, Left, Right).
-
Cycle Tabs: This input action cycles through the tabs in the currently opened UI. One input will go forward and the other backward in the array of available tabs.
-
Transfer: This input action quickly transfers an item from a storage container/crafting workbench to Adira's inventory, or from her inventory to the storage container/crafting workbench. A single input will automatically handle the transfer of the item to an empty spot.
-
Discard: This input action will discard the currently hovered/selected weapon.
-
Cancel: This input action will cancel, go back, or close something in the UI menu.
-
Equip: This input action will equip, use/consume, or craft an item.
-
Confirm: This input action will choose, accept, select, or confirm an option/item from the UI.
-
Map: This input action will close the map (if it is currently opened).
Controller
Gameplay
| Function | Action | Controller |
|---|---|---|
| Move up | move_up | Left analog stick up |
| Move right | move_right | Left analog stick right |
| Move down | move_down | Left analog stick down |
| Move left | move_left | Left analog stick left |
| Aim up | aim_up | Right analog stick up |
| Aim right | aim_right | Right analog stick right |
| Aim down | aim_down | Right analog stick down |
| Aim left | aim_left | Right analog stick left |
| - | - | LB / L1 |
| Weapon Switch | weapon_switch | LT / L2 |
| Inventory | ui_inventory | View /Select |
| Attack | attack | X / Square |
| Roll | roll | A / Cross |
| - | - | B / Circle |
| Interact | interact | Y / Triangle |
| Menu | ui_menu | Menu / Start |
| - | - | RB / R1 |
| Shoot | shoot | RT / R2 |
| Use Item | use_item | D-Pad Up |
| - | - | D-Pad Down |
| Cycle Item Previous | cycle_item_previous | D-Pad Left |
| Cycle Item Next | cycle_item_next | D-Pad Right |
| - | LS / L3 | |
| Map | ui_map | RS / R3 |
GUI Controls
| Function | Action | Controller |
|---|---|---|
| Move up | ui_up | Left analog stick up |
| Move right | ui_right | Left analog stick right |
| Move down | ui_down | Left analog stick down |
| Move left | ui_left | Left analog stick left |
| Cycle Tab Previous | ui_cycle_tab_previous | LB / L1 |
| Cycle Tab Next | ui_cycle_tab_next | RB / R1 |
| - | - | LT / L2 |
| Inventory | ui_inventory | View /Select |
| Use Item | ui_use_item | X / Square |
| Confirm | ui_confirm | A / Cross |
| Cancel | ui_cancel | B / Circle |
| Discard | ui_discard | Y / Triangle |
| Menu | ui_menu | Menu / Start |
| Transfer | ui_transfer | RT / R2 |
| - | - | D-Pad Up |
| - | - | D-Pad Down |
| - | - | D-Pad Left |
| - | - | D-Pad Right |
| - | - | LS / L3 |
| - | - | RS / R3 |
Keyboard
Gameplay
| Function | Action | Keyboard | Mouse |
|---|---|---|---|
| Move up | move_up | W | |
| Move right | move_right | D | |
| Move down | move_down | S | |
| Move left | move_left | A | |
| Aim up | aim_up | Mouse Move | |
| Aim right | aim_right | Mouse Move | |
| Aim down | aim_down | Mouse Move | |
| Aim left | aim_left | Mouse Move | |
| Aim Mode | aim_mode | Right Click | |
| Use Item | use_item | Q | |
| Menu | ui_menu | Esc | |
| Inventory | ui_inventory | Tab | |
| Attack | attack | Left Click | |
| Interact | interact | E | |
| Roll | roll | Shift | |
| Shoot | shoot | Left click | |
| - | - | Space | |
| Cycle Weapon Previous | cycle_weapon_previous | Scroll up | |
| Cycle Weapon Next | cycle_weapon_next | Scroll down | |
| Cycle Item Previous | cycle_item_previous | R | |
| Cycle Item Next | cycle_item_next | F | |
| Map | ui_map | M |
GUI Controls
| Function | Action | Keyboard | Mouse |
|---|---|---|---|
| Move up | ui_up | UP / W | |
| Move right | ui_right | RIGHT / D | |
| Move down | ui_down | DOWN / S | |
| Move left | ui_left | LEFT / A | |
| Select using hover | ui_move_cursor | Move mouse | |
| Cycle Tab Previous | ui_cycle_tab_previous | Q | |
| Cycle Tab Next | ui_cycle_tab_next | E | |
| Menu | ui_menu | Esc | |
| Use Item | ui_use_item | Left click | |
| Confirm | ui_confirm | Enter / Space | |
| Cancel | ui_cancel | Right click | |
| Discard | ui_discard | I | |
| Inventory | ui_inventory | Tab | |
| Transfer | ui_transfer | O | |
| - | - | . | |
| - | - | , | |
| - | - | X | |
| - | - | Z | |
| Map | ui_map | M | |
| - | - | Shift |
Research / Articles / Sources / Links
- Dark Souls 3 - Controls
- Alien Isolation - Controls
- Hyper Light Drifter - Controls
- The Binding of Isaac - Rebirth - Controls
- Hollow Knight - Controls
- Hades - Controls
GDD - Enemies
| Section | Description |
|---|---|
| Overview | This Game Design Document (GDD) aims to provide a comprehensive blueprint of the enemies in game that are key to bringing the game to life and providing a challenge out in the wild to the player as she traverses the levels. All enemies that are a threat will be land based and mainly animals/creatures, but there are also human based enemies. |
| Status | Draft |
| Version | 1.0 |
Creatures
These are animal-based enemies that are scattered throughout the levels and world.
Ant
TODO
Movement Pattern
TODO
Why will it be fun?
TODO
BeeSwarm
| Section | Description |
|---|---|
| Name | Bee Swarm |
| ----------------------- | ------------- |
| Description | A buzzing swarm of bees that hovers in place or moves slowly, launching individual bees at the player. |
| Type | Ranged |
| ----------------------- | ------------- |
| Gameplay Role | A ranged enemy designed to pressure the player from a distance, forcing them to dodge incoming bee attacks or making them a priority. This enemy adds difficulty to combat by constantly harassing the player, especially when paired with other melee enemies. |
| Areas Present | Forests, Moorlands, TBA |
| ----------------------- | ------------- |
| Attack Description | Shoots bees at the player. |
| ----------------------- | ------------- |
| Movement | The swarm moves slowly across the screen, hovering slightly above the ground. It periodically shifts locations to reposition itself, but remains stationary when attacking. |
| Behavior | The Swarm of Bees maintains distance from the player, continuously launching bees at a set interval. It may relocate if the player gets too close or far away. |
| ----------------------- | ------------- |
| Control/Inputs | Players must dodge the incoming bees. Attacking from a distance with ranged weapons is an effective strategy. |
| ----------------------- | ------------- |
| Art & Animation | Describes the enemy's visuals and animations: |
| Idle | The swarm hovers in place, patrolling back and forth. If we can make them hover near shrubs, it would make a lot of sense because honeybees collect nectar. |
| Attack Animation | The swarm briefly gathers energy, then shoots a bee toward the player. |
| Damage Feedback | When hit, bees scatter briefly before reforming into original formation. |
| ----------------------- | ------------- |
| Telegraph & VFX Requirements | How the enemy telegraphs its attacks and the corresponding visual effects: |
| Attack Telegraph | Before launching a bee, the queen bee moves its head back, indicating it is about to attack. |
| VFX Requirements | TBA. |
| ----------------------- | ------------- |
| Technical Specs | The technical foundations of the enemy, including stats and balancing: |
| Health | 20 HP (subject to playtesting). |
| Damage | 10 HP (subject to playtesting). |
| Speed | Slow hovering movement. Bees shoot quickly toward the player. |
| Range | 150pixels (subject to playtesting). |
| Attack Interval | The swarm launches a bee every 2 seconds (subject to playtesting). |
| Knockback | Moderate, subject to playtesting. |
| Player Knockback | Moderate. |
| ----------------------- | ------------- |
| Audio Specs | Description of the enemy's sound effects: |
| Idle | A low buzzing sound that intensifies when the swarm prepares to attack during telegraphj. |
| Attack | A sharp buzzing sound and a swoosh as each bee is launched, followed by a faint whirring sound as the bee homes in on the player. |
| ----------------------- | ------------- |
| VFX | Description of visual effects during the enemy’s actions: |
| Idle | Small bees flying around within the swarm, creating a faint glow or dust particles around the swarm. |
| Attack | A streaking effect as the bee flies toward the player. When a bee hits the player, there’s a small burst of energy or sparks to signify impact. |
| ----------------------- | ------------- |
| Special Case | Tentative but 3 bees get launched in rapid succession at player after the bee swarm HP is gone |
| Fail Cases | TBA |
| ----------------------- | ------------- |
| Combat Strategy | The enemy's general strategy in combat: |
| Preferred Engagement Tactics | Attacks from a range and tries to stay out of reach of the player’s melee attacks. |
| Optimal Player Strategies | Closing in and attacking with a spear or AoE abilities is most effective. |
| Environmental Interactions | If pseudo-3D level design is implemented, the swarm should be able to climb walls seamlessly. |
| ----------------------- | ------------- |
| Synergies | Pairs well with melee enemies, forcing the player to dodge bee attacks while dealing with close-range threats. Also effective in tight spaces where dodging bees becomes more difficult. |
| ----------------------- | ------------- |
| Enemy Progression | Variations or stronger versions of the enemy encountered later in the game: |
| Variation 1 | TBA |
Why will it be fun?
Bees being long ranged attackers makes them perfect for challenging players dealing with multiple melee enemies. Players will have to prioritize
Boar
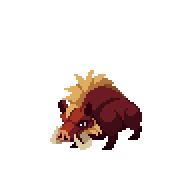
A boar will not be a threat until you are too close to it.
Movement Pattern
A boar will be in a patrol state until it sees the player. Even after seeing the player, the boar might back off a little until the player gets too close.
Why will it be fun?
A boar is an aggressive enemy for players and will charge beyond the player and smack into hard obstacles.
Ibex
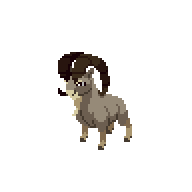
TODO
Movement Pattern
TODO
Why will it be fun?
TODO
Rabbit
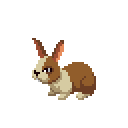
| Section | Description |
|---|---|
| Name | Rabbit |
| ---------------------------- | ------------- |
| Description | A quick and aggressive enemy that charges towards the player, attempting to lunge and cause damage. |
| Type | Melee |
| ---------------------------- | ------------- |
| Gameplay Role | The rabbit serves as a close-range threat, constantly lunging at the player and repositioning itself to attack again. It adds pressure in combat and is especially challenging in groups. |
| Areas Present | Forests Moorlands, TBA |
| ---------------------------- | ------------- |
| Attack Description | Lunges at the player from a short distance, waits for a second, and starts building up next attack. |
| ---------------------------- | ------------- |
| Movement | The rabbit moves quickly across the screen, targeting the player and charging in the direction of the player. |
| Behavior | The rabbit aggressively targets the player, aiming to get in close for its lunge attack. If attacked, it gets stunned or knocked back, forcing it to recover before attacking again. |
| ---------------------------- | ------------- |
| Control/Inputs | Players must dodge the lunging attack or interrupt the rabbit mid-charge with a well-timed attack. Getting too close or ignoring the rabbit leaves the player vulnerable to repeated lunges. |
| ---------------------------- | ------------- |
| Art & Animation | Describes the enemy's visuals and animations: |
| Idle | The rabbit hops slightly in place in linear paths unless player is detected |
| Attack Animation | The rabbit crouches momentarily before lunging at the player. |
| Damage Feedback | When hit, the rabbit gets knocked back, momentarily dazed. |
| ---------------------------- | ------------- |
| Telegraph & VFX Requirements | How the enemy telegraphs its attacks and the corresponding visual effects: |
| Attack Telegraph | Before lunging, the rabbit briefly crouches and shifts its weight backward, preparing to spring forward. |
| VFX Requirements | Small dust clouds for when the the rabbit lunges. |
| ---------------------------- | ------------- |
| Technical Specs | The technical foundations of the enemy, including stats and balancing: |
| Health | 10 (subject to playtesting). |
| Damage | 5 (subject to playtesting). |
| Speed | Fast movement. |
| Range | Short range lunging attack. |
| Attack Interval | Attacks every 3 seconds (subject to playtesting). |
| Knockback | High. |
| Player Knockback | None. |
| ---------------------------- | ------------- |
| Audio Specs | Description of the enemy's sound effects: |
| Idle | The sound of light footsteps or soft, rhythmic breathing. |
| Attack | A quick rustling sound as the rabbit charges, followed by a light thud when it hits the player. |
| ---------------------------- | ------------- |
| VFX | Description of visual effects during the enemy’s actions: |
| Idle | Slight dust particles around the rabbit’s feet as it hops in place. |
| Attack | A brief trail effect to signify the lunge’s speed. |
| ---------------------------- | ------------- |
| Special Case | None |
| Fail Cases | None |
| ---------------------------- | ------------- |
| Combat Strategy | The enemy's general strategy in combat: |
| Preferred Engagement Tactics | Charges at the player from close range, attempting to lunge and then retreat to avoid being struck. |
| Optimal Player Strategies | Best handled with a spear. Time the attacks to interrupt its charge or attack after it has lunged. |
| Environmental Interactions | N/A |
| ---------------------------- | ------------- |
| Synergies | Pairs well with ranged enemies that can distract the player, allowing the rabbit to get in close for quick attacks. Also effective in environments with limited movement space. |
| ---------------------------- | ------------- |
| Enemy Progression | Rattle Snake in Canyons with Higher Poison Effectiveness (T) |
| Variation 1 | TBA |
Why will it be fun?
A rabbit is a cannon fodder enemy that will work pretty well in a crowd where it will be JUST ENOUGH to cause issues for the player.
Snake
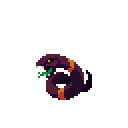
A snake should feel threatening - its hisses should be heard as soon as you enter the vicinity and they should be able to sense you nearby regardless of sight since snakes have thermal vision or biochemical vision in nature.
| Section | Description |
|---|---|
| Name | Snake |
| ---------------------------- | ------------- |
| Description | A slithering predator that strikes at the player with quick, venomous lunges. Can blend in the environment sometimes The precise timing to ambush its target. |
| Type | Melee |
| ---------------------------- | ------------- |
| Gameplay Role | The snake strikes with quick lunges that inflict damage and TENTATIVELY status effects. |
| Areas Present | Forests, Moorlands, TBA |
| ---------------------------- | ------------- |
| Attack Description | Strikes at the player from a short distance, dealing damage and potentially applying a debuff. |
| ---------------------------- | ------------- |
| Movement | The snake moves across the ground in rapid short bursts in a winding pattern to mess up with the rhythm of the player. When idle, it coils in place, blending into its surroundings. |
| Behavior | The snake maintains a low profile and waits for the player to get close. When the player enters its range, it lunges forward quickly to strike. If the player moves away, the snake may try to reposition itself for another attack. |
| ---------------------------- | ------------- |
| Control/Inputs | Players must watch their surroundings for the snake’s camouflaged position and dodge or parry its strike. Players should approach cautiously and be ready to react to sudden attacks. |
| ---------------------------- | ------------- |
| Art & Animation | Describes the enemy's visuals and animations: |
| Idle | The snake coils in place, swaying slightly and blending in with the environment. Occasionally flicks its tongue. |
| Attack Animation | The snake briefly rears its head back before snapping forward in a quick lunge. |
| Damage Feedback | When hit, the snake briefly flattens to the ground before recoiling back into its attack stance. |
| ---------------------------- | ------------- |
| Telegraph & VFX Requirements | How the enemy telegraphs its attacks and the corresponding visual effects: |
| Attack Telegraph | The snake coils tightly and raises its head before lunging forward. |
| VFX Requirements | TBA. |
| ---------------------------- | ------------- |
| Technical Specs | The technical foundations of the enemy, including stats and balancing: |
| Health | Low to Medium (subject to playtesting). |
| Damage | Medium (subject to playtesting). |
| Speed | Slow slithering movement, but fast lunging attack. |
| Range | Short range lunging attack. |
| Attack Interval | The snake attacks every 2.5 seconds (subject to playtesting). |
| Knockback | Low to moderate, subject to playtesting. |
| Player Knockback | None. |
| ---------------------------- | ------------- |
| Audio Specs | Description of the enemy's sound effects: |
| Idle | A faint rustling or slithering sound, with occasional hissing. |
| Attack | A sharp hiss followed by a swift, snapping sound as the snake lunges. Rustling of grass as the snake slides through. |
| ---------------------------- | ------------- |
| VFX | Description of visual effects during the enemy’s actions: |
| Idle | Subtle grass movement around the snake’s coiled and moving position, with a small glint in its eyes when it's about to attack. |
| Attack | A quick blur effect as the snake lunges forward. A faint, dark vapor trail if poison or a debuff is inflicted (T). |
| ---------------------------- | ------------- |
| Special Case | TBA |
| Fail Cases | TBA |
| ---------------------------- | ------------- |
| Combat Strategy | The enemy's general strategy in combat: |
| Preferred Engagement Tactics | Prefers to wait in hiding and strike from a camouflaged position. If spotted, it may try to circle around the player before attacking again. |
| Optimal Player Strategies | Use ranged attacks or area-clearing abilities to expose or damage the snake from a safe distance. Pay attention to its coiling telegraph and prepare to dodge or counter its lunges. |
| Environmental Interactions | Can move through narrow spaces or climb over small obstacles to maintain pursuit. It can also remain hidden in tall grass or shadowed areas, adding an element of surprise. |
| ---------------------------- | ------------- |
| Synergies | Pairs well with other stealthy or environmental enemies, creating situations where players must watch their surroundings closely. Also effective in narrow areas where dodging is more challenging. |
| ---------------------------- | ------------- |
| Enemy Progression | Rattle Snake in Canyons with Higher Poison Effectiveness (T) |
| Variations | TBA |
Why will it be fun?
A snake is an uncomfortable enemy for players. It is a cannon fodder enemy in terms of HP and defense stats but can cause some serious damage with its poisoning if combined with other enemies.
Bat
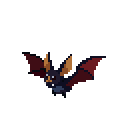
TODO
Movement Pattern
TODO
Why will it be fun?
TODO
Bird
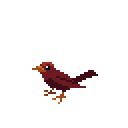
TODO
Movement Pattern
TODO
Why will it be fun?
TODO
Deer
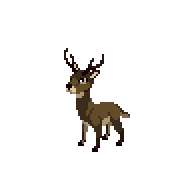
TODO
Movement Pattern
TODO
Why will it be fun?
TODO
Mammoth
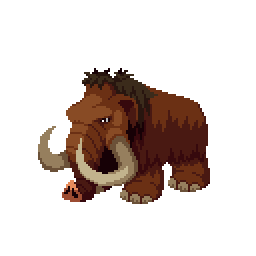
TODO
Movement Pattern
TODO
Why will it be fun?
TODO
Rhino
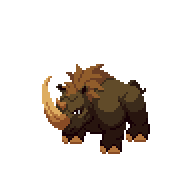
TODO
Movement Pattern
TODO
Why will it be fun?
TODO
Spider
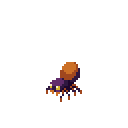
TODO
Movement Pattern
TODO
Why will it be fun?
TODO
Bear

TODO
Movement Pattern
TODO
Why will it be fun?
TODO
Bison
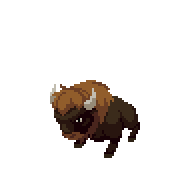
TODO
Movement Pattern
TODO
Why will it be fun?
TODO
Hornet
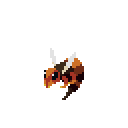
TODO
Movement Pattern
TODO
Why will it be fun?
TODO
Mosquito
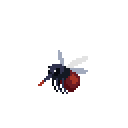
TODO
Movement Pattern
TODO
Why will it be fun?
TODO
Smilodon
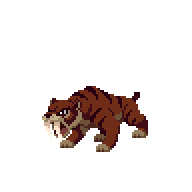
TODO
Movement Pattern
TODO
Why will it be fun?
TODO
Wolf
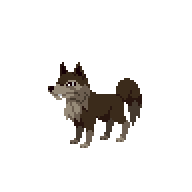
TODO
Movement Pattern
TODO
Why will it be fun?
TODO
Humans
To be discussed.
GDD - Locations
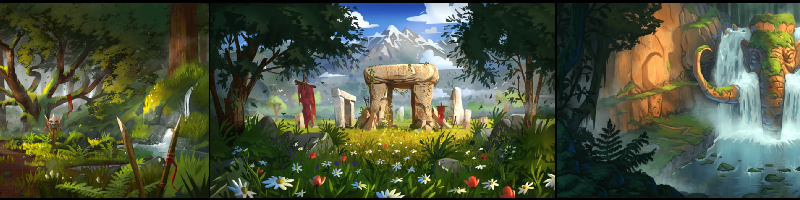
| Section | Description |
|---|---|
| Overview | This Game Design Document (GDD) aims to provide a comprehensive blueprint of the Locations in the game Tribe of the Accord and their associated tile-sets and props. |
| Status | Draft |
| Version | 1.0 |
Overview
GDD - Locations - Props
Props are used to decorate each location.
Props Overview
- Animal Bones
- Block
- Bush
- Cactus
- Cave
- Chest
- Hedge
- Hedge Prickly
- Hearth
- Hideout
- Hut
- Leaf Carpet
- Log
- Post Blockade
- Pond
- Pot
- Rock
- Signpost
- Spike Trap
- Stalagmite
- Statue
- Storage Container
- Stream
- Tent
- Tree
- Tumbleweed
- Waterfall
- Sign Post
- Workbench
1. Animal Bones

Description
The animal bones are used as decorative elements to enhance the game environment.
Locations used:
- Caves
- Canyons
2. Block

Description
The block is used for creating obstacles and structures in various areas.
Locations used:
- Caves
3. Bush

Description
The bush is used as a decorative element in various areas.
Locations used:
- Forest
- Meadows
4. Cactus

This asset has not yet been created, and this image is an AI placeholder
Description
The cactus is used as a natural obstacle and decoration in desert areas. It causes attack damage to the Player upon touching it.
Locations used:
- Canyons
5. Cave
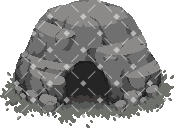
Description
The cave is used as an entrance to an underground caves location. They can act as pathways between two locations as part of level design.
Locations used:
- Forest
- Moorlands
6. Chest

Description
The chest is used for storing valuable items. It can be opened by the player to reveal the item stored.
Locations used:
- All locations
7. Hedge

Description
The hedge is used as a natural obstacle and decoration in various areas.
Locations used:
- Forest
- Meadows
8. Hedge Prickly

Description
The hedge prickly is used as a natural obstacle and decoration in various areas. It causes attack damage to the Player upon touching it.
Locations used:
- Forest
- Meadows
9. Hearth

Description
The hearth is used as a central fire pit for cooking and warmth.
Locations used:
- Campsite
10. Hideout

This asset has not yet been created, and this image is an AI placeholder
Description
The hideout is used for Adira to sleep, similar to a Tent
Locations used:
- Forest
11. Hut

This asset has not yet been created, and this image is an AI placeholder
Description
The hut is used as a traditional dwelling.
Locations used:
- Campsite
12. Leaf Carpet
Description
The leaf carpet is a temporary placement of loose leaves that disperse once the Player walks on them.
Locations used:
- Forest
- Moorlands
- Meadows
13. Log

Description
The log is used as a natural obstacle and decoration in various areas.
Locations used:
- Forest
14. Post Blockade

Description
The pillar is used as a structural element in various areas.
Locations used:
- Moorlands
- Forest
- Meadows
15. Pond
Description
The pond is used to add water bodies within various areas.
Locations used:
- Caves
- Forest
- Meadows
16. Pot

Description
The pot is used for cooking and boiling water.
Locations used:
- Campsite
17. Rock

Description
The rock is used to create natural obstacles and decorations.
Locations used:
- Caves
- Forest
- Meadows
- Moorlands
18. Signpost

Description
The signpost is used to provide directions and information to the player.
Locations used:
- Campsite
- Caves
- Forest
19. Spike Trap
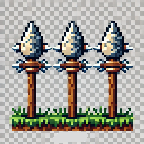
This asset has not yet been created, and this image is an AI placeholder
Description
The spike trap is used as a dangerous obstacle to catch or harm players.
Locations used:
- Caves
- Dark Forest
20. Stalagmite

Description
The stalagmite is used as a natural cave formation.
Locations used:
- Caves
21. Statue
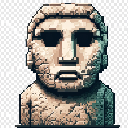
This asset has not yet been created, and this image is an AI placeholder
Description
The statue is used as a decorative element/landmark in various areas and can vary in type.
Locations used:
- Caves
- Shadow Forest
22. Storage Container

Description
The storage container is used for storing various items. The Player can interact to get items out of it or place items inside.
Locations used:
- Campsite
23. Stream

This asset has not yet been created, and this image is an AI placeholder
Description
The stream is used to add flowing water bodies within various areas.
Locations used:
- Valleys
24. Tent

Description
The Tent is used for Adira to sleep, where she can enter to end the day.
Locations used:
- Moorlands
- Forest
- Falls Village
25. Tree
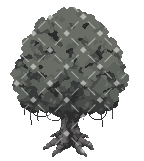
Description
The tree is used as a major decorative element in various areas and is animated. It makes a whooshing sound when the Player gets close to it.
Locations used:
- Forest
- Meadows
- Dark Forest
26. Tumbleweed

This asset has not yet been created, and this image is an AI placeholder
Description
The tumbleweed is used as a natural obstacle and decoration in desert areas. It can be moved around when touched but does not do anything.
Locations used:
- Canyons
27. Waterfall
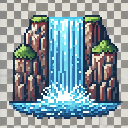
This asset has not yet been created, and this image is an AI placeholder
Description
The waterfall is used as a decoration, it makes a crashing water sound when the player gets close to it.
Locations used:
- Valleys
- Falls Village
28. Sign Post
Description
The sign post is dug into the ground and varies based on the icon:
- Info - Gives the player a random or forced 'Tip', which brings up a tip screen.
- Tent - Go home (fast track or completion of level if reached a dead end)
- Hunt - Trigger for starting a new chapter or choosing a weapon (TBD)
Locations used:
- Moorlands
- Forest
- Meadows
- Caves
- Canyons
- Valleys
29. Workbench

Description
The workbench is used to craft items and weapons. The Player can interact with the workbench to bring up the UI menu to craft items.
Locations used:
- Moorlands
- Forest
- Meadows
- Caves
- Canyons
- Valleys
GDD - Locations - Tilesets
Tilesets are used for the repeatable environment. This is the order of layers to form a location.
1. Flooring
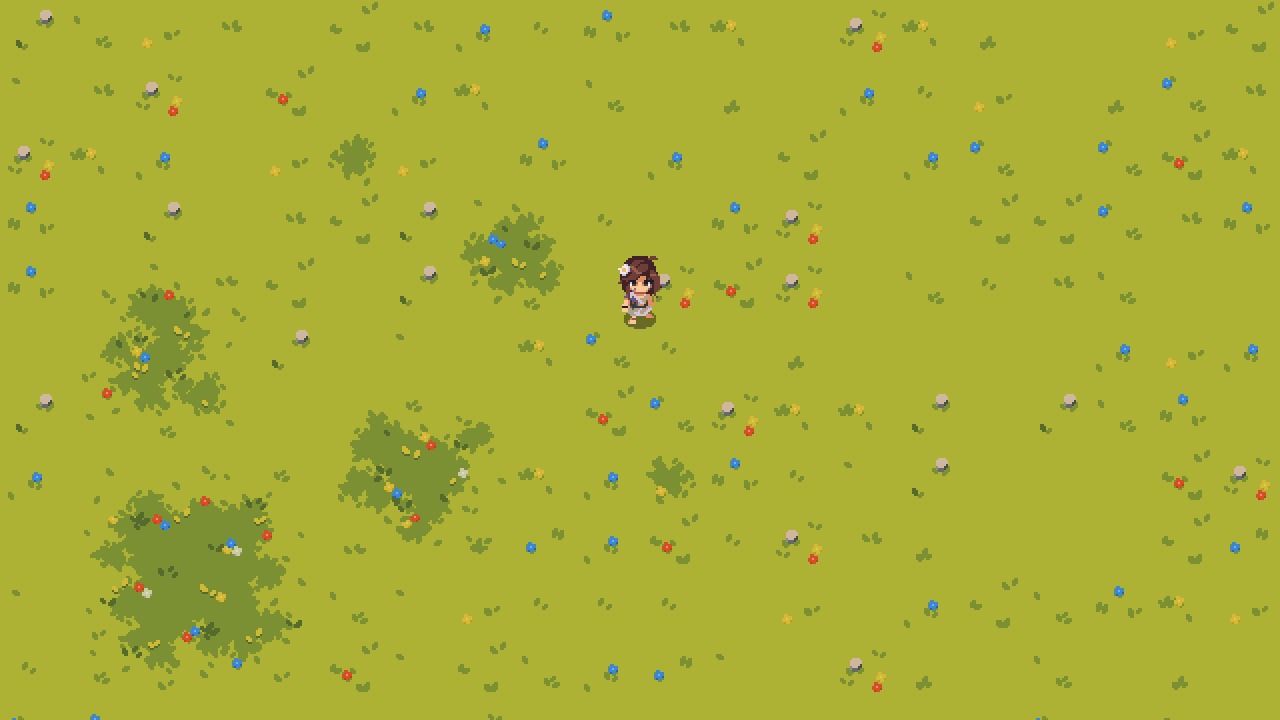
Flooring is the bottom layer of a room painted using a collection of tiles per location.
Examples:
- Grass
- Sand
- Hard Ground
- Snow
2. Pits
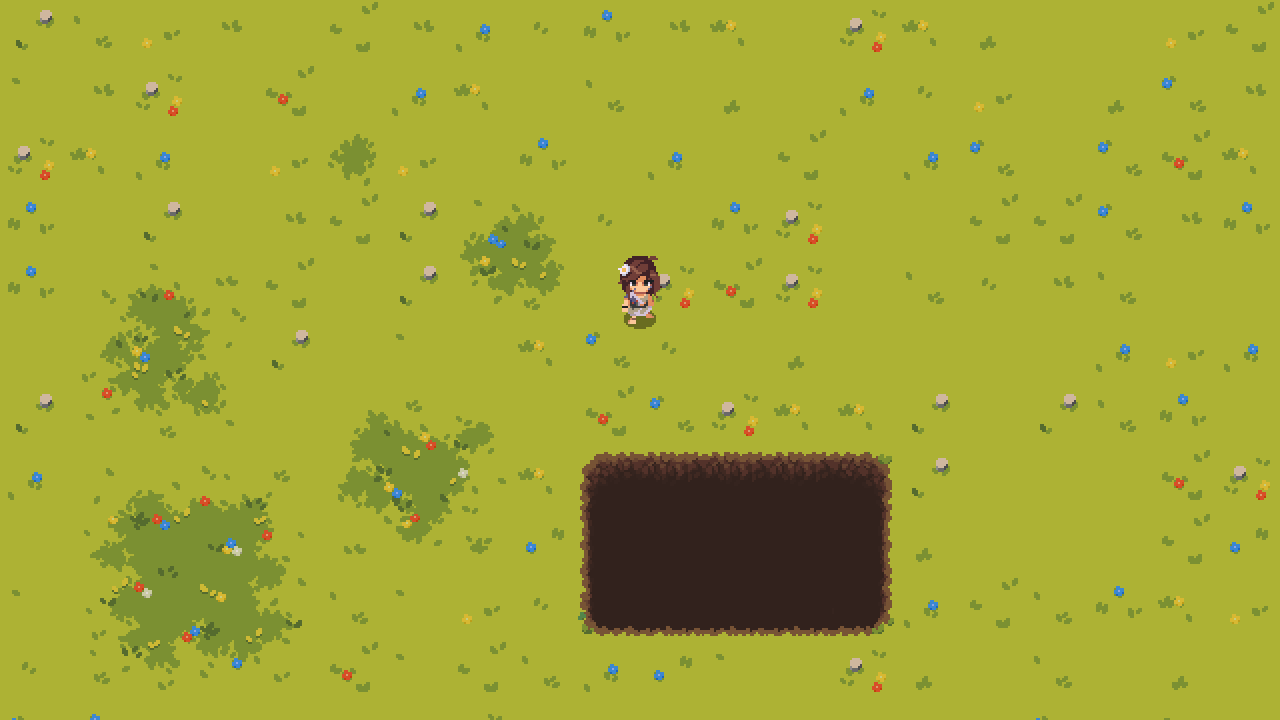
Pits are the second layer of a room painted using a collection of tiles per location. If the Player moves into a pit, they fall down, so the requirement is to avoid.
3. Platforms
Platforms are the third layer of a room painted using a collection of tiles per location. Platforms are raised from the floor and the Player can go up and down to these platforms via accessible steps.
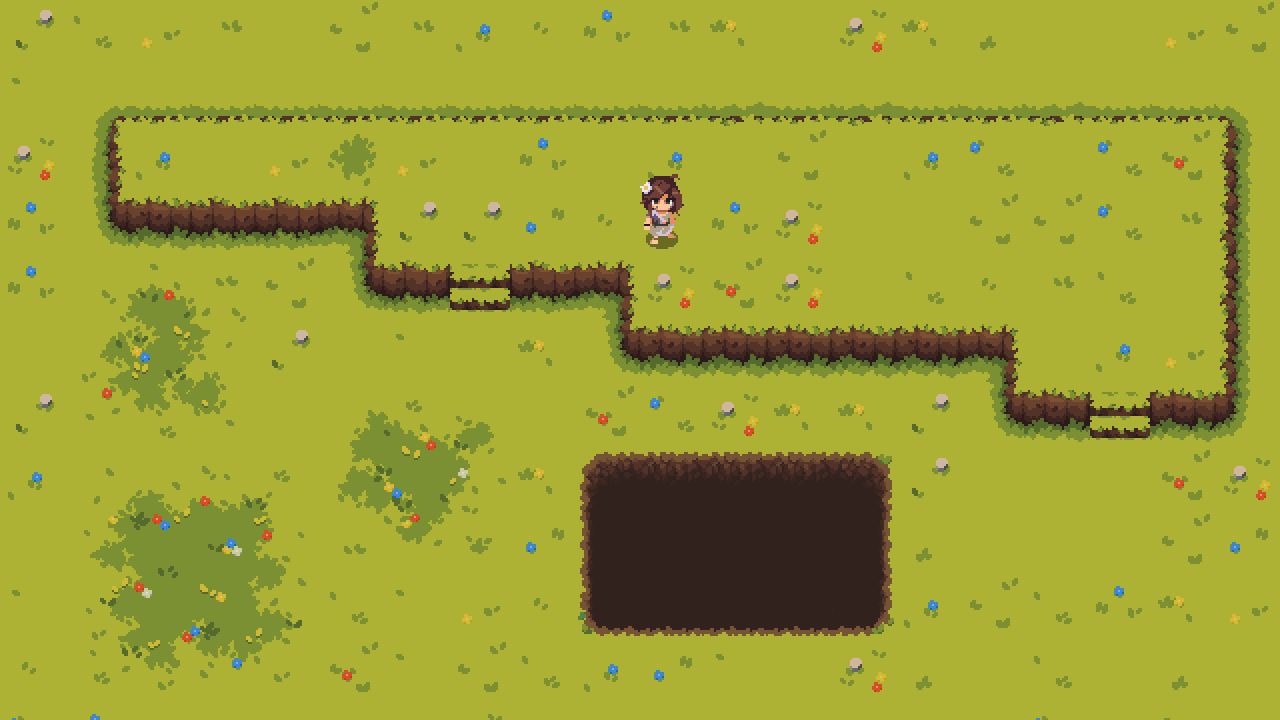
4. Borders
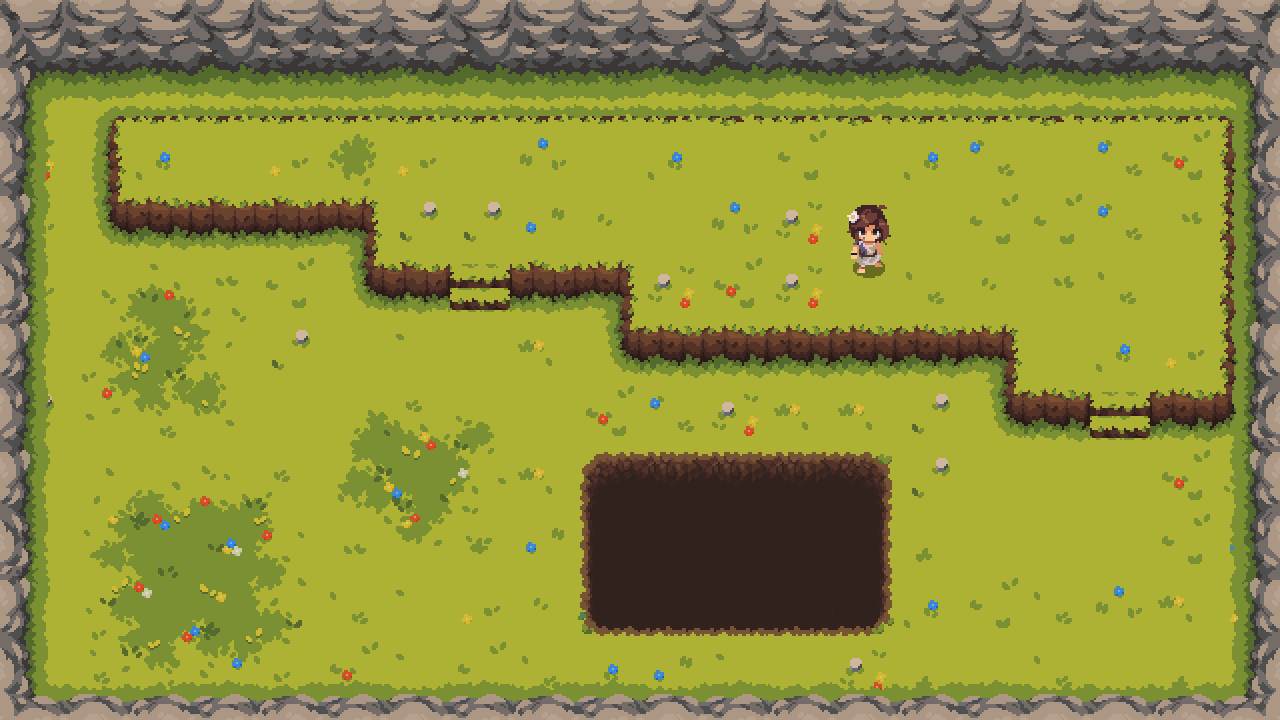
Borders are the fourth layer of a room painted using a collection of tiles per location. Borders are used to block the outer perimeter of a room and keep the player in the boundaries/confines of the world.
Examples:
- Rocks
- Boulders
- Pebbles
- Underbrush
GDD - Locations - Types
Tribe of the Accord supports 8 location types as part of the full game, with subset locations (Such as Ringpeak Camp) that use an existing location theme. Having different themed locations is important for enhancing the player's experience and engagement. Diverse environments provide a sense of exploration and discovery, keeping the gameplay fresh and exciting as players progress through various landscapes. This diversity allows for more creative level design and can help in building a more immersive and believable game world.
Location Overview
Format: LocationNameInGame (SimplifiedName)
- (1) Bouldermoor (Moorlands)
- (1.1) Ringpeak Camp (Campsite)
- (2) Wisty Woodlands (Forest)
- (2.1) Adira's Hideout (Hideout)
- (3) Meadowhenge (Meadows)
- (4) Stonecradle Caves (Caves)
- (5) Ribble Valleys (Valleys)
- (5.1) Falls Tribe Village (Village)
- (6) Cavebear Canyons (Canyons)
- (7) Shadow Forest (DarkForest)
- (8) Ibex Mountains (Mountains)
1. Bouldermoor
Bouldermoor is a location characterized by rolling hills covered in heather and moss, with patches of wetland and scattered rocks.

1.0.1 - Theme
- Rolling hills
- Heather and moss
- Wetlands
- Scattered rocks
1.0.2 - Tile-sets
- Heather-covered ground
- Moss patches
- Wetland areas
- Rocky terrain
1.0.3 - Props
- Primitive stone huts with thatched roofs
- Campfires with stone-age tools and weapons
- Animal tracks in the soft earth
- Sparse, leafless trees
1.1. Ringpeak Camp
The Ringpeak Camp is a location used for A, B, C. It is designed to be D, E, F.
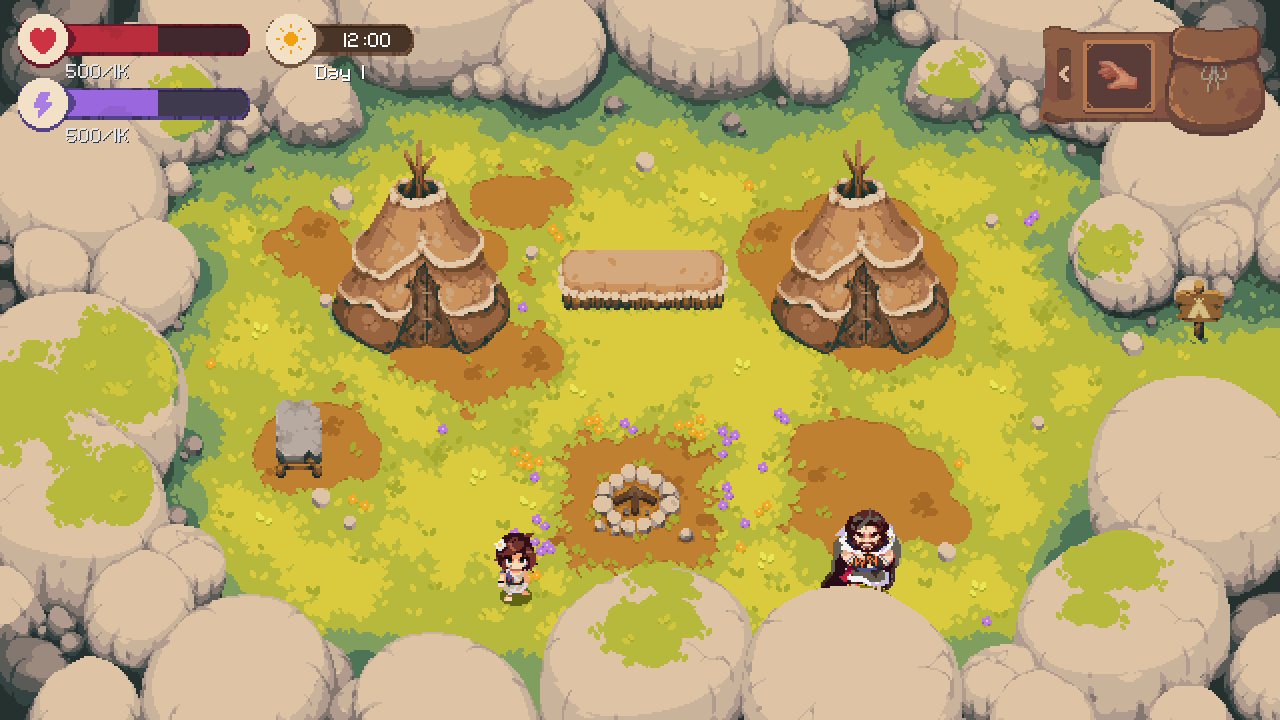
1.1.1 - Theme
- Same as Moorlands
1.1.2 - Tile-sets
- Same as Moorlands
1.1.3 - Props
- Coned Tents
- Storage Container
- Workbench
- Hearth
- SignPost Home
2. Wisty Woodlands
Wisty Woodlands is a dense forest filled with oak trees, mossy rocks, hedges, and bushes.
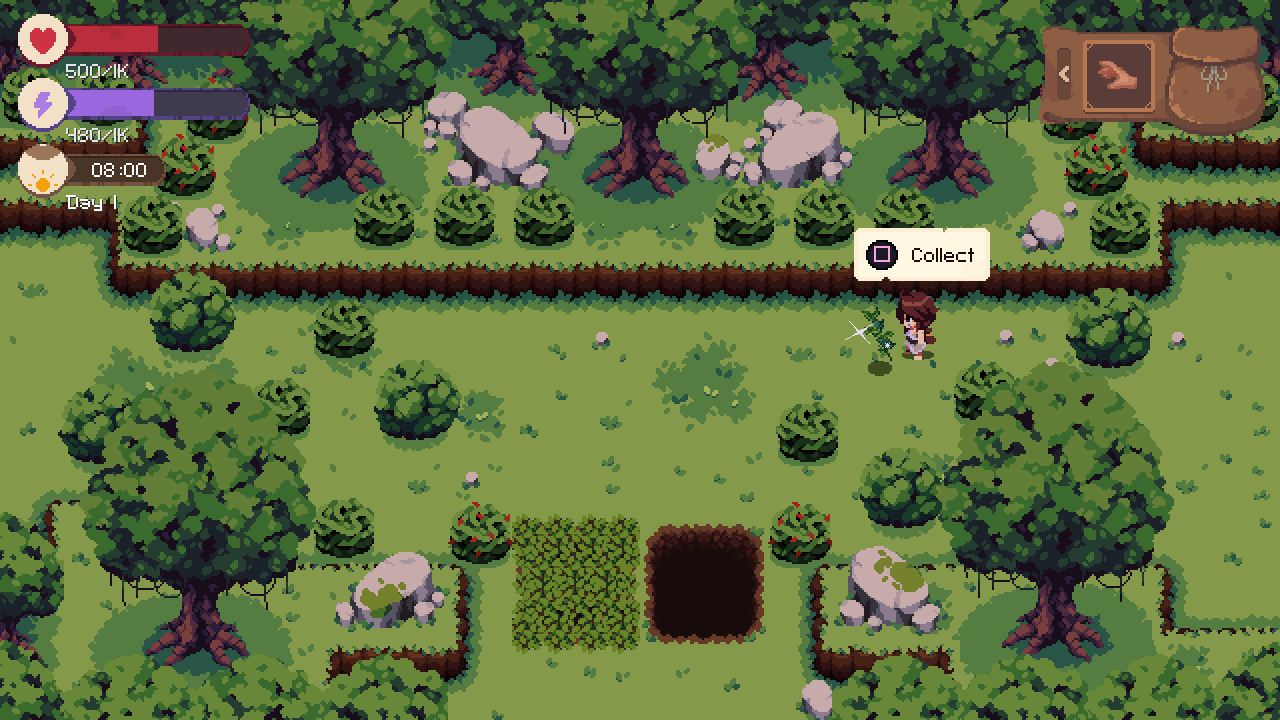
2.0.1 - Theme
- Dense forest
- Oak trees
- Mossy rocks
- Thick underbrush
2.0.2 - Tile-sets
- Forest floor with fallen leaves
- Mossy patches
- Dirt paths
- Tree bases
2.0.3 - Props
- Primitive wooden huts
- Fallen logs
- Thick vines hanging from trees
- Various forest plants and fungi
2.1. Adira's Hideout
Adira's Hideout is a secluded area within the Wisty Woodlands, perfect for serenity and gathering one's thoughts during difficult times.

2.1.1 - Theme
- Secluded
- Hidden treasures
- Secretive
2.1.2 - Tile-sets
- Dense underbrush
- Hidden paths
- Camouflaged ground
2.1.3 - Props
- Secret caches
- Concealed entrances
- Camouflage materials
- Traps and pitfalls
3. Meadowhenge
Meadowhenge is a serene meadow with rolling hills, wildflower meadows, and gentle streams.
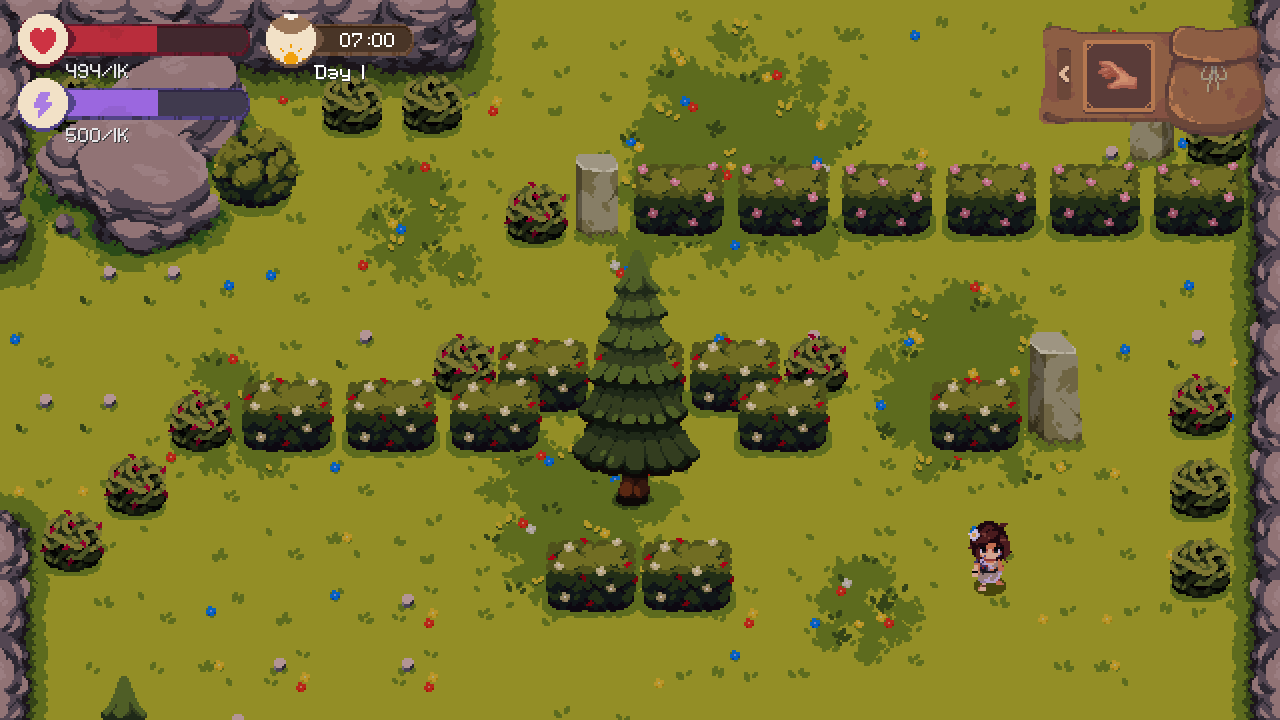
3.0.1 - Theme
- Lush meadows
- Wildflowers
- Rolling hills
- Streams
3.0.2 - Tile-sets
- Grass-covered ground
- Flower patches
- Stream beds
- Meadow terrain
3.0.3 - Props
- Wooden bridges
- Berry bushes
- Butterflies and insects
- Small ponds
4. Stonecradle Caves
Stonecradle Caves is a mysterious and ancient cave system with dark, winding tunnels and underground water bodies.
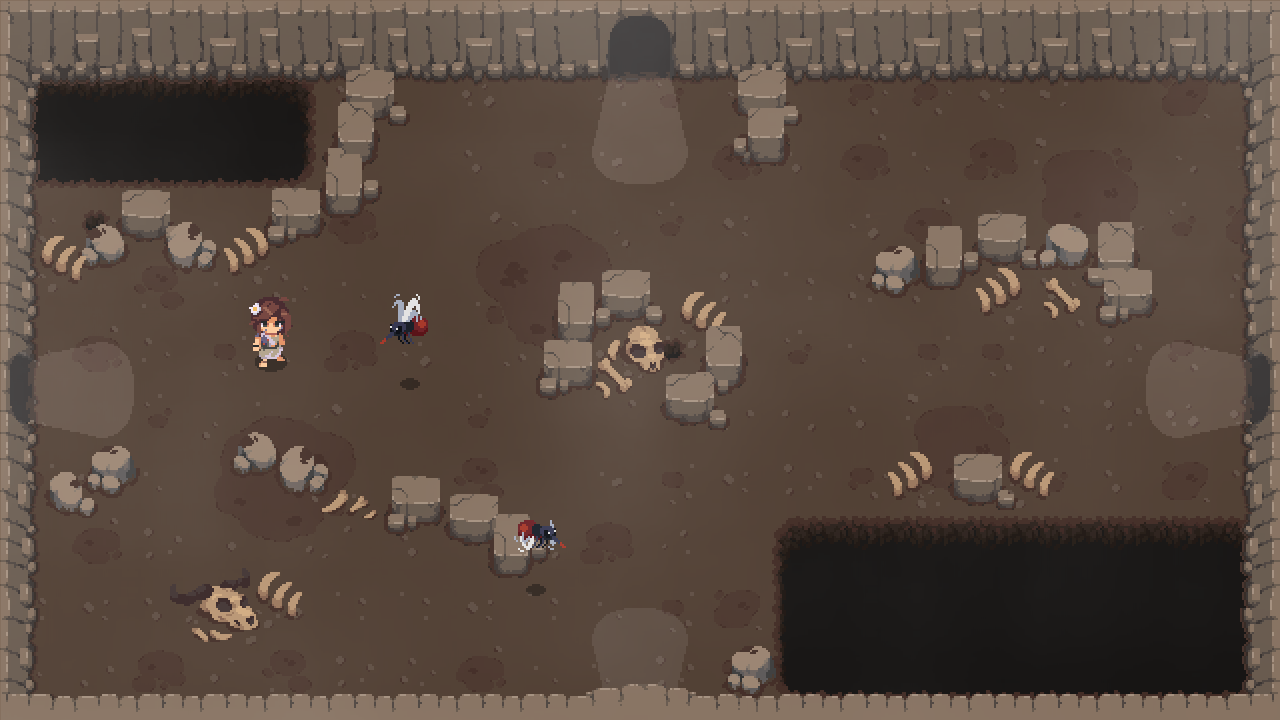
4.0.1 - Theme
- Dark caves
- Winding tunnels
- Underground lakes
- Stalagmites and stalactites
4.0.2 - Tile-sets
- Rocky cave floor
- Wet, mossy patches
- Underground water bodies
- Cave walls
4.0.3 - Props
- Stone-age carvings
- Primitive tools
- Hidden chambers
- Bioluminescent plants
5. Ribble Valleys
Ribble Valleys is a lush, serene landscape with rolling hills, wildflower meadows, and flowing streams.
5.0.1 - Theme
- Rolling hills
- Wildflower meadows
- Flowing streams
- Lush vegetation
5.0.2 - Tile-sets
- Green grass
- Wildflower patches
- Smooth river stones
- Dirt paths
5.0.3 - Props
- Small wooden huts
- Wooden benches
- Vegetable gardens
- Animal pens
5.1. Falls Tribe Village
Falls Tribe Village is a vibrant community set near waterfalls with lush greenery and wooden structures.
5.1.1 - Theme
- Waterfalls
- Lush greenery
- Community village
- Wooden structures
5.1.2 - Tile-sets
- Grass and dirt flooring
- Wooden walkways
- Water bodies
- Cliff edges
5.1.3 - Props
- Wooden huts
- Water wells
- Market stalls
- Community fire pits
6. Cavebear Canyons
Cavebear Canyons is a rugged, arid landscape characterized by towering sandstone cliffs and eroded rock formations.
6.0.1 - Theme
- Rugged canyons
- Sandstone cliffs
- Eroded rocks
- Sandy desert
6.0.2 - Tile-sets
- Desert flooring
- Sandstone cliffs
- Rocky outcrops
- Cracked earth
6.0.3 - Props
- Cacti
- Dry shrubs
- Tumbleweeds
- Ancient petroglyphs
7. Shadow Forest
Shadow Forest is a dark, mysterious woodland filled with gnarled, twisted trees and thick underbrush.
7.0.1 - Theme
- Dark woodland
- Twisted trees
- Thick underbrush
- Eerie fog patches
7.0.2 - Tile-sets
- Dark, damp soil
- Mossy ground
- Fallen leaves
- Tree bases
7.0.3 - Props
- Poisonous mushrooms
- Creepy stone statues
- Thick vines
- Large, dark boulders
8. Ibex Mountains
Ibex Mountains is a rugged, majestic terrain with towering pine trees, rocky cliffs, and snow patches.
8.0.1 - Theme
- Rugged terrain
- Pine trees
- Rocky cliffs
- Snow patches
8.0.2 - Tile-sets
- Rocky ground
- Snow-covered areas
- Pine tree bases
- Cliff edges
8.0.3 - Props
- Mountain huts
- Small mountain streams
- Alpine flowers
- Caverns or caves
GDD - Items
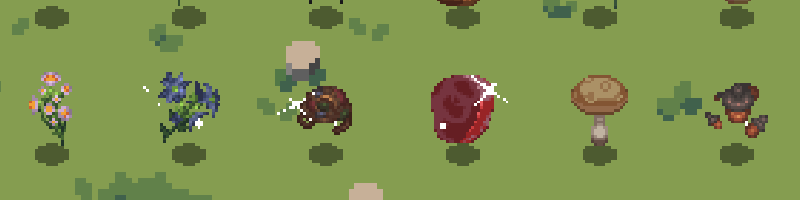
| Section | Description |
|---|---|
| Overview | This Game Design Document (GDD) provides a comprehensive blueprint of the items in the game Tribe of the Accord. |
| Status | Ready |
| Version | 2.0 |
Description
Items play an important role in the game. They can be collected by the player by walking over them and are spread throughout the map, usually found by cutting down bushes, opening chests, or defeating enemies.
What will the items be used for?
Items allow players to restore health and/or provide temporary buffs or debuffs.
This section is not yet finalized in the design phase, but items could be divided into four categories:
- Consumables - Items that can be cooked and/or consumed for health restoration or buffs/debuffs.
- Equippables - Items that can be equipped to provide various bonuses.
- Exchangeables - Items that can be exchanged as currency to obtain other items.
- Key Items - Permanent items related to abilities or the storyline.
Consumables
Consumables (which also function as cookables since they are food items) will be classified into four types: health restoration, stamina regeneration, attack power, and specials.
- Health Restoration - These food items will allow Adira to restore health.
- Stamina Regeneration - These food items will increase Adira's stamina regeneration.
- Attack Power - These food items will enhance Adira's attack power.
- Specials - These will apply special effects to any food consumed.
Meat
All meat items will provide some variation of health restoration.
| Name | Description | Effect - Raw | Effect - Cooked |
|---|---|---|---|
  | Small Meat: Meat from small animals like rabbits, snakes, or bats. | 5 HP Instant Increase | 15 HP Instant Increase |
  | Medium Meat: Meat from medium-sized animals like boars, wolves, or ibexes. | 10 HP Instant Increase | 30 HP Instant Increase |
  | Large Meat: Meat from large animals like rhinos or bison. | 20 HP Instant Increase | 60 HP Instant Increase |
Berries
All berries will provide some variation of stamina regeneration boost.
| Name | Description | Effect - Raw | Effect - Cooked |
|---|---|---|---|
 | Blackberries: Obtained from certain shrubs or exchanged at shops. | 1% faster stamina regeneration for 10 seconds | 3% faster stamina regeneration for 30 seconds |
 | Rosehipberries: Obtained from certain shrubs or exchanged at shops. | 3% faster stamina regeneration for 10 seconds | 9% faster stamina regeneration for 30 seconds |
 | Strawberries: Obtained from certain shrubs or exchanged at shops. | 5% faster stamina regeneration for 15 seconds | 15% faster stamina regeneration for 45 seconds |
Herbs
All herbs will provide some variation of attack power boost.
| Name | Description | Effect - Raw | Effect - Cooked |
|---|---|---|---|
 | Chicory: Found in herb clusters along cave walls or tree trunks. | 2% higher attack power for 10 seconds | 6% higher attack power for 30 seconds |
 | Nettles: Found in herb clusters along cave walls or tree trunks. | 4% higher attack power for 10 seconds | 12% higher attack power for 30 seconds |
 | Horseradishes: Found in herb clusters along cave walls or tree trunks. | 6% higher attack power for 15 seconds | 18% higher attack power for 45 seconds |
Specials (T)
Specials provide buffs, debuffs, or a combination of both for the above items.
| Name | Description | Effect - Raw | Effect - Cooked |
|---|---|---|---|
 | Ginger Root: Obtained from ginger plants. | +3% attack power, +3% faster stamina regeneration | +9% attack power, +9% faster stamina regeneration |
 | Pear: Obtained from pear plants. | +3% health increase, +3% faster stamina regeneration | +9% health increase, +9% faster stamina regeneration |
 | Hazelnut: Obtained from hazelnut plants. | +3% health increase, +3% faster stamina regeneration | +9% health increase, +9% faster stamina regeneration |
 | Grey Oyster Mushroom: Found in weedy mushroom growths. | +20 HP, +1 HP/sec regen for 10 seconds, -5% attack power | +60 HP, +1 HP/sec regen for 30 seconds, -15% attack power |
 | Field Mushroom: Found in marshy mushroom growths. | +12.5% stamina regeneration, -5% attack power | +37.5% stamina regeneration, -15% attack power |
 | Truffle Mushroom: Found in dark mushroom growths. | +12.5% attack power, -20 HP | +37.5% attack power, -80 HP |
Cooking System:
The cooking system is a combination of summing and multiplying the ingredients.
Assume [i] is a standard ingredient and [s] is a special ingredient:
Output = (Σ[i]) × (Σ[s])
GDD - Quests
Work in progress
GDD - Replayability
Work in progress
GDD - Music
Work in progress
GDD - SFX
Work in progress
GDD - UI/UX
Work in progress
GDD - VFX
Work in progress
GDD - Visuals
Work in progress
GDD - Weapons
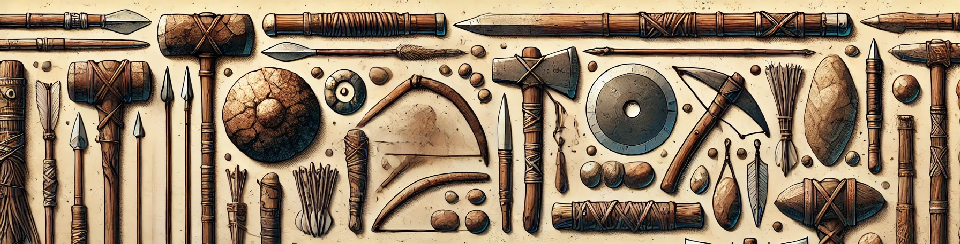
| Section | Description |
|---|---|
| Overview | This Game Design Document (GDD) aims to provide a comprehensive blueprint of all the supported weapons in the game Tribe of the Accord. |
| Status | Ready for Adoption |
| Version | 1.0 |
Description
Weapons will be unlocked and upgraded throughout the game via narrative scenarios.
Supported Weapons in Game
These are the weapons that get unlocked and upgraded through progression:
- Unarmed (Default)
- Spear
- Axe
Example Unlock and Upgrade
- Player unlocks the Spear at the beginning of the game 'Spear' in the first scene.
- Player can unlock new abilities related to that weapon, such as the option to 'Throw' spears.
Weapon attributes
These attributes are configured at the Weapon and Variant level.
- Weapon: Name of the Weapon
- Attack Speed: How quick to execute an attack
- Health Damage: How much health damage is dealt
- Poise Damage: How much poise damage is dealt that can result in stagger
- Range: The distance of the weapon's attack
- Block Efficiency: How good is the weapon at blocking and taking damage
- Stealth Multiplier: How multiplied damage can be dealt when sneaking up on a target
- Special: What type of special attack is available
1. Unarmed

- Player uses their hands and feet
- Very limited range
- Damage is very limited
- 3 consecutive attacks
- Right punch
- Left punch
- Roundhouse kick
- Cooldown period after series of attacks executed
1.1. Abilities/Upgrades
- N/A
2. Spear

- Player taps attack button, and it does a basic lunge attack.
- Alternatively, Player holds attack button and this charges a bar, then releases a spear lunge with both hands.
- Enemies positioned at full extension of the spear, results in more damage.
- Cooldown period after attack
2.1. Abilities/Upgrades
- Throw Spear
- Pole Vault
- Hookshot
2.1.1. Throw Spear
- Throwing weapon with 360 degree aiming capabilities
- Throw but then have to retrieve it scenarios:
- the player misses, and it sticks into the ground.
- the player hits an enemy, and it sticks into the enemy.
- the player hits a destructable item, it will break it.
- the player throws it and it falls down a pit, it appears back in inventory.
- the player throws it and lands in a unobtainable place, it appears back in inventory.
3. Axe

- One handed swing of an axe.
- 3 consecutive attacks
- Right swing
- Left swing
- Top down swing
- Cooldown period after series of attacks executed
3.1. Abilities/Upgrades
- Boomerang
- Heavy Attack 1
- Heavy Attack 1
Level Design
Level design is crucial for a top-down 2D action-adventure game as it directly influences gameplay, player engagement, and the overall experience. Here’s a summary of its importance:
-
Guiding Player Progression: Effective level design shapes how players navigate through the game world. It balances exploration with directed paths, ensuring players can progress while also discovering secrets and rewards.
-
Enhancing Gameplay Mechanics: The layout and structure of levels are designed to complement and challenge core gameplay mechanics, such as combat, puzzle-solving, and exploration. Well-designed levels create opportunities for players to utilize their skills in varied and engaging ways.
-
Creating Immersive Environments: Even in 2D, level design plays a key role in building immersive and cohesive game worlds. The visual and thematic consistency across levels, along with dynamic elements like lighting and interactive objects, helps to draw players into the game’s narrative and atmosphere.
-
Balancing Difficulty and Pacing: Proper level design ensures a smooth difficulty curve, introducing new challenges and enemies progressively. It also manages the pacing of the game, alternating between intense action sequences and quieter moments of exploration or story development to keep players engaged.
-
Encouraging Exploration and Replayability: Good level design encourages players to explore every corner of the map, rewarding curiosity with hidden areas, collectibles, or narrative pieces. This not only enhances the player’s experience but also adds replay value as players return to discover missed content.
-
Supporting Storytelling: In action-adventure games, the environment often tells a story. Level design integrates visual storytelling elements, such as environmental details, character placements, and scripted events, to convey the narrative without relying solely on dialogue or cutscenes.
Level Design Principles
Level design is the practice of planning and building spaces for video games
Flow & Navigation
Ensure that the player can move smoothly through levels without feeling lost. Use subtle visual cues like landmarks and lighting to guide the player.
Pacing
Balance combat, exploration, and puzzle-solving in a way that maintains player interest and challenge without overwhelming them.
Exploration & Secrets
Encourage exploration by including hidden areas, secret rooms, and unlockable shortcuts that reward the player for being curious.
Combat Zones
Design distinct areas where combat is likely to happen. Ensure there's enough space for movement and dodging, while obstacles or terrain can add complexity to combat.
Clear Objectives
Always make the player's goal clear, whether it’s defeating enemies, solving a puzzle, or finding an item. Use UI elements sparingly to avoid disrupting immersion.
Meaningful Backtracking
Allow players to revisit areas with new abilities or items, unlocking previously inaccessible zones. This adds depth to exploration.
Environmental Storytelling
Let the environment tell a story. Use level elements like ruins, clutter, and weather effects to hint at the world’s history and lore.
Visual Variety
Each area should have a unique look or theme (biomes/locations) to keep the player engaged. Different visuals also aid in navigation and memory.
Progressive Difficulty
Gradually introduce harder enemies, more complex puzzles, and trickier platforming. Each new area should build on the player's acquired skills.
Tight Enemy Placement
Position enemies in a way that makes combat interesting without overwhelming the player. Use environmental hazards and traps to create more dynamic encounters.
Dynamic Puzzle Design
Include puzzles that aren’t too abstract, but challenge the player to use logic or game mechanics creatively. These should integrate with the world seamlessly.
Player Agency
Allow the player to approach challenges in different ways, whether it’s choosing how to fight enemies or the order in which they explore.
Shortcuts & Fast Travel
Include shortcuts or teleport points that make it easier to traverse areas quickly after clearing them, reducing unnecessary backtracking.
Progression Feedback
Give clear feedback when the player progresses, such as unlocking a passage, obtaining a new item, or defeating a boss. These moments should feel rewarding.
Cohesive World Design
The world should feel interconnected, with logical transitions between different areas. Each zone should feel like it fits into a larger world.
Level Design - Getting Started
This is the typical order of designing a new Level.
- Pre-production: plan out the big ideas and overall experience design.
- Combat: Define how player(s) and enemy types interact.
- Layout: sketch a visual top-down 2D plan for a level.
- Blockout: build a basic in-game 2D rough draft and playtest it.
- Scripting: integrate events and behaviors (missions, quests, doors, buttons, AI)
- Environment Art: "art pass" the level with props and set dressing
- Release: document, play test, and publish the project/demo.
Level Design - Creating Levels
World Map
This shows the World map of Tribe of the Accord and the location of where the chapters take place.
Follow this guide to understand how to create levels.
Structure
1. Understand how the levels are structured
Generate
2. Now let's generate the boilerplate code to create the structure.
Build
3. With the changes in place, we can now design levels.
Level Design - Structure
When creating levels, there are 4 associated components to achieve a playable solution.
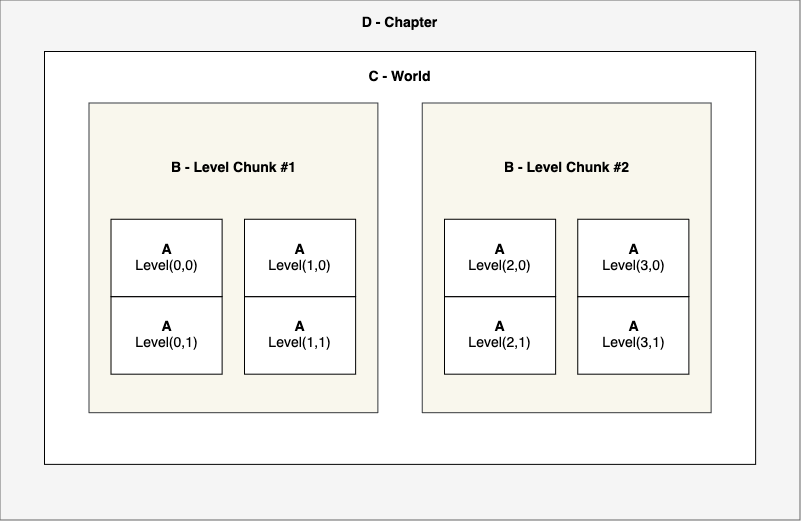
Version 2 (As of Sep 2024)
Changelog
- Concepts of '
Rooms' has been removed. MoveRoomTriggerhas been renamed toMoveLevelTrigger.- There are 4 Components instead of 5.
- Removed Tween nodes, we can use
create_tweeninstead. - All Levels inherit from a Base Level Scene based on the below
- Procedural Generation levels are being scrapped in favour of hand made/linear levels.
Version 1 (Deprecated) (Pre Sep 2024)
This version is shown for reference only and is still in use, but the recommendation is to use Version 2 for all Level Design.
Level Design - Structure
When creating levels, there are 4 associated components to achieve a playable solution.
Version 2 (As of Sep 2024)
Changelog
- Concepts of '
Rooms' has been removed. MoveRoomTriggerhas been renamed toMoveLevelTrigger.- There are 4 Components instead of 5.
- Removed Tween nodes, we can use
create_tweeninstead. - All Levels inherit from a Base Level Scene based on the below
- Procedural Generation levels are being scrapped in favour of hand made/linear levels.
Version 1 (Deprecated) (Pre Sep 2024)
This version is shown for reference only and is still in use, but the recommendation is to use Version 2 for all Level Design.
Level Design - Creating Levels
1 - Level
This is where we hold all background & foreground layers, tiles, props, enemies and the player instance.
Node Tree
Level // Root Node for Level
	MoveLevelTrigger // outer boxes that trigger a move to another level (Formerly MoveRoomTrigger)
	Background // Container for background assets (Node2D) e.g. Distant artwork/parallax views
	Flooring // Container for flooring tilesets to paint the floor (Node2D)
		Grass // Tileset for Grass/Sand/Snow
		Pits // Pit Tilesets
	Platforms // Used to add Platforms/Cliffs on top of the floor (Node2D)
		PlatformWalls // Used to paint the platform tileset
		PlatformFlooring // Used to paint higher level flooring
		PlatformCollisions // Smaller tiles to paint collisions
	Borders // Used to create border perimeters to keep Player in (Node2D)
		Closed // Tileset version of a fully closed level
		Open // Tileset version of a fully open level
	YSort // Where we place all props & enemies
		Enemies // Where we add all enemies (YSort)
		Items // Where we add all items(YSort)
		Props // Where we add all props (YSort)
		Player // This is where the Player is placed (KinematicBody2D)
	Foreground // Container for foreground assets (Node2D) e.g. Closer Bushes/Trees to add depth
	Navigation // Where we add Navigation Polygons
Layers of a Level
Background
A Background can be used to draw a background scenic view or can simply be the underlay of the flooring - in this case; Water.
Or it could be used for a scenic view (Unofficial background asset used for illustrative purposes)
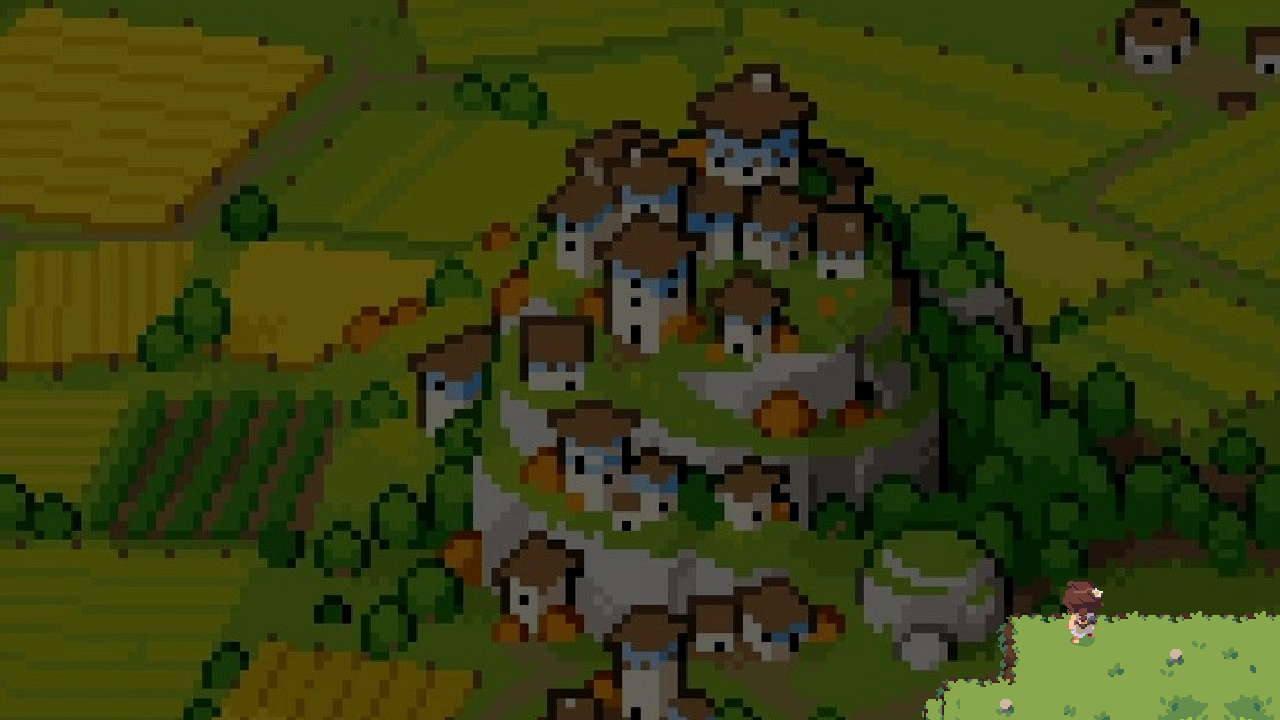
Flooring
Flooring sits above the background and is typically used to paint the floor tileset - in this case; Grass.
Pits usually sit on top of the flooring but sit inside the Flooring layer node.
Platforms
Platforms are in-land and are raised levels where a Player can climb/walk up or drop down from.
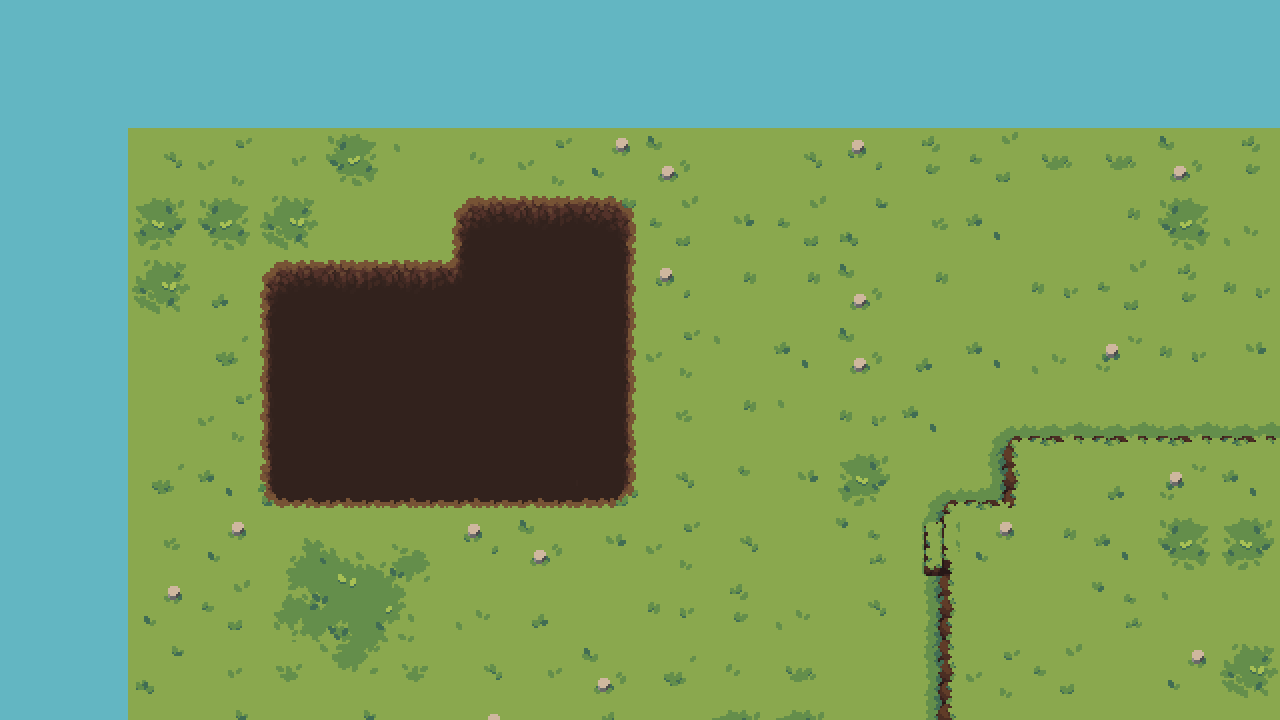
Borders
Borders simply border the level to avoid the Player from escaping. It comes with collisions as standard.
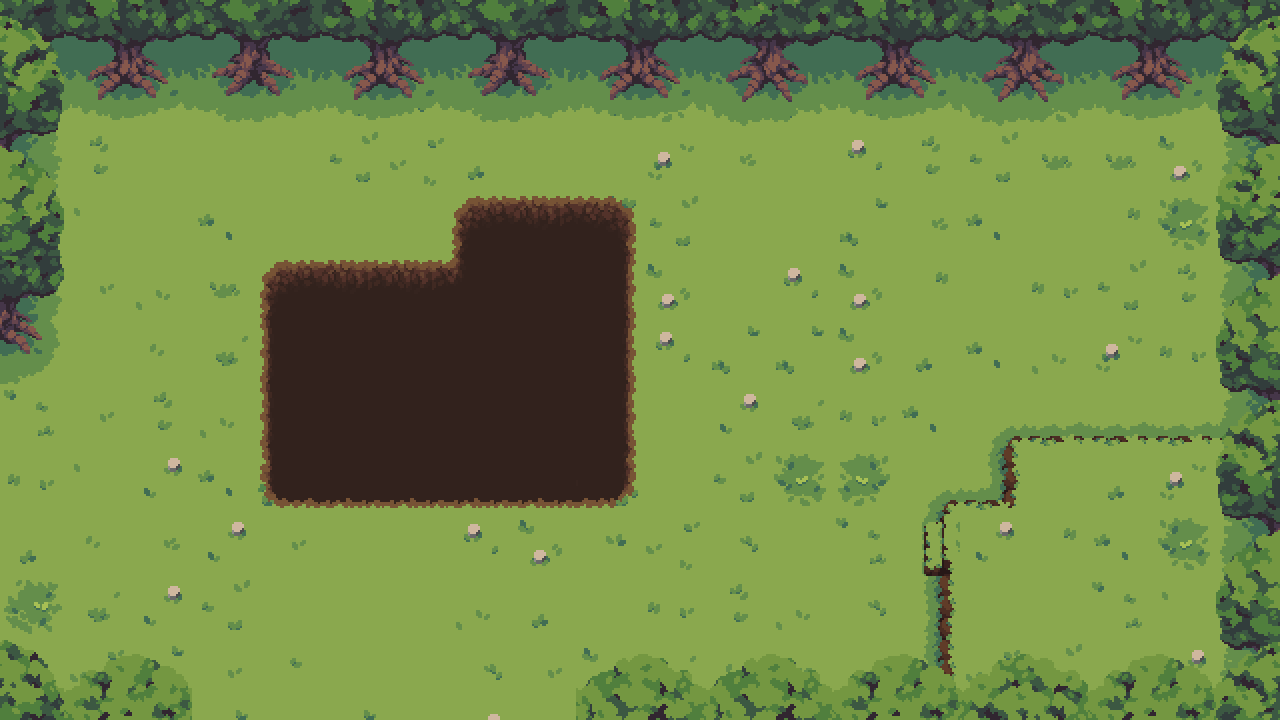
Borders are only to be used on the outside perimeter of the world.
YSort
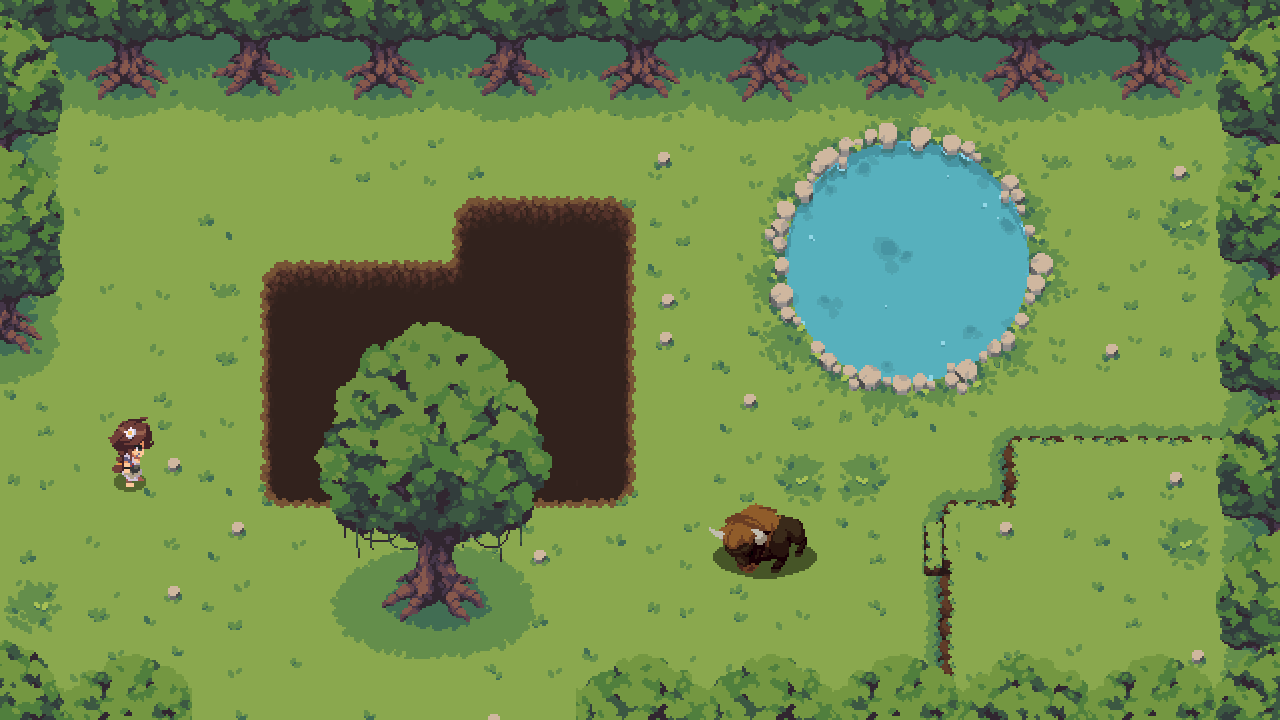
Foreground
We can add additional layers in the foreground to give the level more dimension, so it doesn't feel as flat.
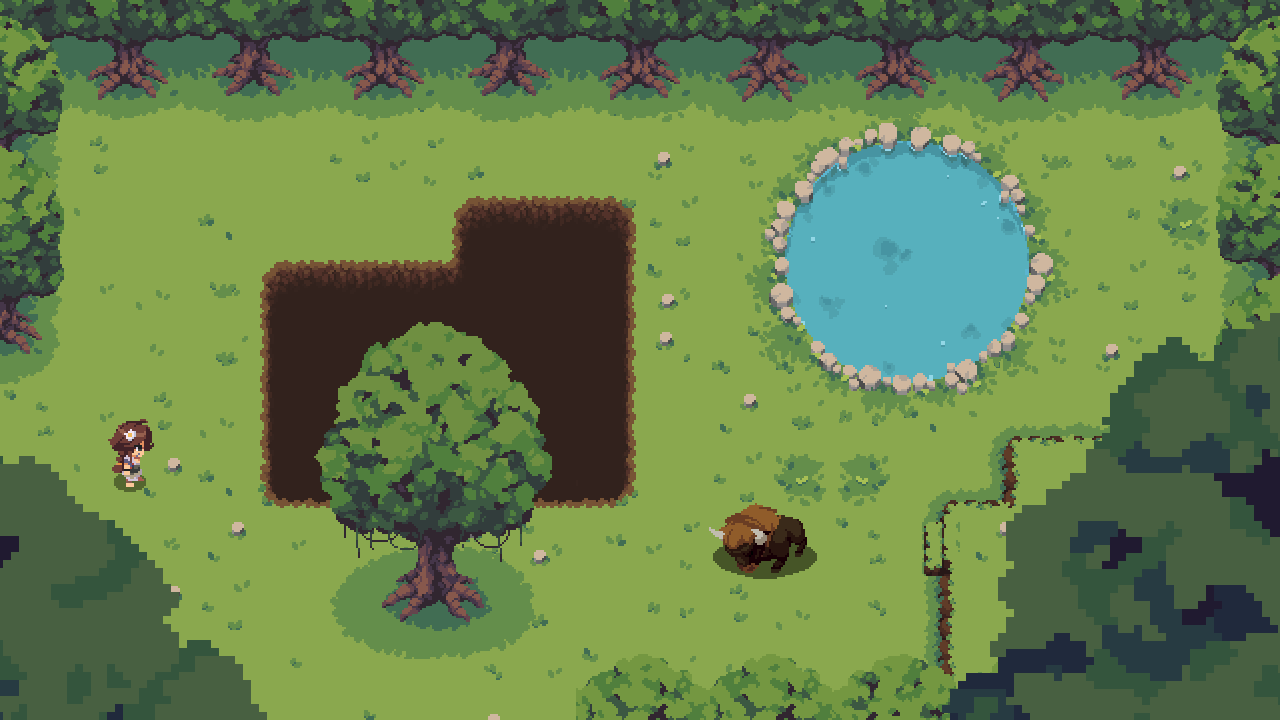
Code Location
The goal is to share levels across Chapters as much as possible, however we need the flexibility to scope to chapters and identify differences.
tribe-of-the-accord/
	src/
		Levels/
			Level(0_0).tscn // (if shared across Chapters)
			Level(0_0).gd // (some levels will need there own functionality)
			Level(0,0).test.gd
			Chapter_001/
				Level(12,0).tscn // (if scoped to a specific Chapter)
				Level(12,0).gd // (if scoped to a specific Chapter)
				Level(12,0).test.gd // test to check the scene
Template
These are the files used to generate the source code above 'Code Location'
tribe-of-the-accord/
	src/
		TemplatesLevels/ // None of these files are to be used directly, they should be created by the ChapterGenerator
			AbstractLevel.tscn // This is the scene that all other templates 'Inherit' from.
			TemplateLevelForest.tscn // This is the template scene for the Forest Biome
			TemplateLevelMoorlands.tscn // This is the template scene for the Moorlands Biome
			TemplateLevelMeadows.tscn // This is the template scene for the Meadows Biome
			TemplateLevelCaves.tscn // This is the template scene for the Caves Biome
Level Design - Creating Levels
2 - Level Chunk
This is a collection of Levels that form the entire available space allocated in memory. This allows us to limit the number of levels we load into memory and use a fading transition to move to a new chunk of levels.
Guidelines
When designing the levels, consider the following:
Balanced Chunks
Ensure that the level chunks you build have a well balanced number of levels inside.
- Too small is wasteful as we have to sarcrifice seamless movement through the levels.
- Too large feels seamless to the player, but performance suffers with every level we add.
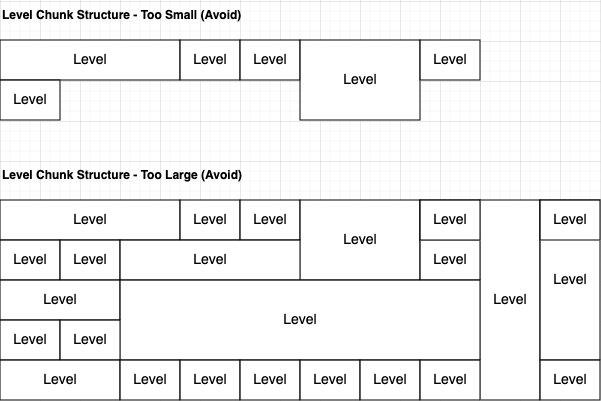
There's no strict number of levels per chunk, but we should consider how well the level performs.
1x1 Levels (Avoid)
Our original design was to use levels the same size of the screen with a fixed camera that would pan to the next level when reaching the edge of that level. We want to avoid this as it makes the world feel too clinical and less seamless.
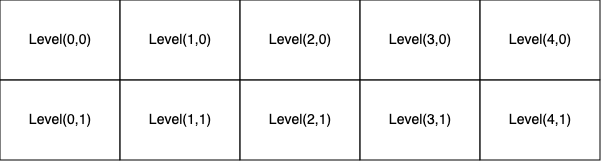
NxN Levels (Advised)
- Our new design is to provide variety of level sizes to provide more room to breathe and fight more enemies, but still supporting single levels for more intimate moments.
- You need to ensure that the coordinates are always correct. E.g. as shown in the image example below, if you design a level at grid coordinate (1, 0) - and it's a 4x4 sized room, this means it would take over the coordinates:
- 1, 0
- 2, 0
- 1, 1
- 2, 1
- If a single sized level, the camera will be fixed.
- If a NxN sized level, the camera will follow the player in the boundaries of that level.
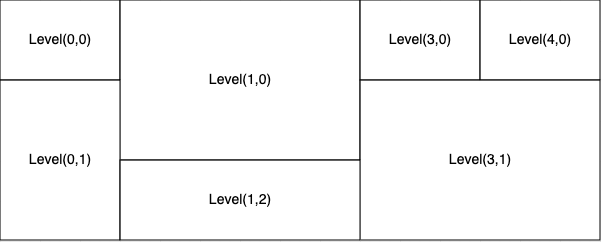
Node Tree
LevelChunk_001 // Root Node for LevelChunk LevelChunk_XXX (Based on Chapter)
	Levels // Container for all Levels
		Level(0_0) // Needs to map to the world grid coordinates (1 - Level)
		Level(1_0) // (Coord Vector2(1, 0))
		Level(2_0) // (Coord Vector2(2, 0))
Code Location
tribe-of-the-accord/
	src/
		LevelChunks/
			LevelChunk_001.tscn // Chapter 1 -   first loaded chunk
			LevelChunk_001_2.tscn // Chapter 1 - second loaded chunk
			LevelChunk_001_3.tscn // Chapter 1 - third loaded chunk
			LevelChunk_002.tscn // Chapter 2 - third loaded chunk
Template
These are the files used to generate the source code above 'Code Location'
tribe-of-the-accord/
	src/
		TemplatesLevelChunks/ // None of these files are to be used directly, they should be created by the ChapterGenerator
			AbstractLevelChunk.tscn // This is the scene that all other templates 'Inherit' from.
			TemplateLevelChunk.tscn // This is the template scene to create Level Chunk scenes
Level Design - Creating Levels
3 - World
This is the controller of many level chunks which coordinates the tear down and instantiation of a new Level Chunk.
Node Tree
World_001 // Root Node for World World_XXX (Based on Chapter)
	GameplayCamera // Used to follow the Player/Pan to a new Level
	DebugCamera // Used for debugging (Roaming around Map in Debug mode)
	LevelChunks // Container for adding/removing Level chunks and transitioning/fading between
		// You would only have 2 chunks at any one time that are freeing or creating then swapping
		LevelChunk_001 // Instantiated Chunk (2 - Level Chunk)
		LevelChunk_002 // Instantiated Chunk (2 - Level Chunk)
	LootGenerators // Used to generate random items from Bushes and Chests
	LevelChunkCoordinator // Used to coordinate the swap out of level chunks
	FadeEffect // Used to fade in or out to Black (LevelChunk swapping)
	DayNightCycle // Controls the visual time of day in the game
Code Location
tribe-of-the-accord/
	src/
		Worlds/
			World_001.tscn // Chapter 1 World
			World_002.tscn // Chapter 2 World
			World_003.tscn // Chapter 3 World
			World_004.tscn // Chapter 4 World
			// ...
Template
These are the files used to generate the source code above 'Code Location'
tribe-of-the-accord/
	src/
		TemplatesWorlds/ // None of these files are to be used directly, they should be created by the ChapterGenerator
			AbstractWorld.tscn // This is the scene that the World template 'Inherits' from.
			TemplateWorld.tscn // This is the template scene used to create World scenes
Level Design - Creating Levels
4 - Chapter
This manipulates the World node and controls the narrative/beats of the Game.
Node Tree
Chapter_001 // Root Node for Chaper Chapter_XXX (Based on Chapter)
	WorldContainer // Container for Worlds
		World // (3 - World)
	Audio // Container for Audio cues
		Ambience // Ambience of the environment
		MainMusic // Main Cue music for the chapter in question
	FadeEffect // Used to fade in or out to Black as part of the Narrative scene
Code Location
tribe-of-the-accord/
	src/
		Chapters/
			Chapter_001.tscn // Chapter 1 World
			Chapter_001.gd
			Chapter_002.tscn // Chapter 2 World
			Chapter_002.gd
			Chapter_003.tscn // Chapter 3 World
			Chapter_003.gd
			Chapter_004.tscn // Chapter 4 World
			Chapter_004.gd
			// ...
Template
These are the files used to generate the source code above 'Code Location'
tribe-of-the-accord/
	src/
		TemplatesChapters/ // None of these files are to be used directly, they should be created by the ChapterGenerator
			AbstractChapter.tscn // This is the scene that the Chapter template 'Inherits' from.
			TemplateChapter.tscn // This is the template scene used to create Chapter scenes
Level Design - Creating Levels
This version is shown for reference only and is still in use, but the recommendation is to use Version 2 for all Level Design.
1 - Room (Deprecated)
This is where we hold all tilemaps/props/enemies and the player
Node Tree
Room // Root Node for Level
	MoveRoomTrigger // outer boxes that trigger a move to another room
	Flooring // Tileset to paint the floor
	Overlay // Used to overlay shadows or pits
	Platforms // Used to add Platforms/Cliffs on top of the floor
	Borders // Used to create border perimeters to keep Player in
	YSort // Where we place all props & enemies
		Enemies // Where we add all enemies
		Player // This is where the Player is placed
	Navigation // Where we add Navigation Polygons
	Tween // Used to do Tweens
Level Design - Creating Levels
This version is shown for reference only and is still in use, but the recommendation is to use Version 2 for all Level Design.
2 - Level (Deprecated)
This is a wrapper of a Room.
Node Tree
Level // Root Node for Level
	Room // Node that contains all of the Props/Tiles (1 - Room)
	Tween // Used to do Tweens
Location
tribe-of-the-accord/
	src/
		Levels/
Level Design - Creating Levels
This version is shown for reference only and is still in use, but the recommendation is to use Version 2 for all Level Design.
3 - Level Chunk (Deprecated)
This is a collection of Levels that form the entire available space allocated in memory.
Node Tree
LevelChunk_001 // Root Node for LevelChunk LevelChunk_XXX (Based on Chapter)
	Levels // Container for all Levels
		Level(0_0) // Needs to map to the world grid coordinates (2 - Level)
		Level(1_0) // Needs to map to the world grid coordinates (2 - Level)
		Level(2_0) // Needs to map to the world grid coordinates (2 - Level)
	Tween
Location
tribe-of-the-accord/
	src/
		LevelChunks/
Template
tribe-of-the-accord/
	src/
		TemplatesLevelChunks/
Level Design - Creating Levels
This version is shown for reference only and is still in use, but the recommendation is to use Version 2 for all Level Design.
4 - World (Deprecated)
This is the controller of many level chunks which coordinates the tear down and instantiation of a new Level Chunk.
Node Tree
World_[Name] // Root Node for World World_XXX (Based on Chapter)
	GameplayCamera // Used to follow the Player/Pan to a new Level
	DebugCamera // Used for debugging (Roaming around Map in Debug mode)
	LevelChunks // Container for adding/removing Level chunks and transitioning/fading between
		LevelChunk_001 // Instanciated Chunk (3 - Level Chunk)
	LootGenerators // Used to generate items from Bushes and Chests
	Tween
	LevelChunkCoordinator
	FadeEffect
	DayNightCycle
Location
tribe-of-the-accord/
	src/
		[Name]World.tscn
Level Design - Creating Levels
This version is shown for reference only and is still in use, but the recommendation is to use Version 2 for all Level Design.
5 - Part (Deprecated)
This manipulates the World node and controls the narrative/beats of the Game.
Node Tree
Part_Name // Root Node for Part Part_[Name] (Based on Chapter)
	World // Container for Worlds
		World_Tutorial // (4 - World)
	Audio // Container for Audio cues
		Ambience // Ambience of the environment
		MainMusic // Main Cue music for the chapter in question
	FadeEffect
Generate Boilerplate
There is a directory in helpers called ChapterGenerator.
- Open the scene
helpers/ChapterGenerator/ChapterGenerator.tscnand run it.
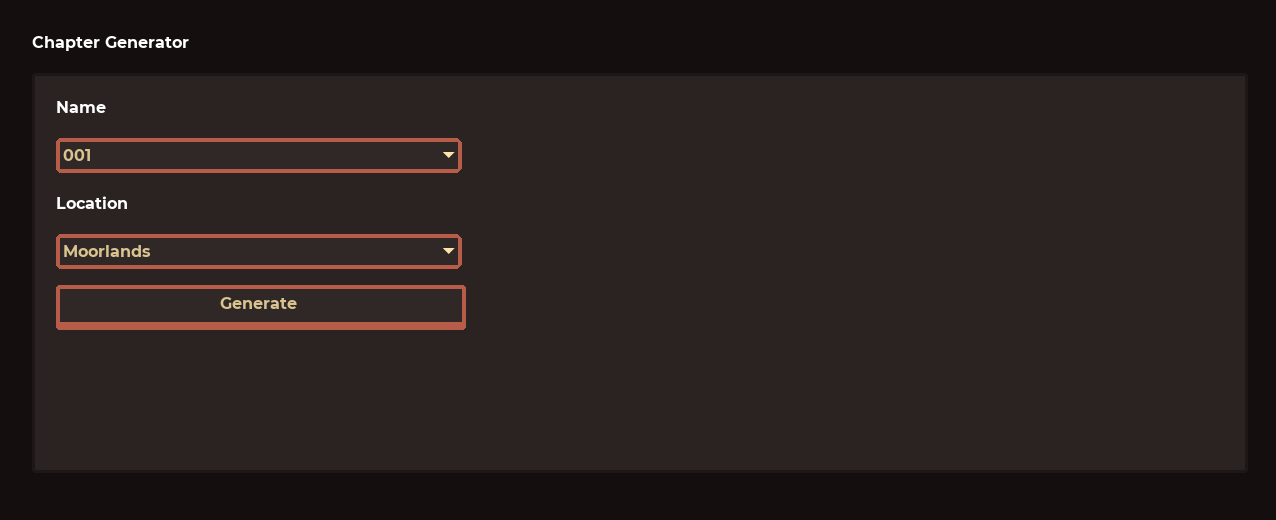
- Choose the Chapter you want to build and the Location/Biome assets you want to use. This will generate the following if you choosed to create Chapter 001:
src/Levels/ // (x3) just to get you started
	Chapter_001
		Level(0_0).tscn // copied from one of the level templates in 'src/TemplatesLevels'
		Level(0_0).gd
		Level(1_0).tscn // copied from one of the level templates in 'src/TemplatesLevels'
		Level(1_0).gd
		Level(2_0).tscn // copied from one of the level templates in 'src/TemplatesLevels'
		Level(2_0).gd

src/LevelChunks
	LevelChunk_001.tscn // copied from 'src/TemplatesLevelChunks/TemplateLevelChunk.tscn'
	LevelChunk_001.gd
	LevelChunk_001.test.gd

src/Worlds
	World_001.tscn // copied from 'src/TemplatesWorlds/TemplateWorld.tscn'
	World_001.gd

src/Chapters
	Chapter_001.tscn // copied from 'src/TemplatesChapters/TemplateChapter.tscn'
	Chapter_001.gd
- You should now be able to open Chapter_001.tscn and it should work.
Building Levels
Work in progress
Level Design Documents
This is a collection of level design documents that explain the sequence of events per chapter but more oriented to the level design. This is more the low level implementation based on the reference of its respective narrative document - they should compliment each other.
For example:
LDD - Chapter 1

- Title: A New Dawn
- Description: Adira chases a deer
- Duration: 7m
- Reference:
src/LevelDesign/Chapter1Level.tscn
1. Description
1.1. Restrictions
- Level must be located by the Campsite and Moorlands
- Quest/day must start with Adira's introduction
- Player must be introduced to:
- Basic Commands (Movement, Attack, Roll)
- Charge Attack
- Basic enemies (Ant, Ant2)
- Platforming
- Player must chase the Deer
- Player must fail the hunt.
- Torion must be introduced.
- Existence of other tribesmen must be presented.
1.2. Goals
- Introduction of basic commands
- Include many optional rewards (hidden in bushes)
- Introduce Leaf Carpet mechanic
- Help the player become more familiar with overall controls and roll ranges.
- Make an engaging chase scene.
- Teach the player that Adira's moveset will be unlocked and improved throughout the game.
1.3. List of Scenes
- Chapter start
- Deer reappears, then jumps through a big hole.
- Tribesmen introduction. [suggestion] Hunting other animals by using Charge Attack.
- [optional] Second tribesmen scene where Adira observes and learns how to use the Charge Attack.
- Deer platform chase start
- End of chase scene. [Suggestion] Adira fails to capture the deer, and Torion shows up.
2. Setting
2.1. Locations - World Areas
- Campsite
- Moorlands
2.2. Time of Day
- Chapter start: Morning
- After deer chase ends: Afternoon
3. Resources
3.1. Enemy List
- meleeBasic
- meleeBasic2
3.2. Hazard List
- Leaf Carpet
- Pitfalls
- Regular bushes
- Treasure bushes (can be replaced by chests)
3.3. Collectibles
- None
4. Walkthrough
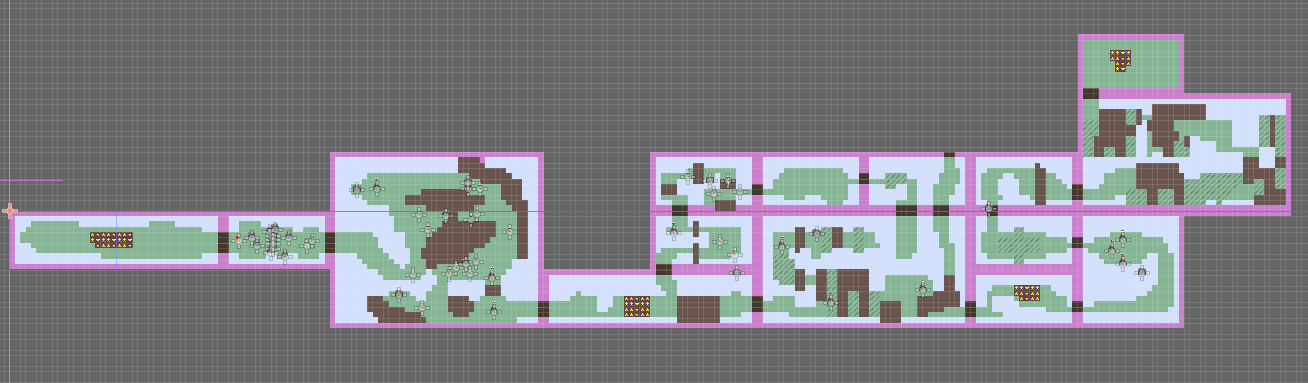
4.1. Deer Scene 1 - Adira Introduction
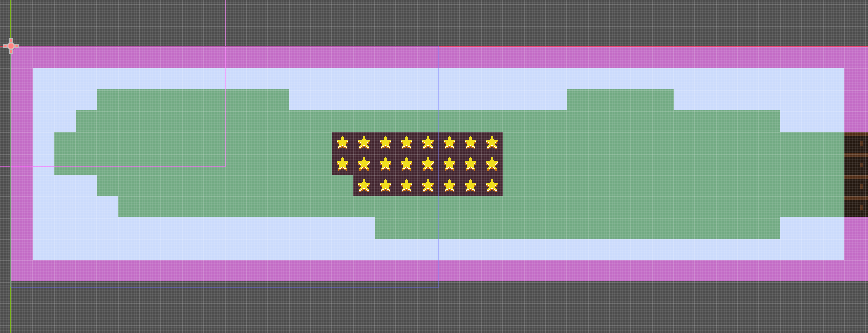
Goal: Introduce Adira to the player and establish the starting point of her journey.
Cutscene
The chapter begins with a cinematic introduction showcasing a camera pan through the moorlands from the right to left, then focusing on a deer grazing the soil. Suddenly, Adira charges at the Deer with her spear raised from inside a bush (Bush particles disperse as does sound of rustling), spooking the deer away. Once the deer is no longer in sight, the player is free to roam the area.
Gameplay Mechanics Unlocked:
- Basic Attack
- Rolling
- Toggle Menu
Dialogue/Internal Monologue
After the deer has fled:
- Adira (internal monologue): “A buck this size... it’s rare to see one here.”
- Adira (internal monologue): “Torion’s traps may catch birds and hares, but a deer like this will keep us fed for days.”
4.2. Attack Tutorial
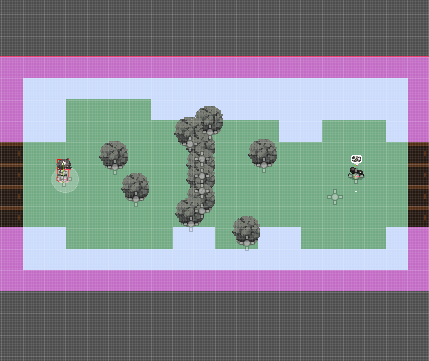
Goal: Teach the player how to use the Basic Attack in a safe environment.
Room Description:
The player is introduced to an enemy standing behind a bush that blocks their path. To progress, the player must use their Basic Attack to clear the bush.
HUD Prompts
- “Press [Key] to attack.”
Cutscene
N/A
Dialogue/Internal Monologue
N/A
4.3. Room 3
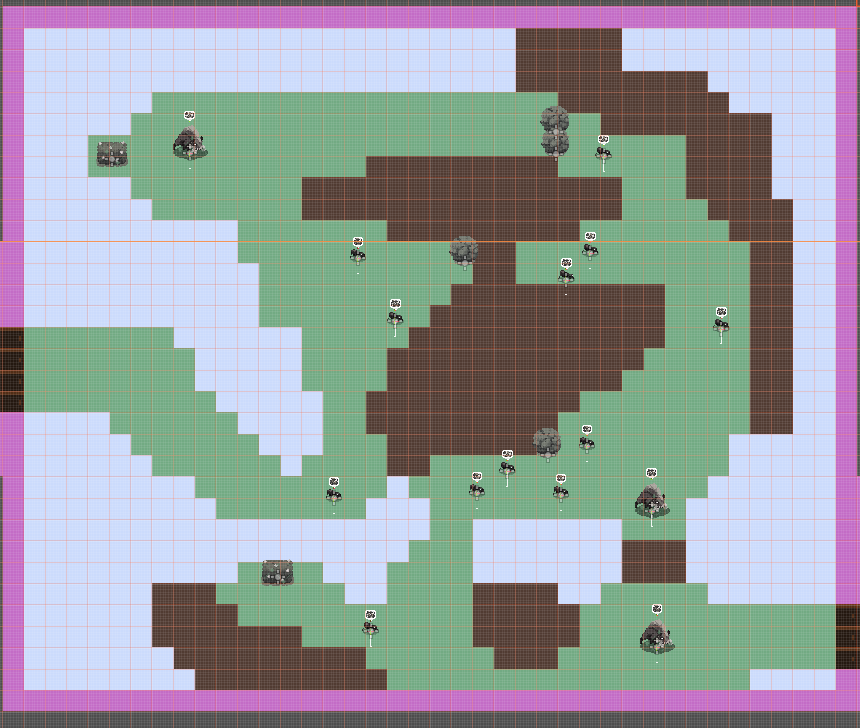
Goal: Encourage exploration and present opportunities for players to discover "roll over pits" as a mechanic before the tutorial.
Room Description:
This larger room provides a linear path, filled with possible shortcuts for players who experiment with the roll mechanic over pitfalls. Hidden rewards incentivize exploration, while a stronger enemy is introduced to raise the stakes.
Key Features:
- Optional exploration paths
- Rewards for exploring the roll action
- A tougher enemy that takes more hits to be defeated (Rabbit)
Cutscene
N/A
Dialogue/Internal Monologue
N/A
HUD Prompts
- “Press [Key] to roll.”
4.4. Deer Scene 2 - Jumps Through Hole

Goal: Advance the narrative by presenting the deer as the player's target and presenting a pitfall that is too large to roll across.
Cutscene
A cinematic plays where Adira spots the deer and sets her sights on it. Adira sprints towards the Deer again but the deer escapes by jumping across a wide gap, forcing Adira to find an alternate route. This event highlights Adira's determination and resourcefulness despite her lack of experience as a hunter.
Dialogue/Internal Monologue
- Adira (internal monologue): “There it is!"
Once the Deer has cleared the long gap.
- Adira (internal monologue): "(Sigh) Too far to jump. I need to find another way.”
4.5. Rolling Over Pits Tutorial
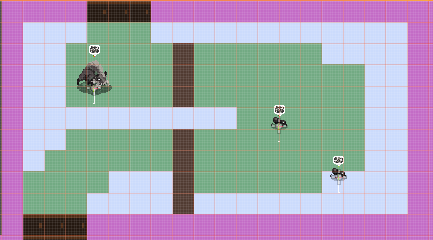
Goal: Teach the roll over pitfalls mechanic in a controlled and visually clear setting.
Room Description:
This room features a straightforward design where rolling over a pit is required to progress. There will be 2 Ant enemies.
Cutscene
N/A
Dialogue/Internal Monologue
N/A
HUD Prompts
N/A
4.6. Room 5
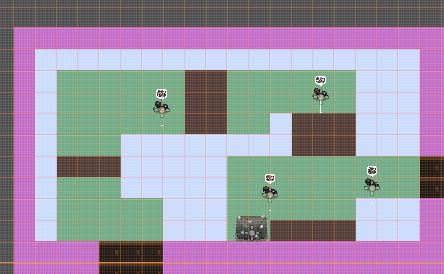
Goal: Introduce a combination of combat and rolling mechanics. Players must be encouraged to plan ahead while getting more comfortable with multiple inputs in a short period of time.
Room Description:
Enemies are strategically placed to activate only when the player moves closer, requiring them to roll over pits to engage.
Cutscene
N/A
Dialogue/Internal Monologue
N/A
HUD Prompts
N/A
4.7. Room 7 - Leaf Carpet Introduction
Goal: Introduce the Leaf Carpet mechanic in an easy-to-read environment.
Room Description:
This room focuses on teaching the player how Leaf Carpets work, with clear visual indicators and no external threats.
Cutscene
N/A
Dialogue/Internal Monologue
N/A
HUD Prompts
N/A - It's very obvious and would be otherwise spoonfeeding the player.
4.8. Room 8 - Leaf Carpet 2

Goal: Reinforce Leaf Carpet mechanics by slightly increasing the challenge.
Room Description:
The room requires players to use multiple Leaf Carpets in a short period of time. This helps them better understand the timing and reinforces the visual differences between the tiles.
Cutscene
N/A
Dialogue/Internal Monologue
N/A
HUD Prompts
N/A
4.9. Room 9 - Tribesmen Scene - Introduction
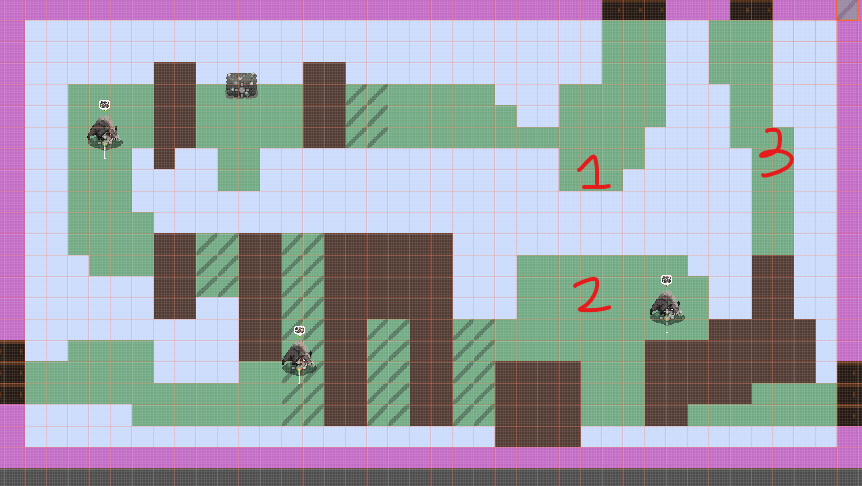
Goal: Introduce the tribesmen and foreshadow the Charge Attack mechanic.
- Leaf Carpet + Rolling
- Leaf Carpet + Combat
- Rolling + Leaf Carpet
Cutscene
A cinematic shows Adira observing tribesmen from afar. Two men are looking after an injured boy. Once they leave, Adira must traverse platforms, by the time she gets to their location, they have gone.
Dialogue/Internal Monologue
Camera pans to the tribespeople (2 males & a boy) in the top right who are nursing their injured son.
- Adira (internal monologue): "A tribe... why are they here?"
- Adira (internal monologue): "And what's happened to that boy?"
Pans back to Adira
- Adira (internal monologue): "I can’t let the deer get away.”
- Adira (internal monologue): "Torion will be so mad.”
HUD Prompts
N/A
4.10. Room 10 - Breakable Object Scene - Charge Attack Intro
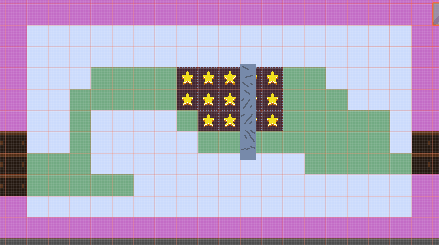
Goal: Introduce the Charge Attack through a breakable obstacle.
Room Description:
Adira comes into a room that has an obstacle in the way. A simple Spear tap attack won't be enough to break through it, so the Player has to work out that the charge and release attack is the only way to break it down. When using the simple tap attack, the obstacle simply shudders and remains in tact.
Cutscene
N/A
Dialogue/Internal Monologue
N/A
HUD Prompts
N/A
4.11. Room 11 - Charge Attack Tutorial
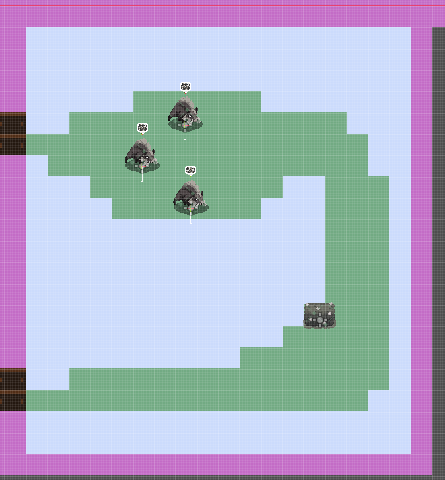
Goal: Teach the player how to use the Charge Attack in an isolated, focused setting.
Room Description:
The player practices using the Charge Attack to defeat rabbits who are weak to this mechanic.
Cutscene
N/A
Dialogue/Internal Monologue
N/A
HUD Prompts
N/A
4.12. Room 12 - Leaf Carpet Arena
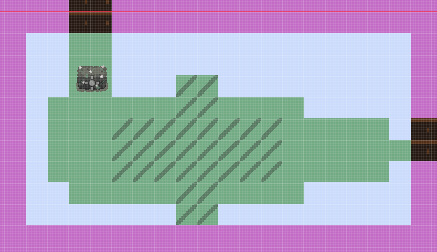
Goal: Combine combat and mechanics in a controlled arena environment.
Room Description:
A combat arena locks the player inside a specific area until they defeat multiple waves of enemies. This will be the first main arena of the game and combat will be carried out by the player as part of 3 waves. Enemies will drop from above, and the Player will need to balance fighting with pit avoidance.
Original Notes (Not applicable): If this is the very first arena of the game and combat against basic enemies is still challenging for the player, the arena's layout must be very simple (square layout with no hazards) with three waves of enemies.
Otherwise, this arena shall utilize the Leaf Carpet as a way to increase the challenge and bring together all the elements taught to the player so far.
4.13. Room 13 - Deer Scene 3 - Chase Start
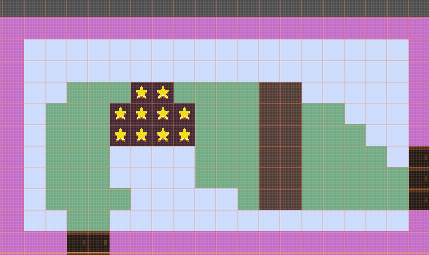
Goal: Transition into an active chase sequence.
Scene Description:
Adira catches up to the deer, triggering a chase. This time, the gap between platforms is small enough for Adira to jump and follow. The deer is always in arms distance and will adapt to the pace of the Player - this could be slow to fast.
4.14. Room 14 - Chase Platform Challenge
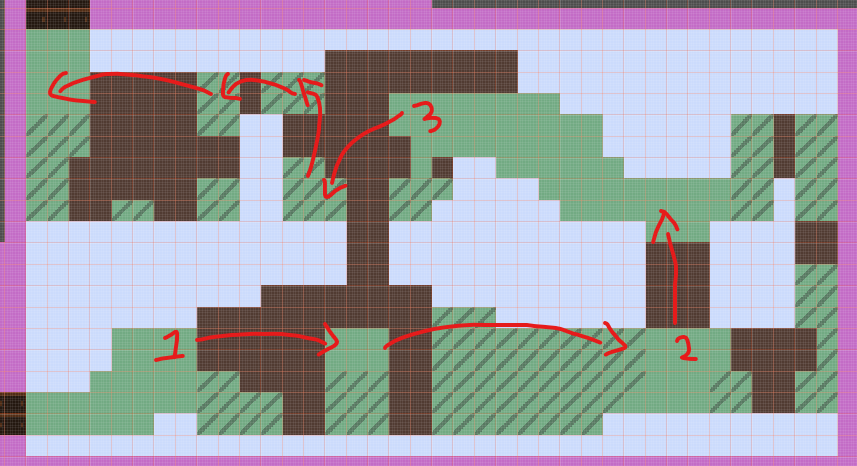
Goal: Challenge the player with platforming sequences during the chase.
Room Description:
The deer pauses at three designated spots, guiding the player to their next objective. Players must combine rolling and precise timing on Leaf Carpets to progress. No enemies are present to maintain the fast pace and focus on platforming.
4.15. Room 15 - Deer Scene 4 - End
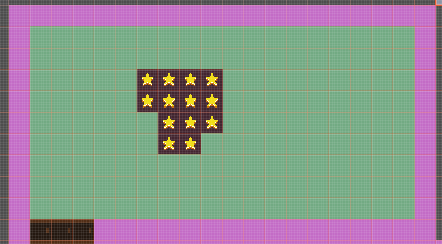
Goal: Conclude the deer chase arc and advance the story.
Cutscene
Adira fails to capture the deer, and it flies off. Torion's voice bellows out to the fear of Adira where he arrives to tell her off before they head back to Camp.
Dialogue/Internal Monologue
Before the deer has fled:
- Adira (internal monologue): “I've got you now!”
After the deer has fled:
- Adira (internal monologue): “Noo! Gone... I lost it.” (sighs) “Torion’s going to-”
- Torion: “ADIRA!!!”
- Adira (internal monologue): “...”
Torion walks over to Adira.
- Torion: “You walk away from me. I tell you to stay, yet you do not listen.”
- Adira: “I saw a deer. A big one. It could have fed us for days.”
- Torion: “And now it feeds nothing. You think hunting is about chasing? Hunting is about waiting. Patience.”
- Adira: “I know how to hunt.”
- Torion: “You know how to chase. Not hunt. It is not the same. One day, when I am gone, you will need to know the difference.”
- Adira: “I’m sorry.”
- Torion: “... Come. The day grows dark.”
4.16. Room 16 - Camp Scene - Chapter End
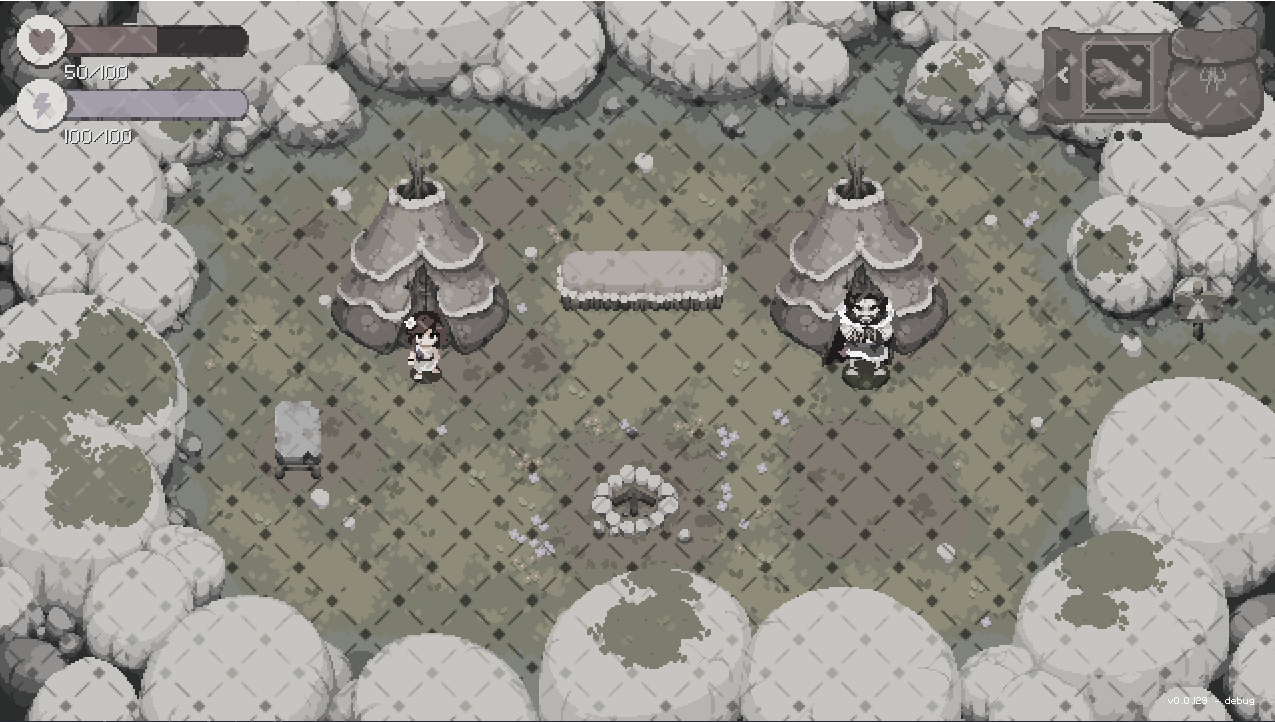
Goal: Provide exposition and character development.
Scene Description:
At the camp, Adira and Torion discuss:
- Strange events in the moorlands
- Torion’s discomfort with living in a tribal setting
- Torion's relationship with Adira and its complexities
- Better showcasing Adira's and Torion's personalities
Dialogue/Internal Monologue
- Torion: “You do not understand how it works. Hunting is waiting, not chasing.”
- *Adira *: “I know!”
- Torion: “You do not. If it were not for me, our bellies would be empty tonight.”
- Adira: “...”
- Torion: “The deer should not have been here. Something chased it into the moorlands.”
- Adira: “By what?”
- Torion: “I hope we will not find out.”
- Adira: “...”
- Torion: “It is late, make sure you are up bright and early.”
- Torion: “I have many things to teach you about the wild.”
- Torion: “If you are late, I will be gone.”
LDD - Chapter 2
- Title: ???
- Description: Torion and Adira spend a day together, fight and run
- Duration: 10m
- Reference:
src/LevelDesign/Chapter2Level.tscn
Table of Contents
1. Description
1.1 Restrictions
- Level must be located by the Campsite and Moorlands
- Quest/day must start with Torion npc Cutscene
- Player must be introduced to the Rabbit enemy/object
- Player must follow Tracks made by the Rabbit
- Player must Hunt Rabbit
- After beating the rabbit, Player must find Torion
- Torion and Adira must fight
- Torion and Adira part ways cutscene
1.2 Goals
- Teach player new ability - Spear charge attack
- Include alternative Paths
- Include Optional Rooms that leads to collectable / secret
- This is the second Main Quest of the game, so both the player and Adira must feel like there is still a long way ahead in order to master the path of the hunter
- Introduction of first ranged enemy, BeeSwarm
- Introduction to first Boss Battle, Torion
1.3 List of Scenes
- Chapter Start
- Moorlands Torion Rabbit scene
- Moorlands Torion Teaches Adira Charge Attack Scene
- Moorlands Torion Reappears
- Moorlands Torion after battle
- Moorlands Rabbit Found
- Moorlands Rabbit Beaten
- Campsite Adira runs away
2. Setting
2.1 Locations - World Areas
- Campsite
- Moorlands
2.2 Time of Day
- Chapter start: Morning
- After Torion Battle: Afternoon
- After Rabbit Fight: Night
3. Resources
3.1 Enemy List
- Ant
- Bird
- BeeSwarm
- torionBoss
3.2 Hazard List
- breakable floor
- Pitfalls
- Cliffs
- Breakable Rocks
3.3 Collectables
- Hidden treasure
4. Walkthrough
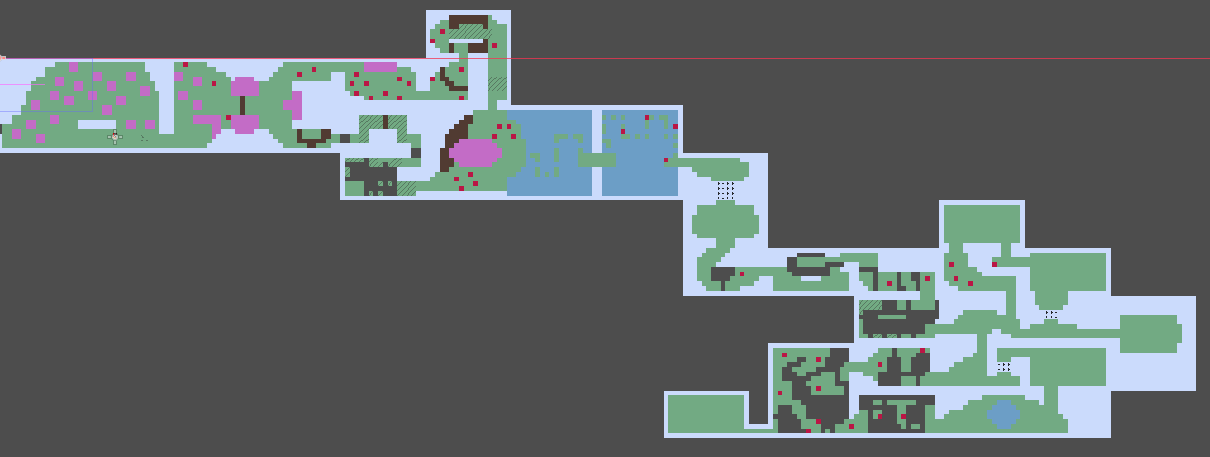
Disclaimer: The room layouts are not final and may change upon further updates.
Use it as a guide that displays the main intentions of a preliminary layout.
4.1 Campsite
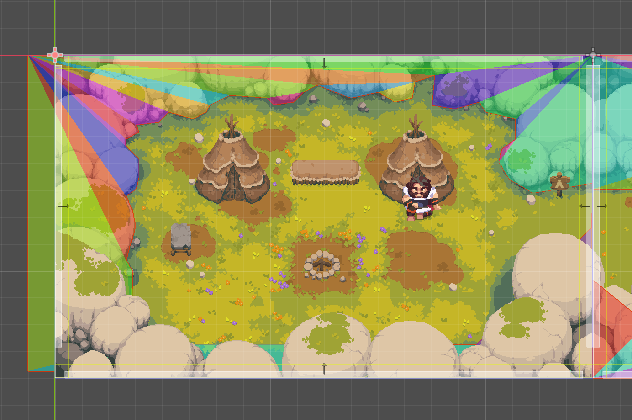
Chapter starts, Adira is free to roam inside the campsite.
A hidden trigger will block the player from leaving the camp before talking to Torion.
Upon talking to Torion, the player leaves.
4.2 The prey

Adira spots her first Rabbit.
The rabbit runs away but leaves easy to follow Tracks. (Green ground tiles)
Torion points out the tracks to Adira and the player is free to roam.
The player can move to the left, but a hidden trigger forces her not to go back to the campsite.
** Cutscene Notes **
The Room layout can be molded in order to better display this cutscene. The only points that cannot be changed is the number and position of the room's exit points.
Setup
Position of actors:
- Torion
- Rabbit
Position of Triggers:
- Trigger by the left (on enter, once per game trigger)
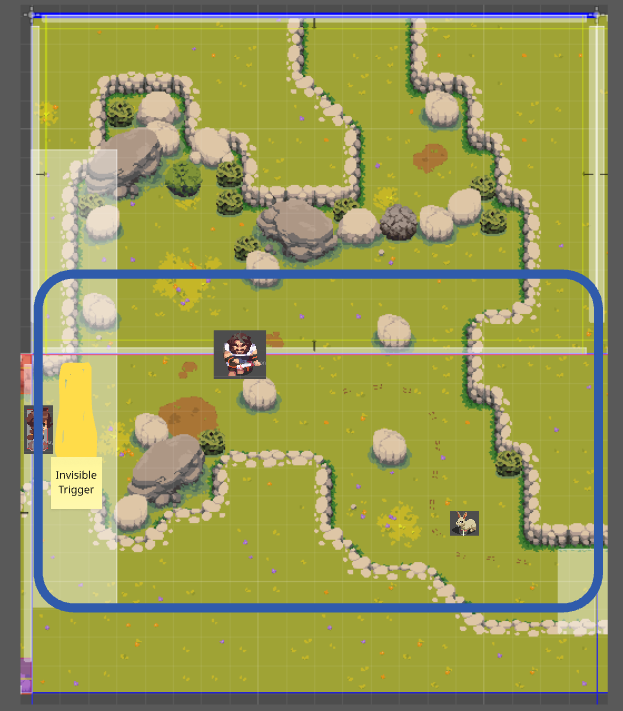
Scene Start
Once the player touches the Invisible trigger, the scene starts.
Player loses control of Adira. Adira slowly approaches Torion who is stalking the Rabbit.
Torion and Adira then start a brief dialogue.
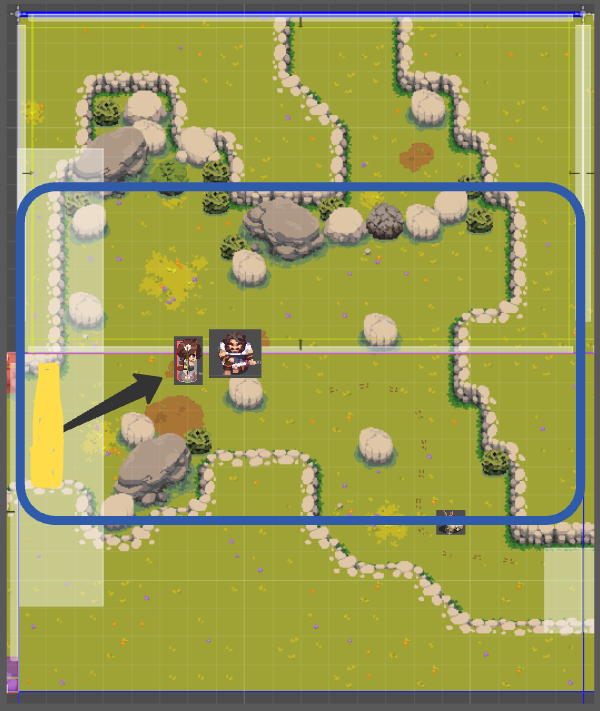
Rabbit Focus
After the relevant dialogues occur, Torion brings attention to the Rabbit.
Camera slowly pans to center all actors. (dotted blue rect -> Blue Rect)
Dialogue continues, Torion talks about rabbit.
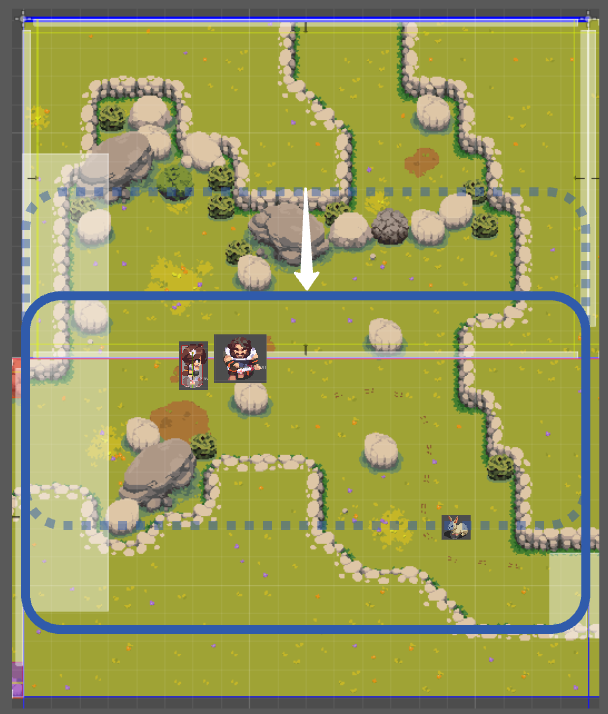
Rabbit moves away
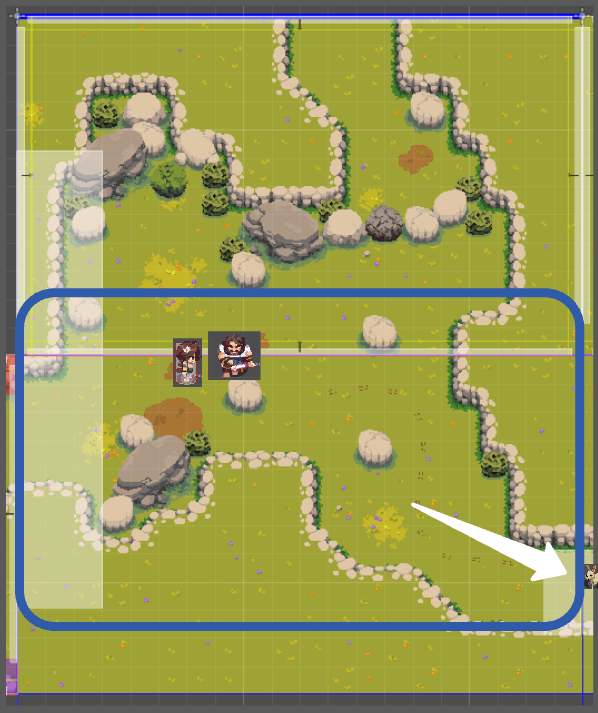
Torion talks about the tracks

Torion leaves screen to the right
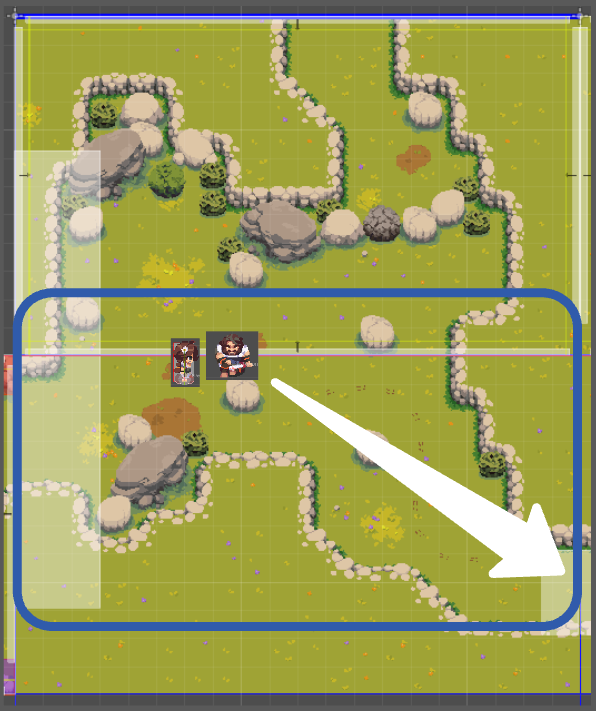
Camera resets
Player regains controls.
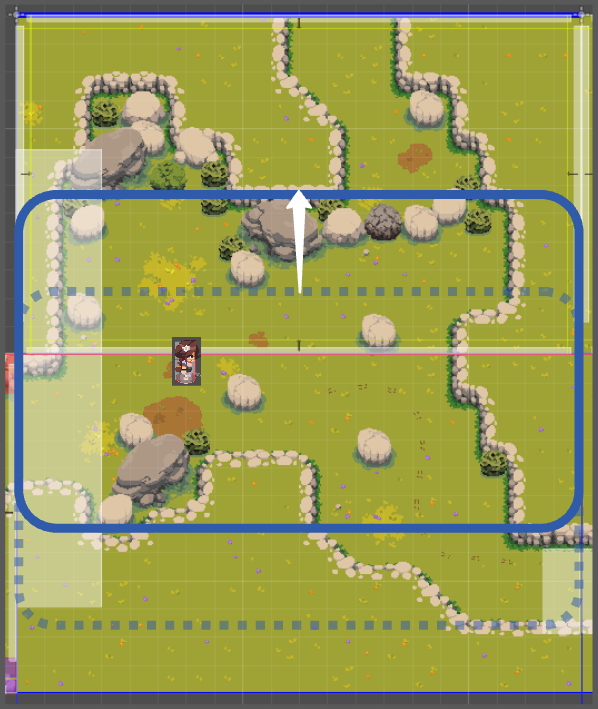
Post Scene Setup
New trigger at Campsite exit:
If the player enters, Adira says:
"I must hurry, the tracks are still fresh"
She moves back to the center of the room.
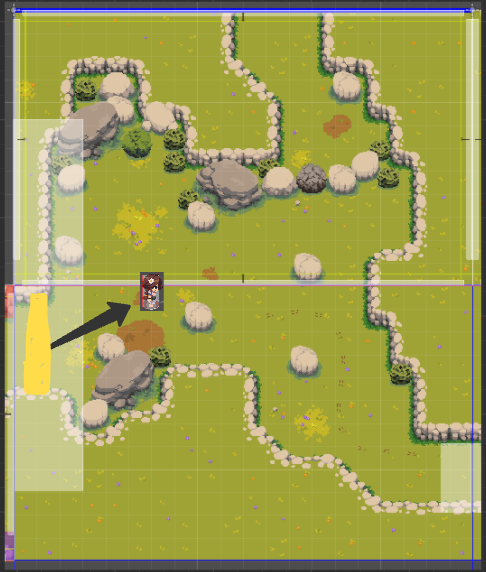
4.3 Room 3
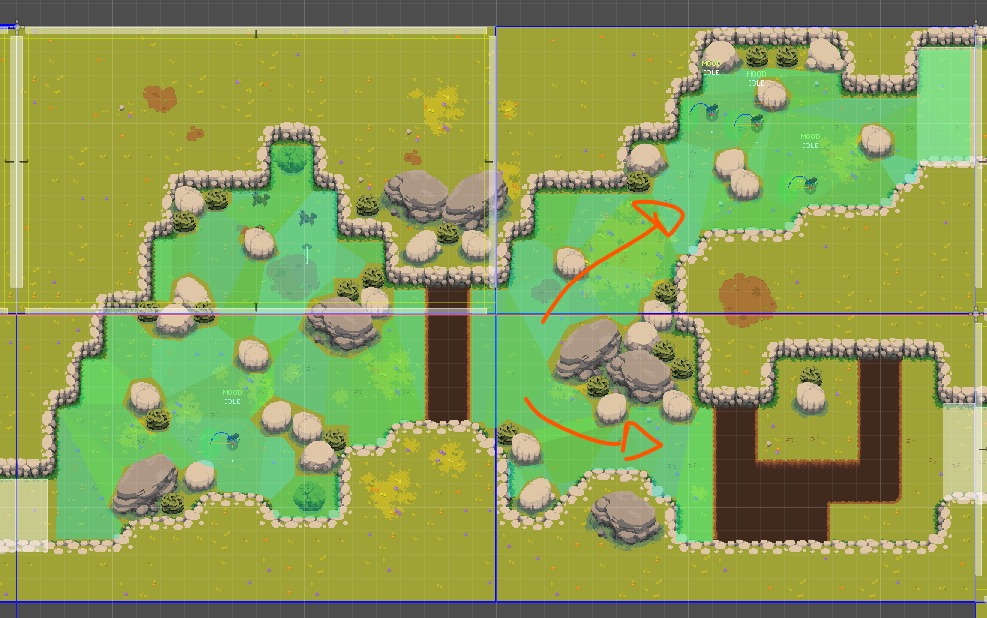
Following the tracks, the Player can choose between the north or south path.
Both will end up in the same place but the player is free to pick either path.
4.4a. Room 4 - North Path
This path is mostly focused on combat, but also must introduce the player to basic platform challenges (jumping over pitfalls) and the hazard of Breakable/temporary Floors.
4.4b. Room 5 - South Path
This path is mostly focused on Platforms, dedicated to introduce the player to platform challenges combined with the hazard of Breakable/temporary Floors.
4.5 Room 6 - Hub
While both paths can be extended in order to better accommodate gameplay flow and better breakdown challenges, both must land in this room.
In either path, the player will drop from a one-way cliff and find himself unable to backtrack. It's also hinted that when he unlocks a traversal ability he will be able to do so. (Pole Vaulting)
4.6 Room 7 - Charge Attack Tutorial
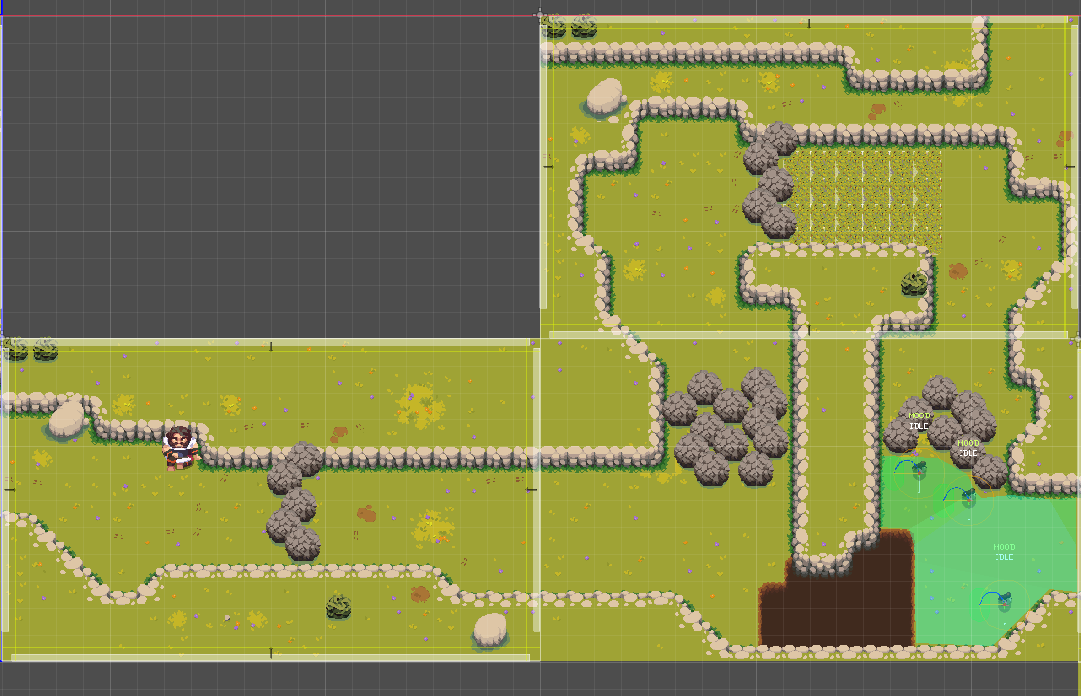
Player meets Torion and is required to use the new skill to destroy the Breakable Rocks that stand in his path.
** Cutscene Notes **
The Room layout can be molded in order to better display this cutscene. The only points that cannot be changed is the number and position of the room's exit points.
Setup
Position of actors:
- Torion
Position of Triggers:
- Trigger by the left (on enter, once per game trigger)
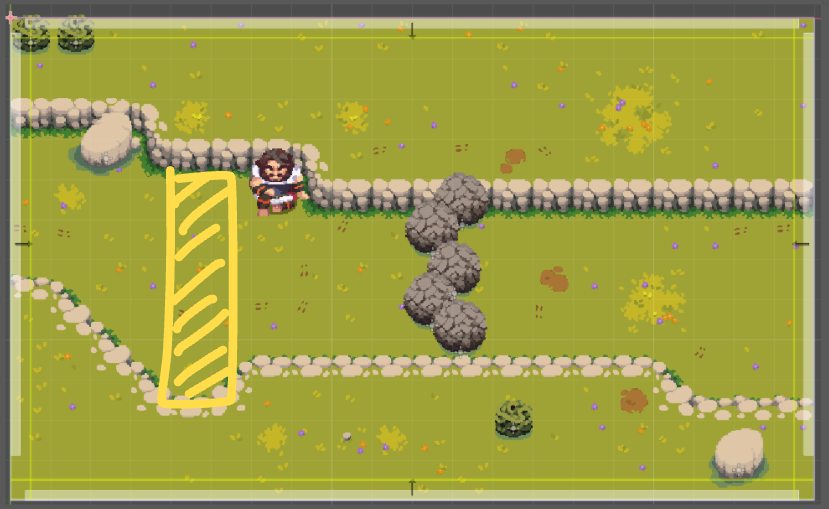
Scene Start
Adira Approaches Torion.
Dialogue Starts

Charge Attack position
Adira positions herself in front of the rocks.
Torion prompts the player about how to input the Spear Charge Attack.
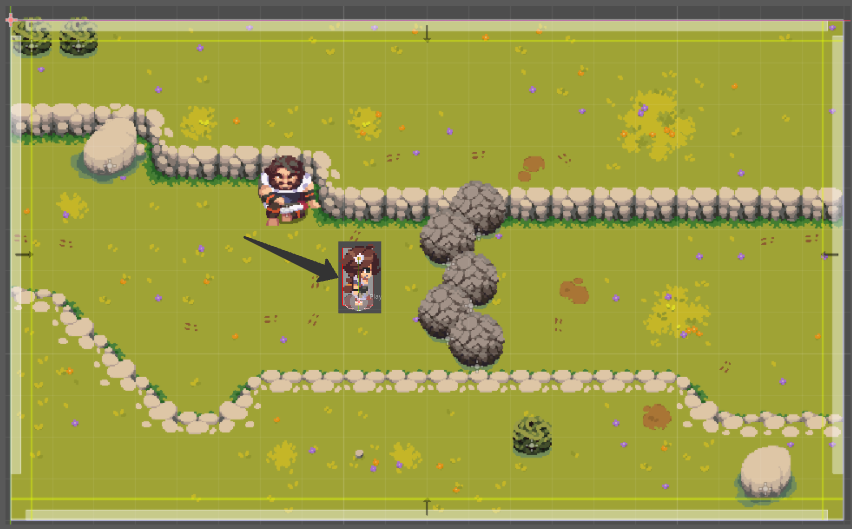
Aftermath
Once Adira Destroys the rocks, Torion says something and possibly moves towards the next room.
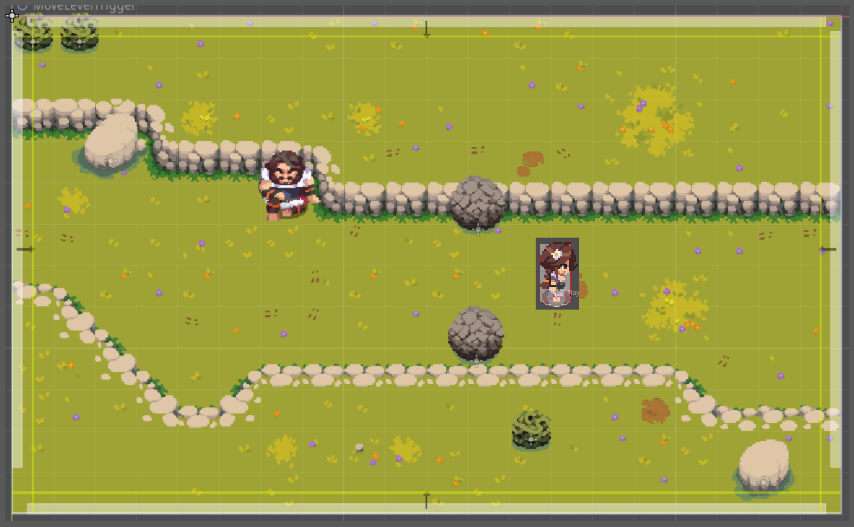
4.7 Room 8 - Rest Area
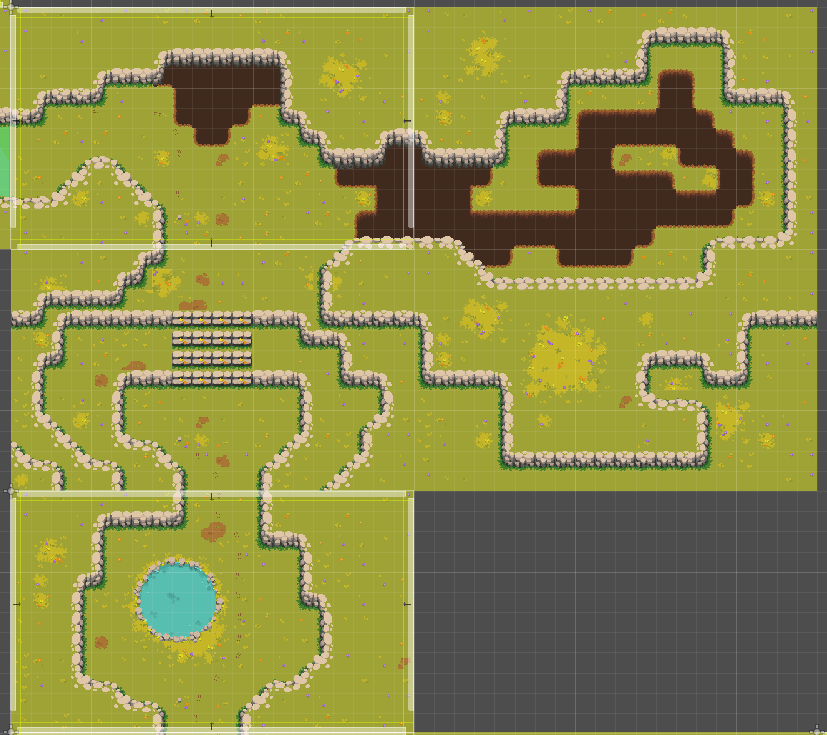
Player can rest and heal here. Player must regain his strength before facing the next part of the level.
4.8 Room 9 - Ranged Enemy Introduction
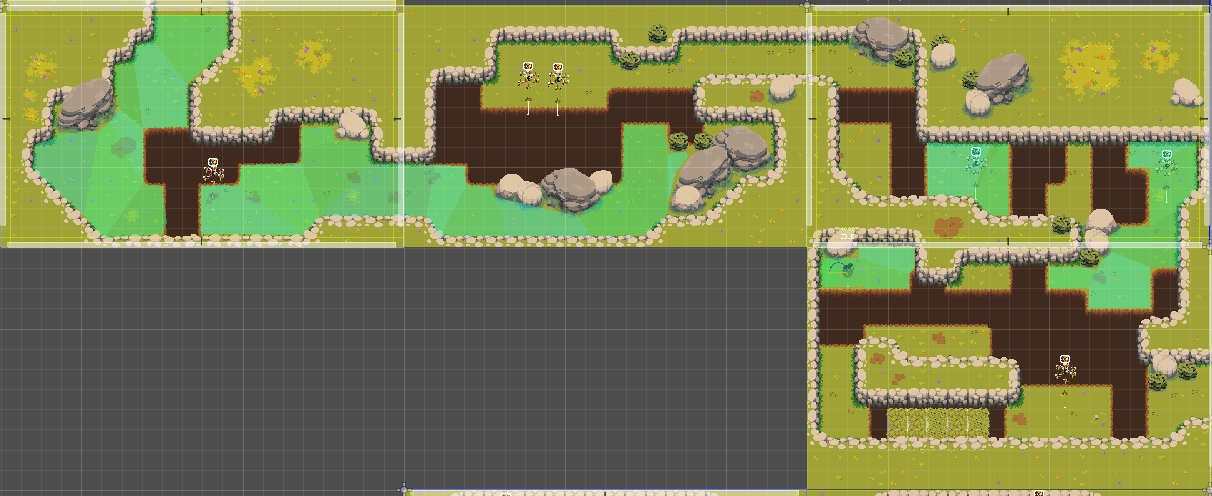
A controlled environment created for the introduction of a new enemy - BeeSwarm.
This new enemy will then be the focus of this whole area and slowly combined with other aspects that the player is already familiar:
- combat solo
- multiple instances
- platforming
- breakable floor
- combined with melee enemies
- bigger rooms, will attack outside of camera view
- all of the above
4.9 Room 10 - Blocked Pathway, Rabbit Tracks
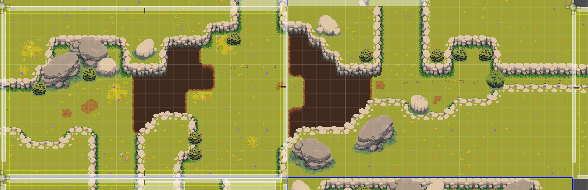
Upon reaching this room, the player must realise that the path to the rabbit is now blocked and he must find a way to reach it.
Due to the presence of a big pitfall, the player must move towards the south path.
4.10 Room 11 - South Branch - Arenas / Combat
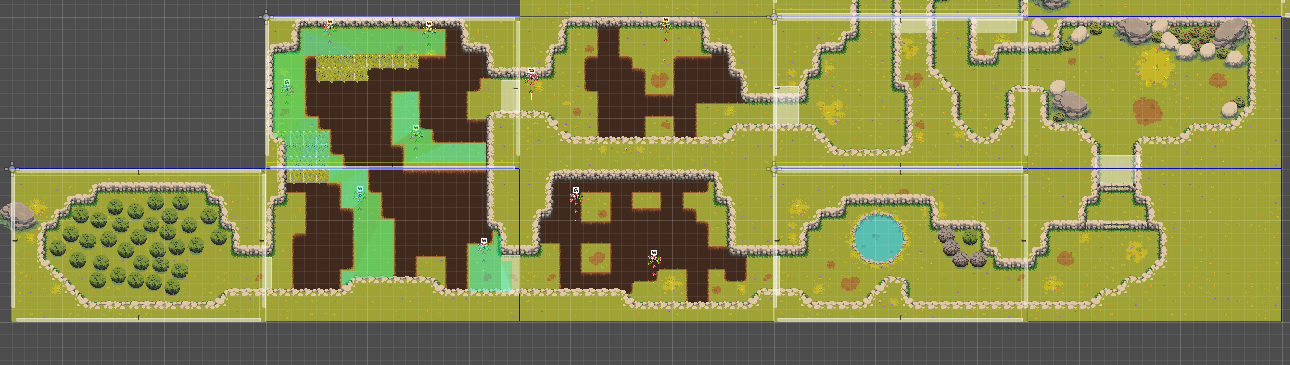
Upon reaching the first room, the objective must be clear (he can see the way to clear the blocked path in this very first room, but it's impossible to access.)
Big Room: Multiples ranged enemies combined with platforming. Make use of camera restrictions to increase the intensity of the challenge.
Secret Room: The player can reach this room if he pays close attention to a small / secluded entrance in the Big Room.
Safe Room: Adira can heal here after the big room.
Arena: First instance where Ranged enemy will be paired with previous enemies.
Usage must be divided into multiple waves and while keep the challenge interesting and somewhat tactical. (ex: multiples ranged across the room / followed by melees in front of ranged.)
After defeating the arena, the player is now free to collect the key item / unblock the main path.
4.10 Room 11 - North Branch - Puzzle Room
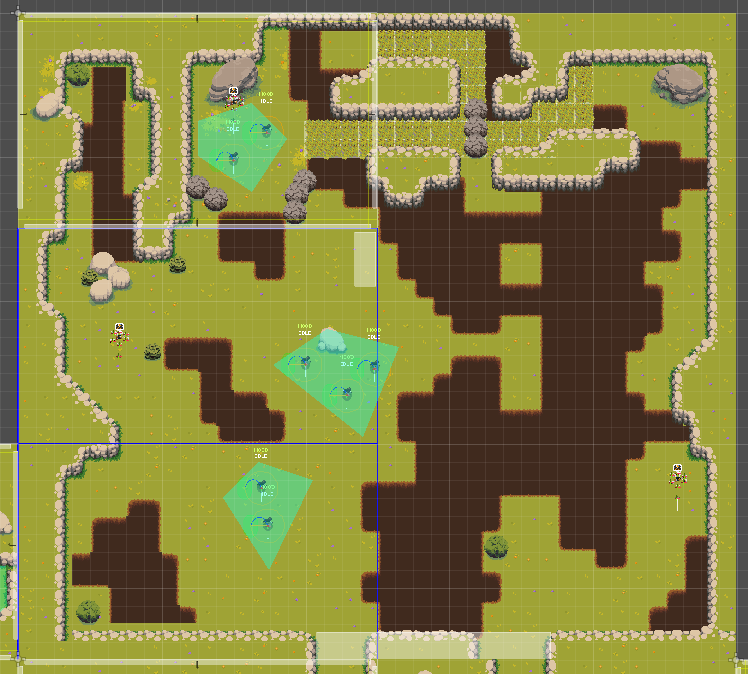
Using the Breakable walls, Adira must find a way through a challenge that combines leaf carpet and breakable rocks.
4.11 Room 12 - Torion Battle
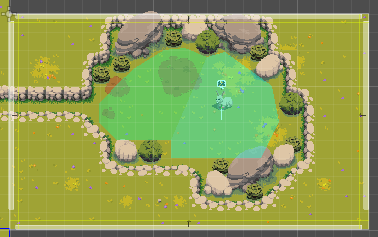
Adira meets torion one last time.
A scene happens where the conclusion is Adira Fighting Torion.
** Cutscene Notes - Before battle **
The Room layout will probably be updated in the future to better improve the gameplay depending on changes made to Torion's challenge and stats.
Setup
Position of actors:
- Torion
Position of Triggers:
- Trigger by the left (on enter, once per game trigger)
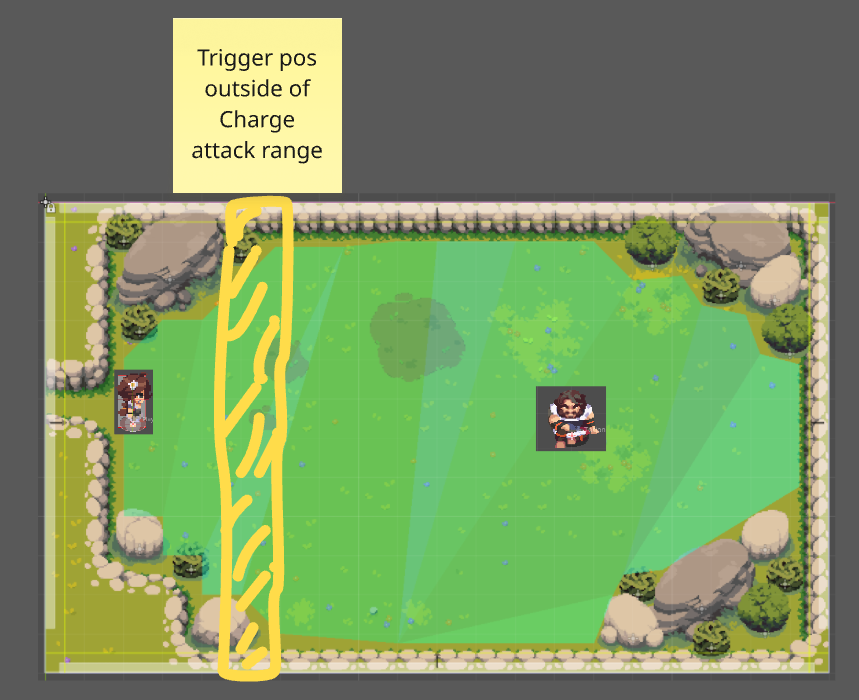
Scene Start
Once the player touches the invisible trigger, the player loses control of character and the cutscene starts.
Adira Approaches Torion.
Dialogue Starts
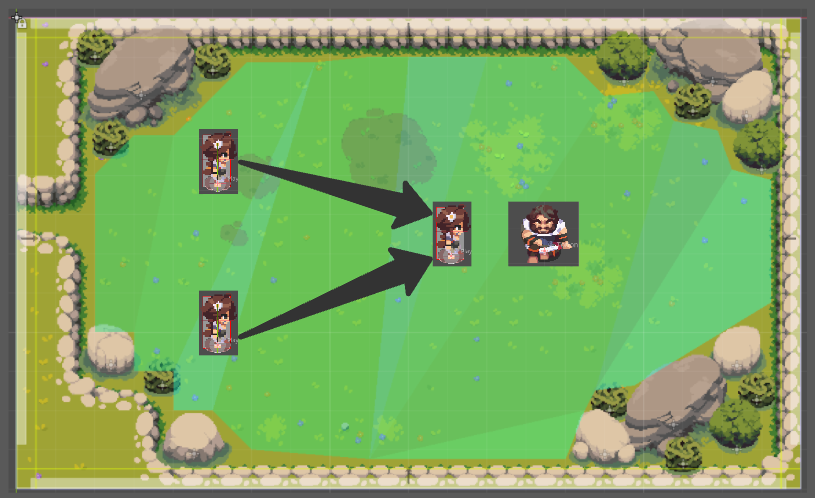
Torion stands up, ready for battle
Dialogue may continue or not, the moment where he stands up and presents his spear must be aligned with the dialogue context.
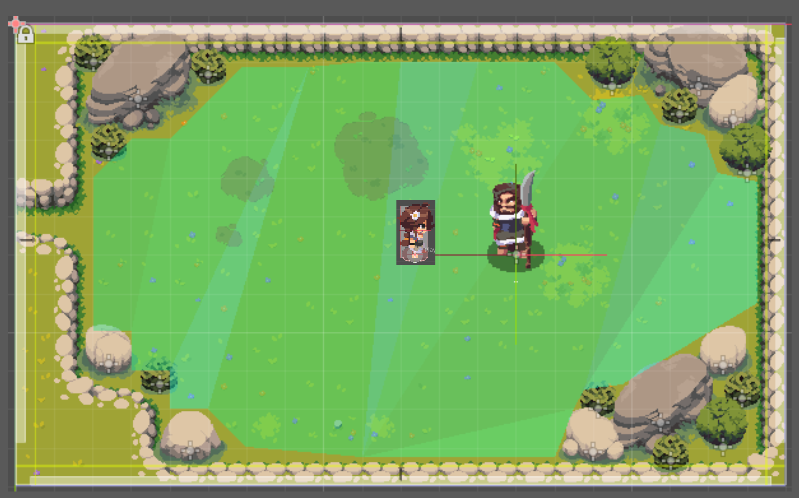
Adira steps back
Both characters are now centralized in the screen. A final Dialogue is said before the battle starts.
If the player must be victorious: Setup flag so the scene wont repeat in this savefile again. ( in case the player must repeat the battle )
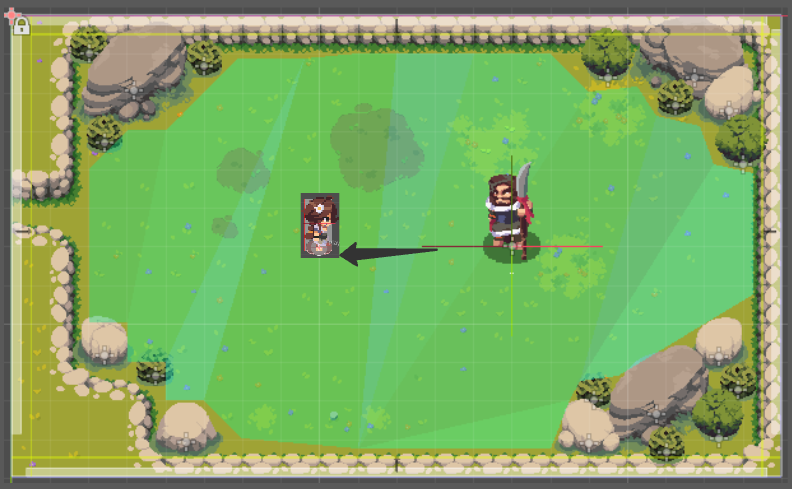
Once the battle is over, a final cutscene is initiated.
** Cutscene Notes - After Battle **
Torion is beaten
Wherever Torion is defeated, the game stops, player loses control and both characters reposition to this exact stations.
Dialogue Starts once both are in position.
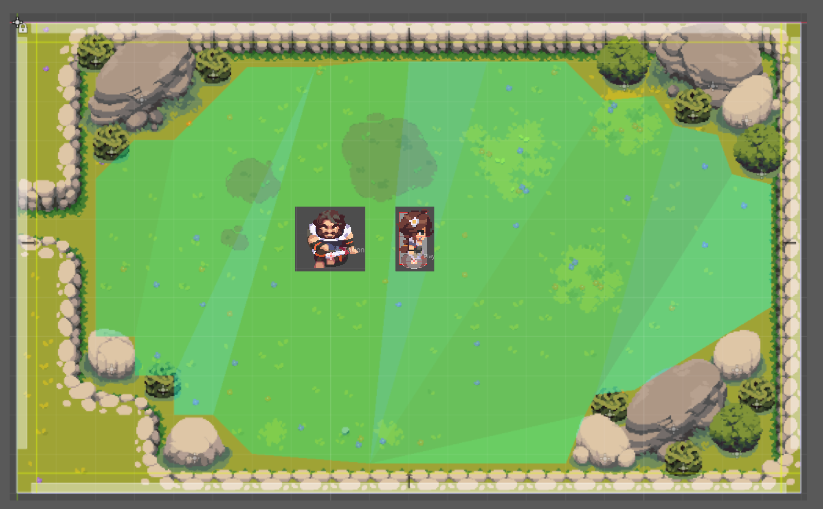
Torion flees
Torion says something and Leaves the area, saying he will return to the camp
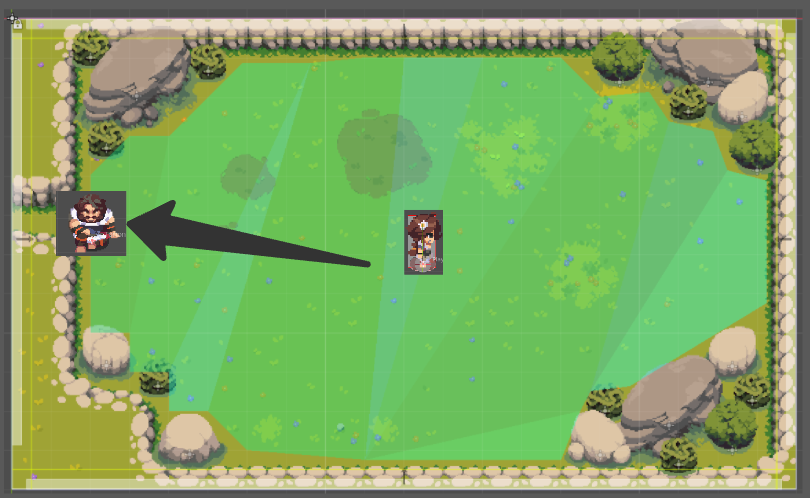
Adira sets her new goal
Adira says that she will still hunt the rabbit before returning to the camp.
Post Scene setup
DEMO:
Fade to black, post content screen and information. ( thanks for playing, wishlist, patreon promo, etc )
Game: The player regains control of the character. An invisible trigger is placed by the left. ( repeatable scene , adira says that she must hunt the rabbit and returns to the initial cutscene position )
4.12 Rabbit Lair Entrance
Not developed
Adira reaches the entrance to the Rabbit's Lair.
There shall be a transition between areas: Moorlands tileset → Cave Tileset.
Content shall be a combination of everything shown to the player so far.
Charge attack + Ranged Enemies + Melee Enemies + Platforming in different combinations and scaling difficulty.
Also, due to the cavernous nature, the level design can be more open with different available routes to reach the goal.
4.13 Rabbit Battle
Not developed TBD
4.14 Adira Returns to Camp
Adira returns to the campsite, now set ablaze.
Torion is gone and Adira must run away from possible invaders.
Chapter 3
Work in Progress
Chapter 4
Work in Progress
Chapter [Chapter Number]: [Chapter Title]
1. Overview
Main Objective
- Define the primary goal for the player in this chapter. Is it combat-focused, exploration-driven, or a blend of both?
Tone and Atmosphere
- Describe the mood and atmosphere, focusing on the intensity and excitement typical of action-adventure games. Consider how these elements evolve throughout the chapter.
Action Set-Pieces
- Outline any major action sequences or set-pieces that are central to this chapter.
2. Environment Design
Setting
- Describe the dynamic locations where the action unfolds. Include details like terrain (e.g., rugged mountains, dense urban environments), architecture (e.g., ancient ruins), and overall aesthetic (e.g., gritty realism, stylized fantasy).
Key Areas
- List and describe critical locations within the level (e.g., combat arenas, hidden caves, chase sequences). Consider how each area supports the genre's gameplay.
Lighting and Color Scheme
- Describe how lighting and color schemes are used to heighten tension, guide the player, and create contrast between exploration and action scenes.
3. Gameplay Mechanics
Core Mechanics
- List and describe the core gameplay mechanics, such as combat systems (melee, ranged, combo systems), traversal (climbing, jumping, swinging), and interaction with the environment.
Puzzles and Challenges
- Outline puzzles or environmental challenges, focusing on how they are integrated into action sequences (e.g., time-sensitive puzzles during combat, moveable blocks, keys for blocked passages).
Combat and Stealth Elements
- Detail the combat mechanics, including types of enemies, AI behavior, and any stealth options. Describe how these elements contribute to the chapter's pacing and excitement.
4. Narrative Integration
Dialogue and Interactions
- Describe significant character interactions or dialogue that shape the narrative and influence gameplay. Consider how these moments build tension or provide context for action sequences.
Cinematic Sequences
- List any cutscenes or quick-time events (QTEs) that are crucial for storytelling and immersion. Explain their role in connecting narrative and gameplay.
5. Level Flow
Player Path
- Describe the intended player path, focusing on how the level design encourages exploration while guiding players toward key action points. Mention any opportunities for non-linear exploration.
Pacing
- Discuss how the chapter balances high-intensity action with moments of exploration or story development. Consider how pacing influences player engagement.
Scripted Events
- Detail any scripted sequences (e.g., ambushes, chases) that are designed to surprise the player or escalate the action.
6. Visual and Audio Elements
Visual Cues
- Highlight any visual cues (e.g., fires, ambush, environmental hazards) that help guide the player or enhance the storytelling.
Sound Design
- Describe the soundscape, including how music, sound effects, and ambient sounds are used to heighten the tension, signal danger, or provide relief during quieter moments.
Key Assets
- List unique assets (e.g., destructible environments, iconic weapons) that are essential to this chapter's identity.
7. Challenges and Rewards
Obstacles
- Identify major obstacles (e.g., enemy waves, environmental hazards) that the player must overcome. Discuss how these challenges are designed to test the player’s skills.
Rewards
- Describe the rewards (e.g., weapon upgrades, narrative reveals) that players can earn by completing challenges or exploring hidden areas.
Secret Areas/Collectibles
- Note any hidden areas or collectibles that encourage exploration and add depth to the gameplay.
8. Additional Notes
Inspiration and References
- Mention any inspiration sources (e.g., movies, other games) or references that influenced the design of this chapter. Discuss how these inspirations are reflected in the level design.
Art Style References
- Include specific art style or thematic references that guided the visual design, focusing on how they support the action-adventure genre.
Miscellaneous
- Any other relevant information not covered above that contributes to the chapter’s design.
Architecture
Work in progress
Architecture
Work in progress
Technical Choices
Engine
This game currently use Godot LTS version: 3.5.3 for the following reasons:
- It has a lot of work implemented in the old tile system for the entire Game World.
- Godot Wwise integration isn't fully supported in Godot 4.X.
- My current observation is that Godot 4.X is stable but not commercial-proof (This will obviously come with time), but it feels premature to make the move yet.
- This project will continue to adapt to the new standards.
- The Tilemap/tileset has gone through quite a overhaul and when trying to upgrade recently as a test it broke a lot of the World/Levels/Rooms. This is simply too much work to carry out for now.
Coding Conventions
Godot Coding Standards
File Naming Conventions
General Guidelines
- All Godot script files should use the
.gdextension. - Use PascalCase for all filenames in
src/.- Scripts
- Resources
- Scenes
- Use
camel-case.mdfor documentation files.
Examples
- Script file:
Player.gd - Scene file:
Player.tscn - Resource file:
ItemResource.gd - Documentation file:
docs/markdown/dev_process/1-create-branch.md
Code Structure
Classes and Nodes
- Class names should be written in PascalCase.
- Node names should be written in PascalCase and should be descriptive.
# Good Example
class_name Player extends KinematicBody2D

# Bad Example
class_name player extends KinematicBody2D
Variables
- Use snake_case for variable names.
- Variables should be descriptive and clear in their purpose.
# Good Example
var player_speed = 10
var health_points = 100

# Bad Example
var PlayerSpeed = 10
var hp = 100
Constants
- Use ALL_CAPS with underscores for constants.
# Good Example
const MAX_HEALTH = 100

# Bad Example
const maxHealth = 100
Functions
- Use snake_case for function names.
- Function names should clearly describe their purpose.
# Good Example
func calculate_damage(amount):
    return amount * 2

# Bad Example
func CalculateDamage(amount):
    return amount * 2
Signals
- Use snake_case for signal names.
- Signals should be named to clearly indicate the event they represent.
# Good Example
signal health_changed(new_health)

# Bad Example
signal HealthChanged(new_health)
Commenting and Documentation
Inline Comments
- Use comments to explain the purpose of complex logic.
- Inline comments should be concise and relevant.
# Good Example
# Calculate the damage dealt to the player
func calculate_damage(amount):
    return amount * 2

# Bad Example
func calculate_damage(amount):
    # this function calculates damage
    return amount * 2
Documentation Comments
- Use multiline comments for documentation purposes at the beginning of scripts and functions.
- Documentation comments should provide an overview of the script or function's purpose and usage.
"""
Player.gd
This script handles the player's character behavior including movement and health.
"""

"""
calculate_damage(amount)
Calculates the damage dealt based on the input amount.
Parameters:
- amount (int): The base damage amount.

Returns:
- int: The calculated damage.
"""
func calculate_damage(amount):
    return amount * 2
Project Structure
Folders and Organization
- Organize scripts into folders based on their functionality.
- Use PascalCase for folder names.
Best Practices
Consistency
- Ensure consistent naming conventions and code structure throughout the project.
- Regularly review code to maintain adherence to these standards.
Readability
- Prioritize code readability and clarity over brevity.
- Use descriptive names and avoid overly complex logic within single functions.
Performance
- Be mindful of performance implications, especially in critical sections of the code.
- Optimize code where necessary without sacrificing readability.
Reusability
- Write modular and reusable code where possible.
- Avoid duplication by abstracting common functionality into reusable functions or scripts.
Conclusion
Following these coding standards will help maintain a clean, readable, and maintainable codebase for your Godot projects. Consistency in naming conventions, structure, and documentation will facilitate collaboration and improve the overall quality of the project.
Setup
Getting developers set up with the game locally and quickly is crucial as it directly impacts productivity and the development cycle's efficiency. A fast setup process reduces the time it takes for new team members to become productive, allowing them to start contributing to the project sooner.
It also minimizes potential frustrations that can arise from lengthy or complicated setup procedures, which can lead to delays and reduced motivation. Furthermore, having a local development environment enables developers to test changes, debug issues, and iterate on features in real-time, leading to faster development and quicker identification and resolution of bugs.
This guide has been put together to reduce the feedback loop and allow you to get up and running faster. If you notice any steps/pain points are missing, please update this documentation.
Starting point
1 - Github Access:
Please send me your Github Username so I can add you to the following repositories:
- https://github.com/smks/tribe-of-the-accord (Main Project)
- https://github.com/smks/tribe-of-the-accord-soundbanks (Where Wwise/Audio files live)
To get the game running you will need to first download the Wwise Binary and the Soundbank to play the audio otherwise the game will fail to run:
Follow the steps below where we download the files into the Main Project: https://github.com/smks/tribe-of-the-accord
2 - Download the Wwise binaries
These are the binaries that generate the necessary singletons when the Game runs. E.g. Wwise, AkEvent etc.
You will be able to download the binaries by:
- Navigating to the releases here https://github.com/smks/tribe-of-the-accord-soundbanks/releases
- Download
bin.zipfrom the latest binaries version e.g.WwiseBinaries_3.5.2_v2. (v1 has issues with Windows) - Inside this Zip you will have 3 platform binaries, but you only need one platform.
Files inside the zip needs to be copied to:
- If on Mac: move
osxtoaddons/wwise/bin/osx - If on Linux: move
linuxtoaddons/wwise/bin/linux - If on Windows: move
win64toaddons/wwise/bin/win64 - All other files can be placed in
addons/wwise/bin
3 - Download the SoundBank
This is an export provided by our Audio team that has a collection of audio events we need in the game.
Steps:
- Navigating to the releases here https://github.com/smks/tribe-of-the-accord-soundbanks/releases
- Download
GeneratedSoundbanks.zipfrom the latest version e.g.v1.1.0-light-demo. - Inside this Zip you will have 3 platform binaries, but you only need 1 platform.
- Mac +
Mac/directory. - Linux +
Linux/directory - Windows +
windows/directory - Wwise_IDs.h (Needed regardless of platform)
This needs to be copied to:
- Mac:
wwise/GeneratedSoundBanks/Mac - Linux:
wwise/GeneratedSoundBanks/Linux - Windows:
wwise/GeneratedSoundBanks/Windows wwise/GeneratedSoundBanks/wwise_ids.gd(Needed for all platforms)wwise/GeneratedSoundBanks/Wwise_IDs.h(Needed for all platforms)
Directories
assets/ Contains all imagery, animations, videos and JSON files needed for the game to function.
By default, you will be given dev 'watermarked' assets to protect copyright and publishing of the game.
Development assets are deployed to itch.io.
To get production commercial assets you will need access permissions to the production repository and use the prod assets. It should be assumed by developers and game designers working on the project that watermarked assets will be used. Either a release manager or the creator will need these assets to release the official game.
Ensure you close the Godot project first before running this so it can reimport images!
sh tools/bin/fetch-prod-assets.sh
Directory List
addons/Contains all third party code, by default this is added to source control (not ideal).
devlog/Contains snapshots of the game used for Marketing and other promotional purposes.
docs/Contains all of the documentation that is hosted on a unique URL per branch + the main URL hosted on Netlify.
helpers/Source code we ideally don't want in the production release, and is used for aiding debugging development + taking snapshots.
sandbox/is used to trial out certain features in scenes that are not part of the official codebase.
script_templates/Scripts to generate end to end tests.
src/Contains all of the production code.
test/Stores the maintest.tscnscene to run tests insrc/**.test.gd.
tools/contains Bash scripts and JavaScript scripts to help speed up development and be more efficient.
wwise/contains all SoundBanks for the game to work with sophisticated audio. Check outwwise/README.mdfor more information.
Tools to Install
Running these scripts are completely optional, you do NOT need to run them to get up and running as they can increase the size of your PR.
We use Godot Toolkit to run linting and check code complexity. You'll need Python and gdtoolkit installed before running any shell scripts below.
pip3 install 'gdtoolkit==3.*'
Run linting and apply it on project
sh tools/bin/lint-scripts-apply.sh
Run code complexity
sh tools/bin/lint-scripts-apply.sh
Create Scene test files
sh tools/bin/create-scene-test-files.sh
Create Script test files
sh tools/bin/create-script-test-files.sh
Testing
We use GUT to run tests.
Development process
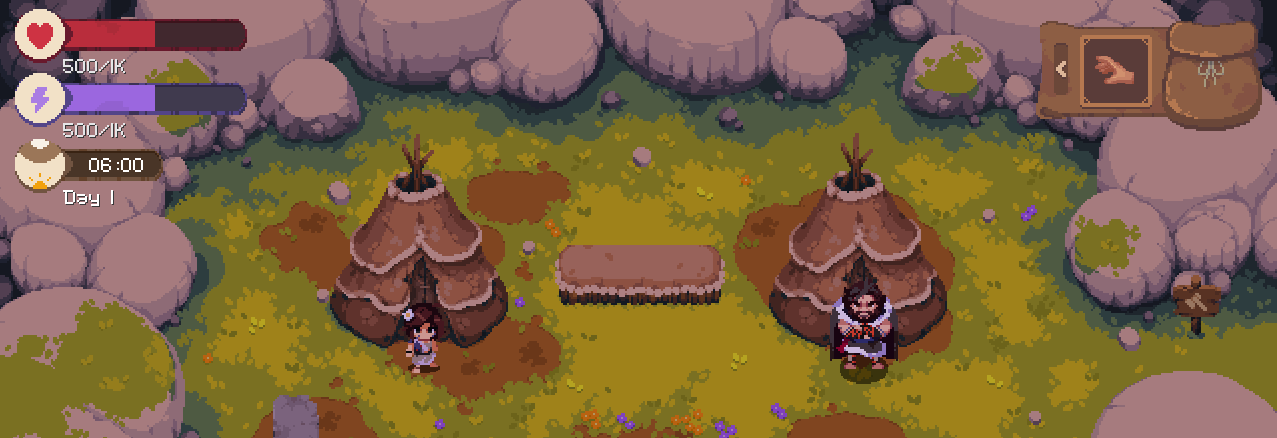
Welcome to the Tribe of the Accord video game GitHub project! Your contributions are crucial to the growth and improvement of the game. This guide will walk you through the process of raising a Pull Request (PR) for submitting your contributions to the project.
Development process
Step 1: Create a Branch
Before you make any changes, ensure you're working on a new branch off the latest main branch of the project. This keeps the main branch clean and your changes organized. This branch should follow the following convention:
Branch convention:
- Should use the Ticket ID (as a prefix) from the Notion ticket you are working on. This allows us to track it back to the project tracking tool.
- Use a small description to give an idea on what the branch is doing.
- Use a suffix to indicate if its a defect, feature or documentation.
All the above to be separated by a -. Example of it all together below.
git checkout -b [TOTA-XXX]-[small-description]-[feature/docs/defect]
Branch examples:
git checkout -b TOTA-349-demo-experience-feature
git checkout -b TOTA-364-gut-testing-docs
git checkout -b TOTA-363-new-day-defect
Development process
Step 2: Make Your Changes
With your branch created, you're ready to make the changes you wish to contribute. This could involve fixing bugs, adding new features, or updating documentation. Ensure your changes are concise and focused on a single area of improvement. Adding multiple changes increases the complexity of the work that has to be later reviewed. Keeping changes very focused on one thing makes it a lot easier for your reviewers.
Making Changes
-
Understand the scope: Before starting, clearly understand what needs to be changed or fixed. When you're addressing an issue from Notion, review the description and any related discussions to fully understand the problem or requirement. If you have any concerns or questions, please reach out to the project owner or the team to avoid delays. This will help avoid divergence or getting to deep into a solution that may not be the right one.
-
Work Incrementally: Make small, incremental changes. This not only makes your changes easier to review but also reduces the risk of introducing bugs. Test your changes locally as you go to ensure they work as expected.
-
Write Clear Code: Write code that is clean and easy to understand. Use meaningful variable and function names, and include comments where necessary to explain the purpose of complex or non-obvious code blocks.
-
Write Tests: You should write tests to cover the code you've written. See testing. These newly created tests should all pass when the feature/defect is ready for review.
Committing Your Changes
-
Commit Often: Commit your changes often with clear, concise commit messages. Each commit should represent a logical unit of work. This makes the history easier to understand and debug if something goes wrong.
git add . git commit -m "A descriptive message explaining the change" -
Write Good Commit Messages: A good commit message should summarize the change in the first line (50 characters or less), followed by a blank line and a more detailed explanation if necessary. Describe why the change is being made and how it addresses the issue.
-
Keep Commits Focused: Each commit should be focused on a single change. Avoid including unrelated changes in the same commit, as this makes it harder to understand the purpose of the commit and can complicate the review process.
-
Review Your Changes Before Pushing: Use
git diffor a graphical Git tool to review your changes before pushing them. This is a good opportunity to catch any mistakes and ensure that only the intended changes are included in the commit.git diff <file-name> -
Push Your Changes: Once you are satisfied with your changes and commits, push them to your branch on the remote repository.
git push origin <your-branch-name>
By following these guidelines, you ensure that your contributions are well-organized, easy to review, and free of unnecessary errors, making the development process smoother for everyone involved.
Development process
Step 3: Create the Pull Request
Navigate to the GitHub repository page for Tribe of the Accord, and you'll see an option to "Compare & pull request" for your branch. Click on it to begin creating your pull request.
Pull Request Template
The project provides a PR template to guide you through providing all necessary information about your changes. Here's how to use it:
- Description: Provide a brief overview of the changes or features introduced. Include specific file paths or components affected if possible.
- Related Issue(s): Link the Notion ticket this maps to. Every PR should have an associated Notion ticket from the Tribe of the Accord Kanban board. This helps with project tracking and makes sure that we are prioritising the right work.
- Type of Change: Indicate whether this is a bug fix, new feature, enhancement, documentation update, etc. using the labels.
- Testing Done: Describe any testing you performed to ensure the changes work as expected. This includes manual Smoke testing and GUT automated testing. You should ensure no regressions are introduced with your changes, and if so, create tests to cover it not happening again.
- Checklist: Sanity check of all the steps required, and acknowledgement that once the PR is merged to main it will get automatically tagged with a semantic version.
- Screenshots/GIFs/Videos: If applicable, add visuals to help showcase the changes.
- Additional Notes: Add any other details or notes helpful for reviewers.
- Reviewer(s): Tag specific individuals or teams for reviewing your PR if they should be aware of changes you are doing (e.g. crossover).
- Merge Readiness: Indicate if the PR is ready for merging or if any work remains to be done.
Ideally I'd use Draft Pull Requests, but this is an Enterprise feature and the cost isn't justified. What you can do instead if prefix your PR with 'WIP -' and remove once it is ready.
Development process
Step 4: Review process
Once your PR is submitted, the project's maintainers and other contributors may provide feedback. Be open to discussions and ready to make further adjustments based on their suggestions. To facilitate a smooth path to merging your PR, consider the following steps:
Responding to Feedback
-
Review Feedback Promptly: Regularly check the PR for feedback from the project maintainers and other contributors. Timely responses show that you are committed to contributing and help keep the project moving forward.
-
Engage in Discussions: If there are comments or questions about your changes, engage in the discussion. Provide clear, respectful responses to feedback and questions. If a comment requires a detailed explanation or a significant change, consider updating your PR with new commits that reflect these discussions.
-
Make Necessary Changes: If the feedback involves making changes to your submitted code, update your branch with these changes. This may involve fixing bugs, refactoring code, or adding additional tests. After making the changes, push them to the same branch to automatically update the PR.
Ensuring PR Readiness
-
PR Checklist: Many projects have a PR checklist in the description template. Ensure all items on this checklist are ticked off, indicating you have met all the necessary requirements, such as adding unit tests, documentation, or meeting coding standards.
-
Continuous Integration (CI) Checks: Ensure that all automated CI checks, such as build, tests, and code quality checks, pass successfully. A 'Green' status indicates that your changes meet the project's automated validation standards and are less likely to introduce bugs or regressions.
-
Approval Process: A PR should be approved by at least one other project member before it can be merged. This approval signifies that the code has been thoroughly reviewed and is considered good quality and in line with the project's goals.
-
Resolve Conversations: Make sure all discussion threads in the PR comments are resolved. This could mean addressing any remaining issues pointed out by reviewers or coming to a consensus on any discussion points. Marking comments as 'Resolved' indicates that you have addressed the feedback or that a discussion has reached a satisfactory conclusion.
Final Steps Before Merging
-
Update branch: Ensure your branch is up to date with the main branch. Only use
git rebaseif you know what is happening as it can cause bad side effects if done incorrectly. The safer approach is to Update the branch via the Github PR view. -
Final Review and Merge: Once all the above steps are completed, the maintainers will do a final review. If everything is in order, they will merge your PR into the main branch. Some projects may use automated tools to merge PRs once all criteria are met.
By actively engaging with the feedback process, fulfilling the checklist requirements, ensuring your PR is 'Green', and obtaining the necessary approvals, you significantly increase the chances of your contributions being seamlessly integrated into the project.
Development process
Step 5: Release!
After your PR has been reviewed and approved, one of the project maintainers will merge it into the main project. Congratulations! Merging does not need to happen by the Game creator and can happen from a fellow colleague. You've successfully contributed to the Tribe of the Accord video game.
Why are there so many steps?
Having many checklist items ticked before marking a PR as ready is important for several reasons:
- Ensures Quality: It verifies that the submission meets the project's quality standards, reducing the likelihood of introducing bugs or regressions.
- Facilitates Review: A PR that adheres to guidelines and passes all checks can be reviewed more efficiently, speeding up the integration process.
- Reduces Revisions: Completing the checklist minimizes the need for back-and-forth revisions, leading to a smoother development workflow.
- Maintains Stability: Ensuring tests pass and conflicts are resolved maintains the stability of the main branch, preventing disruptions for other contributors.
- Improves Documentation: Updated documentation helps maintain clarity about features and changes, aiding future development efforts.
- Enhances Collaboration: A thorough checklist encourages best practices, enhancing collaboration and knowledge sharing within the team.
For more detailed instructions on using Git and GitHub, refer to the GitHub documentation.
Thank you for contributing to the Tribe of the Accord project! Your efforts help make the game better for everyone.
Tribe of the Accord Game CI - GitHub Actions Workflow
This document provides an overview of the GitHub Actions workflow for the "Tribe of the Accord" game, explaining the purpose and steps of each job within the workflow. This workflow automates the process of testing, tagging, and publishing the game to Itch.io.
Workflow Overview
The workflow is triggered on:
- Merges to the
mainbranch. - Pull requests targeting the
mainbranch (But only runs tests)
The workflow includes three main jobs:
test- Using GUT tests to ensure our project has stability (This is run in PR branches)tag- To get a snapshot of the game, increment the game version and push a tag (Only done for merges to main)publish- We publish our game for each supported platform (windows, mac, linux) (Only done for merges to main)
Permissions
The workflow has write permissions for repository contents.
Environment Variables
The workflow sets several environment variables:
GODOT_VERSION: The version of Godot to use.EXPORT_NAME: The name of the exported game.SOUNDBANK_REPO_ASSET_URL: URL to fetch assets for Wwise-related assetsSOUNDBANK_ASSET: Soundbanks for all platformsWWISE_BINARIES_ASSET: Binaries for all platformsGAME_RELEASE_VERSION: Template version - 'latest'
Jobs
1. Test Job
Purpose: Run tests to ensure code quality before proceeding with tagging and publishing.
Runs on: ubuntu-latest
Container: Uses barichello/smks-ci:3.6 Docker image.
Steps:
- Checkout Repository: Checks out the repository using
actions/checkout@v2. - Print Directory Structure: Prints the directory structure for debugging purposes.
- Check Test Files: Runs a script to check for missing test files (
tools/bin/check-missing-tests.sh). (For visibility and not blocking) - Run Tests: Executes the tests using the Godot command line.
2. Tag Job
Purpose: Update the game version and tag the new version.
Dependencies: Requires the test job to succeed.
Runs on: ubuntu-latest
Conditions: Runs only on the main branch (github.ref == 'refs/heads/main').
Steps:
- Checkout Repository: Checks out the repository at the
mainbranch with a personal access token for authentication. - Update Version: Increments the patch version number in the
project.godotfile. - Commit and Tag: Commits the updated
project.godotfile and tags the new version. Pushes the changes and the new tag to the repository.
3. Publish Job
Purpose: Build the game for different platforms and publish the builds to itch.io.
Dependencies: Requires the tag job to succeed.
Runs on: ubuntu-latest
Container: Uses barichello/smks-ci:6 Docker image.
Steps:
- Checkout Repository: Checks out the repository using
actions/checkout@v2. - Install curl: Installs
curlfor downloading dependencies. - Install Butler: Installs
butler, a tool for uploading builds to itch.io. (Moved up because if itch goes down, we don't build all the platform games or download big files). - Download Wwise Binaries: Downloads and unzips Wwise binaries.
- Download Soundbanks: Downloads and unzips soundbanks for each platform (debug and release versions).
- Setup Godot Templates: Sets up Godot export templates. (These are used to generate the games)
- Mac Build: Builds the game for macOS.
- Windows Build: Builds the game for Windows.
- Linux Build: Builds the game for Linux.
- Deploy Mac to itch.io: Deploys the macOS build to itch.io using the
butlertool. - Deploy Windows to itch.io: Deploys the Windows build to itch.io using the
butlertool. - Deploy Linux to itch.io: Deploys the Linux build to itch.io using the
butlertool. - Get Release Commit: Grab the latest commit message (excluding the last commit that upgrades the project.godot version)
- Post Discord Game Release: We want to notify the teams that a new game version has been released
Secrets
The workflow uses the following secrets for authentication:
PAT_TOKEN: Personal Access Token for pushing commits and tags.BUTLER_API_KEY: API key for uploading builds to itch.io.ITCHIO_USERNAME: itch.io username.ITCHIO_GAME: itch.io game identifier.ITCHIO_PASSWORD: itch.io game password. Needed to access restricted itch page and enter password.
Conclusion
This GitHub Actions workflow automates the process of testing, tagging, and publishing the "Tribe of the Accord" game. By following the steps outlined in each job, the workflow ensures that the game is thoroughly tested, versioned correctly, and published to itch.io with minimal manual intervention.
Testing
Properly structured and thorough testing is a cornerstone of stable software development. By following this guide, you can ensure that Tribe of the Accord remains robust and maintainable as it grows in complexity.
Why do we do write tests?
- Error Detection: Quickly identifies bugs and issues in our code, ensuring they are fixed early in the development cycle.
- Code Quality: Encourages better coding practices, leading to cleaner, more maintainable code.
- Refactoring Confidence: Allows us to refactor and improve our code without fear of breaking existing functionality.
- Regression Prevention: Helps prevent regressions by ensuring that new changes don't adversely affect existing functionality.
- Documentation: Acts as a form of documentation, demonstrating how the system is supposed to work.
- Development Efficiency: Speeds up the development process by reducing the time spent on manual testing.
- Team Collaboration: Facilitates better collaboration in team environments by ensuring code changes are tested and functional.
- Integration Testing: Supports testing the integration of different game components and systems.
- Continuous Integration: Integrates easily with CI/CD pipelines, ensuring tests are run automatically for every code change. If you break something, we capture it before merging and impacting others.
- Feedback Loop: Provides a fast feedback loop to developers about the impact of their changes.
Running Tests
Overview
Testing in Godot using the GUT (Godot Unit Testing) framework can be done in multiple ways: through the Godot editor using the tests.tscn scene or the GUT tab, and via command line locally and through Github Action/CI. Ensuring that tests pass is mandatory before merging changes into the main branch.
Running Tests in the Godot Editor
Using tests.tscn
-
Open the Test Scene: Navigate to and open the
tests.tscnfile in your Godot project. This scene is specifically set up to run your GUT tests. -
Run the Scene: Press the "Play Scene" button (F6 by default) to execute the tests. GUT will run all the tests in your project and display the results in the output console.

Using the GUT Tab
-
Open the GUT Tab: In the Godot editor, find the GUT tab, usually located at the bottom panel alongside the "Output" and "Debugger" tabs.
-
Run the Tests: Click on the "Run" button in the GUT tab. This will execute all your tests and show the results directly in the GUT panel.

Running Tests via Command Line for CI
For continuous integration, tests are run automatically whenever a pull request (PR) is made against the main branch. The tests need to pass for the PR to be eligible for merging. The command used in the CI environment is as follows in the root of the project, you can run it too on unix-like terminals:
godot --path $PWD -s addons/gut/gut_cmdln.gd -glog=1
This same script is run as part of the CI build step, as shown below.

Defined in this main.yml file if you're wondering where:
.github/workflows/main.yml
Conclusion
Running GUT tests regularly, both locally in the Godot editor and through CI in the development workflow, is crucial for maintaining high-quality, stable code. Ensure that your tests cover the necessary aspects of your game to leverage the full benefits of automated testing.
Writing Tests
Introduction
This guide provides instructions on how to write tests using the GUT (Godot Unit Testing) library for Tribe of the Accord. Tests are crucial for ensuring that the game's functionality works as expected and remains stable throughout development. Especially when it becomes a commercially maintained project and capturing regressions is done before an official release.
- Library used - https://github.com/bitwes/Gut (Version 7+) Version 9 is for Godot 4+
- Documentation - https://gut.readthedocs.io/en/godot_3x
Test File Structure
To maintain consistency and ensure every source file is tested, our project should have a test file for each source file. Test files are named similarly to their corresponding source files but with a .test.gd extension.
- Source file:
src/Player.gd - Test file:
src/Player.test.gd
Test files in our project are created based on the type of asset you are testing: Scripts or Scenes. Here's how you should structure your test files for each type:
Manual Approach
- Create a new test file for your source file. E.g.
src/Player.test.gd. - Copy the snippet below (Script or Scene templates below).
- Replace
_FullID.gdto the full path e.g.src/Player.gd - Replace
_ID.gdto the full path e.g.Player.gd
For a Script/Reference/Resource file
extends "res://addons/gut/test.gd"

var _Script = load("res://_FullID.gd")
var obj

func before_each():
    obj = _Script.new()

func after_each():
    obj.free()
    obj = null

func after_all() -> void:
    _Script = null

func test_main():
    pending('Need to write test for "_ID"')
For a Scene file
extends "res://addons/gut/test.gd"

const SCENE_PATH = "res://_FullID.tscn"
var scene
var obj = null
var expected_methods = ["_ready"]

func before_each():
    scene = load(SCENE_PATH).instance()
    add_child(scene)

func after_each():
    remove_child(scene)
    scene.free()

func test_main():
    pending('Need to write a test for "_ID"')
We default to a pending function, in the test run it will simply skip the test until you are ready to write some tests.
Generating Test Files
Use the following bash scripts to automatically generate test files for missing tests using Bash scripts found in tools/bin:
-
For Scene files:
sh tools/bin/create-scene-test-files.sh -
For Script and Resource files:
sh tools/bin/create-script-test-files.sh
The downside to this is it will create all test files that are missing in the entire project, but its fine as they are all set as pending tests so it won't impact you unless you add tests to a specific file and they fail.
Writing Your Tests
When you test file has been either manually created or you used the script to generate it for you (which is a lot easier), you are ready to write some tests.
Use assertions to validate the behavior of the object or scene under test. For example:
func test_player_movement():
    obj.move(10, 0)  # Assuming `move` is a method in the Player script
    assert_eq(obj.position.x, 10, "Player should move 10 units along the x-axis")
For some examples of what sort of tests to write, visit this page.
Testing Examples
Here are some arbitrary examples of GUT tests in a Godot project that illustrate the benefits of using automated testing:
Unit Testing
1. Testing Player Movement
This test ensures that the player moves correctly when a move function is called, showcasing error detection and regression prevention.
func test_player_moves_right():
    var player = Player.new()
    var initial_position = player.position
    player.move_right()
    assert_eq(player.position.x, initial_position.x + 1, "Player should move 1 unit to the right")
2. Testing Scene Loading
This test verifies that a scene is loaded properly, demonstrating the benefit of integration testing.
func test_main_menu_loads():
    var main_menu_scene = load("res://scenes/MainMenu.tscn").instance()
    add_child(main_menu_scene)
    assert_not_null(main_menu_scene, "Main Menu scene should be loaded and not null")
3. Testing Health System
This test checks the player’s health decrement function, illustrating code quality and documentation benefits.
func test_health_decrements_correctly():
    var player = Player.new()
    var initial_health = player.health
    player.take_damage(10)
    assert_eq(player.health, initial_health - 10, "Health should decrement by 10")
4. Testing Game Over Condition
This test asserts that the game over condition triggers correctly, aiding in development efficiency.
func test_game_over_triggered_on_zero_health():
    var player = Player.new()
    player.health = 1
    player.take_damage(1)
    assert_true(player.is_game_over(), "Game over should be triggered when health reaches zero")
5. Testing Inventory Management
This test ensures that inventory management works as expected, which is crucial for team collaboration and maintaining code quality.
func test_add_item_to_inventory():
    var inventory = Inventory.new()
    var item = Item.new("Potion")
    inventory.add_item(item)
    assert_true(inventory.has_item("Potion"), "Inventory should contain the added item")
These examples demonstrate how GUT tests in Godot can help detect errors, improve code quality, support refactoring, prevent regressions, serve as documentation, enhance development efficiency, facilitate team collaboration, enable integration testing, integrate with CI/CD, and provide a fast feedback loop.
E2e (End to end) Testing
For Godot, E2E tests typically run within the Godot environment, executing scenarios that a player or user might experience when using the game or application. This includes navigating through menus, interacting with game objects, triggering events, and verifying the outcomes of these actions. The goal is to ensure that all parts of the application work together as expected in a real-world scenario.
In E2E testing with GUT, the test cases would automate actions like clicking buttons, moving characters, entering text, and then validate the responses of the application, such as changing scenes, updating the game state, or saving data. These tests can catch issues that might not be evident in unit or integration tests, such as problems with user flows, graphical rendering, input handling, and overall behavior of the game or application.
Some examples of e2e tests:
- Running through the entire Quest 1 and validating all steps between - Example:
src/Quests/Resources/Torion/001_quench_the_thirst.test.off.gd - Starting the game and ensuring you can get to the main menu to play a new game.
- Going through a cutscene and can continue to the next part of the game.
Game Builds
Here's how we manage our game builds:
Development Builds
Development builds of our games are published on itch.io. These builds are updated frequently and allow us to gather feedback and make improvements based on community input. By accessing our dev builds on itch.io, you can get an early look at new features and changes before they are finalized.
Production Builds
Production builds, which are stable and polished versions of our games, are published on Steam. These builds are meant for a wider audience and provide a more refined gaming experience.
In the future, we plan to expand our production builds to other platforms, ensuring that our games reach as many players as possible.
Thank you for supporting our development journey. Your feedback is invaluable as we strive to create the best gaming experience possible.
Development Builds
Welcome to the development/demo preview guide for Tribe of the Accord!
Follow the steps below to access and download the demo build from itch.io.
Step 1: Visit the Itch.io Page
Go to the Tribe of the Accord itch.io page.
Step 2: Obtain the Password
To access the demo builds, you will need a password. This password can be found in the #game-releases channel on our Discord server.
- Join our Discord server.
- Navigate to the
#game-releaseschannel. - Note down the password provided in the channel.
Step 3: Access the Downloads Page
On the itch.io page, you will be prompted to enter the password to access the downloads section. Enter the password obtained from the Discord channel.
Step 4: Choose Your Build
We have three builds available for different operating systems:
- Linux
- Mac
- Windows
Select and download the appropriate build for your operating system. There is currently 2 Mac builds, choose the latest published version as the other one I cannot remove.
Enjoy the Demo!
Once you have downloaded the build, you can install and start playing Tribe of the Accord. We hope you enjoy the demo and look forward to your feedback!
For any issues or support, please reach out on our Discord server. Links can be found here
Happy gaming!
Production Builds
Process on Steam TBC.
Building the reference
Build Godot Resources
To make the player's animated_sprite, I needed to convert a large spritesheet into an animated sprite, with each animation split up.
It was much harder than I expected. Below is the code I did to create godot resources by code.
Getting the frames of each animation to create a separate spritesheet
extends AnimationPlayer


const PATH = "res://assets/Player/Sheets/"

# The sprite that contains the spritesheet
onready var chara := $"../Viewport/Character" as Sprite

var anim_names = get_animation_list()

for anim_name in anim_names:
	var anim = get_animation(anim_name)
	var idx = anim.find_track("Viewport/Character:frame")
	var num = anim.track_get_key_count(idx)
	var images: Array = []

	for i in range(0, num):
		var value = anim.track_get_key_value(idx, i)
		var pos = Vector2((value % chara.hframes) * 64, (value / chara.hframes) * 64)
		var size = Vector2.ONE * 64
		var rec2 = Rect2(pos, size)
		var new_image = chara.texture.get_data().get_rect(rec2)

		images.append(new_image)


	var final_image := Image.new()
	final_image.crop(images.size() * 64, 64)
	final_image.convert(Image.FORMAT_RGBA8)
	final_image.fill(Color.transparent)

	for i in images.size():
		var image = images[i]
		var rec2 = Rect2(Vector2.ZERO, Vector2.ONE * 64)
		var dest = Vector2(i * 64, 0)

		final_image.blit_rect(image, rec2, dest)

	var _err = final_image.save_png(PATH + anim_name + ".png")
Adding the spritesheets to a animated sprite
func _create_player_sprite_frames():
	for file_name in dir_contents(PATH):
		file_name = file_name.get_basename()
		frames.add_animation(file_name)

		var image := Image.new()
		image.convert(Image.FORMAT_RGBA8)
		var _err := image.load(PATH + file_name + ".png")

		var image_texture := ImageTexture.new()
		image_texture.create_from_image(image, 0)

		var size = image.get_size().x / 64

		for i in size:
			var atlas_texture := AtlasTexture.new()
			atlas_texture.atlas = image_texture
			atlas_texture.region = Rect2(i * 64, 0, 64, 64)

			frames.add_frame(file_name, atlas_texture, i)

	# The images are saved in raw in the file. it is BAD!
	ResourceSaver.save("res://assets/Player/PlayerSpriteFrames.tres", frames)


func dir_contents(path) -> Array:
	# Code is in the Godot docs of the File class
Convert the ressources images into a external resources
extends AnimatedSprite

const PATH := "res://assets/Player/Sheets/"
const PATH_RESOURCE := "res://assets/Player/PlayerSpriteFrames.tres"

var names = # Array of the names of every animation

func _remove_sub_ressource():
	var file := File.new()
	var _e := file.open(PATH_RESOURCE, File.READ)
	var txt := file.get_as_text(true)
	var txts := txt.split("\n")
	var size := txts.size()

	for i in range(size - 1, -1, -1):
		if txts[i].find("[sub_resource type=\"Image\" id=") != -1:
			for y in 8:
				txts.remove(i)

	file.close()
	_e = file.open(PATH3, File.WRITE)
	file.store_string(txts.join("\n"))

func _add_ext_resource():
	var file := File.new()
	var _e := file.open(PATH3, File.READ)
	var txt := file.get_as_text(true)
	var txts := txt.split("\n")
	var size := txts.size()
	var a = 0

	for i in range(size - 1, -1, -1):
		if txts[i].find("[sub_resource type=\"ImageTexture\" id=") != -1:
			var value = int(txts[i].get_slice("=", 2).get_slice("]", 0))

			for y in 4:
				txts.remove(i)

			txts[i] = "[ext_resource path=\"res://assets/Player/Sheets/%s.png\" type=\"Texture\" id=%s]" % [names[a], value]
			a += 1

	file.close()
	_e = file.open(PATH4, File.WRITE)
	file.store_string(txts.join("\n"))
Add a track in the animation player
for anim_name in anim_names:
	var anim := get_animation(anim_name)
	var idx := anim.add_track(TRACK_METHOD)

	anim.track_insert_key(idx, 0, {
			"args": [ anim_name ],
			"method": "change_spritesheet"
		})
	anim.track_set_path(idx, NodePath("Viewport/AnimatedSprite"))
Reference Template
(This will be done by code, use the same specifications as Godot 4 documentation in comments)
Reference
Explains how a script's functions work and how they should be used.
Inheritance
If the script extends from another (and why)
Function
Fields
Changelog
Meant to show changes made to the technical document, not the game.
> The date is written inYYYY/MM/DD.
The version follows semantic versioning:.
MAJOR version if you are making major overhaul.
MINOR version if you add a new page.
PATCH version if you are modifying an existing page.
| Author | Date | Version | Modifications |
|---|---|---|---|
| Smks | 2025/06/08 | 0.43.0 | Added pitch section |
| Smks | 2025/05/11 | 0.42.0 | Added narrative section |
| Smks | 2025/03/01 | 0.41.0 | Added story segment in introduction |
| Smks | 2025/01/11 | 0.40.0 | Updated chapter 1 level design. |
| Phnix | 2024/11/14 | 0.39.0 | Added a page: development\features\levels\stairs.md |
| Phnix | 2024/11/11 | 0.38.0 | Added a page: development\features\levels\walls.md |
| Phnix | 2024/11/11 | 0.37.0 | Added a page: development\features\levels\pits.md |
| Smks | 2024/10/24 | 0.36.0 | Wwise Refactor and Audio documentation |
| Ace | 2024/10/24 | 0.35.0 | Enemy Refactor (Rabbit, Snake, Bee Swarm) GDD |
| Ace | 2024/10/17 | 0.34.0 | Items V2 GDD |
| Smks | 2024/10/03 | 0.33.0 | Level design - getting started/guide |
| Smks | 2024/09/20 | 0.32.0 | Started level design docs |
| Smks | 2024/09/18 | 0.32.0 | Narrative updates Chapter 1 + 2 |
| Acetrologer | 2024/09/17 | 0.31.0 | Introduction to the game |
| Smks | 2024/09/17 | 0.30.0 | UX/UI principles and colour theme |
| eh_jogos | 2024/09/07 | 0.29.0 | Adds "Aim Guide and Aim Assist" page |
| Smks | 2024/09/07 | 0.28.0 | Updated controls.md so its ready for implementation 2.0 |
| Smks | 2024/09/01 | 0.27.0 | Documentation overhaul, based on different specialist areas |
| eh_jogos | 2024/08/07 | 0.26.3 | Added instructions for placing ponds in NxN levels in "Multi Screen Levels" page. |
| Shoyguer | 2024/08/07 | 0.26.2 | Fixed Controls GDD and Gameplay > Controls, according to feedback. |
| Smks | 2024/08/04 | 0.26.1 | Fixed MDBook plugins + new Flowchart Page using Mermaid.js. |
| Smks | 2024/08/04 | 0.26.0 | Added MDBook plugins + new Preview Page in the intros. |
| Smks | 2024/08/03 | 0.25.0 | Added Narrative GDD Updates #2 |
| Shoyguer | 2024/08/02 | 0.24.0 | Added GDD Controls & updated the Control Remap. |
| eh_jogos | 2024/07/29 | 0.23.0 | Added Multi Screen levels page, updated GameplayCamera page, moved testing_caves.md and levels.md and related images to a levels folder outside of features to reflect the new summary structure |
| Smks | 2024/07/27 | 0.22.1 | Added GDD Weapon documentation v2 |
| Smks | 2024/07/26 | 0.22.0 | Added GDD Weapon documentation |
| Smks | 2024/07/20 | 0.21.0 | Added GDD documents and general cleanup of documentation to be better structured. |
| Smks | 2024/07/19 | 0.20.0 | Updated README to avoid confusion on mdBook. |
| Shoyguer | 2024/07/12 | 0.19.0 | Enemy documentation changed, and everything related to enemy data and LoadDB was moved to other pages inside "database". |
| eh_jogos | 2024/07/05 | 0.18.0 | Added Scripted Scenes, SpawnPosition and Notifications pages |
| Smks | 2024/06/30 | 0.17.3 | Updated binary asset reference |
| Shoyguer | 2024/06/26 | 0.17.2 | Added documentation on Enemy Attributes and Balance. Also added Shoyguer name to team.md file |
| Smks | 2024/05/27 | 0.17.1 | Patched documentation on how the new CI works |
| Smks | 2024/05/26 | 0.17.0 | Added documentation on how the new CI works |
| eh_jogos | 2024/05/01 | 0.16.0 | Added the pages: demo featyre tag, version label |
| Smks | 2024/04/21 | 0.15.1 | Added documentation on how to write GUT tests, and updated development process |
| Phnix | 2024/03/28 | 0.15.0 | Added a page: reference/build_godot_resources.md |
| Phnix | 2024/03/28 | 0.14.0 | Added a page explaining how the player's animated sprite works. |
| Smks | 2024/03/25 | 0.13.1 | Patched the how to raise a PR to include checklist steps and mention of incremental version rollout |
| eh_jogos | 2024/03/25 | 0.13.0 | Added the pages: Position and Sit Markers, CutsceneVignette, Changed GameplayCamera to be inside Entities in the SUMMARY |
| Smks | 2024/03/24 | 0.12.1 | Added Getting started - Raising a PR documentation |
| eh_jogos | 2024/03/06 | 0.12.0 | Added the pages: Part_Gameloop, CaveWarps and Testing Caves |
| Phnix | 2024/02/26 | 0.11.0 | Added the addon "Helper Panel" in the feature list |
| Smks | 2024/02/10 | 0.10.0 | Added new enemies in (Bison, Boar, Rabbit, Mosquito, Hornet) |
| Phnix | 2024/02/05 | 0.9.0 | Added Emote page in features |
| eh_jogos | 2024/01/27 | 0.7.1 | Added a paragraph for how to load save slots in save_game page |
| eh_jogos | 2024/01/24 | 0.7.0 | Added info on making huds transparent when player is under them |
| eh_jogos | 2024/01/24 | 0.6.1 | Updates to DebugMenu page |
| eh_jogos | 2024/01/24 | 0.6.0 | Added Gameplay Camera page in features |
| eh_jogos | 2024/01/23 | 0.5.0 | Added Debug Menu page in features/ui |
| Phnix | 2024/01/21 | 0.4.2 | Updated the meaning block of the page to blockquotes |
| Phnix | 2024/01/21 | 0.4.1 | Updated the changelog versions |
| Phnix | 2024/01/21 | 0.4.0 | Added the plans page |
| eh_jogos | 2024/01/21 | 0.3.1 | Improved Save Game page |
| Phnix | 2023/12/19 | 0.3.0 | Added the NPC feature |
| Smks | 2023/12/02 | 0.2.0 | Added Game Save feature |
| Phnix | 2023/11/07 | 0.1.0 | Created the mdBook structure |
Template
Meant to explain how a script/feature works
Goals
What is the goal of the feature
How it works
Macro overview
With what script it communicates
With what script it communicates, (and why) (Is it using a Autoload, sending events, ...)
Helper Panel
Goals
This add-on is a multi-purpose dock that is designed to help you with all sorts of things.
It adds a small dock to the bottom right of the screen. (Not enabled by default)
Add new categories
You can add new categories to the dock by modifying these two files:
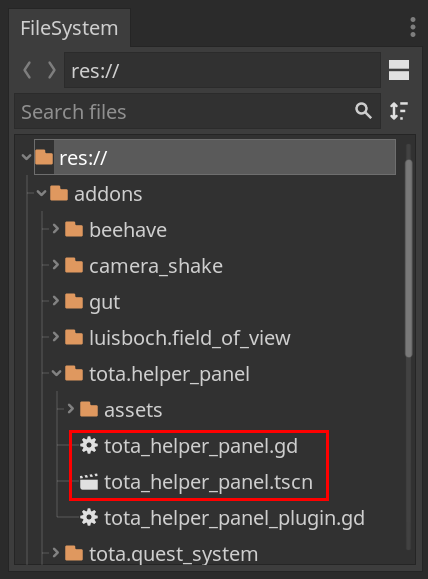
Quest Helper
This category helps making quests, by focusing the file system dock on the appropriate quest folders.
Battle Manager Class Overview
The Battle Manager is a global class responsible for controlling the enemies' turns when engaged in battles against the player.
Functions:
get_scene_enemies()
Populates the scene_enemies array with enemies from the current level room and connects their signals to the BattleManager.
_process(delta)
Updates the paused status based on the timer.
trigger_enemy_battle(enemy:Enemy)
Adds an enemy to the turn_order and changes its behavior to "Battle".
enemy_was_attacked(enemy:Enemy)
Handles an enemy being attacked during its turn or triggers battle mode if not already in battle.
on_enemy_died(enemy:Enemy)
Removes a dead enemy from the turn_order and manages turn passing if it was the current turn.
enemy_attacked(enemy:Enemy)
Handles the event when an enemy attacks, passing the turn or triggering battle mode.
pass_turn()
Advances to the next turn in the turn_order and manages turn and round rest times.
is_enemy_turn(enemy)
Checks if it is the specified enemy's turn and if the battle is not paused.
Behavior
Behaviors helps NPCs and Enemies to work with a limited set of states, this gives flexibility on controlling how they act in the world. It is basically a state machine within a state machine.
How behaviors work:
Behaviors are managed by the class BehaviorManager. Each behavior contains a StateManager with a unique set of states for the current behavior. It can be used to control state flow for NPCs and Enemies.
BehaviorManager
The BehaviorManager is initialized by the owner, then it initializes the StateMachine which then initializes all the states passing the reference of the owner responsible for all the states and behaviors.
init
It is called by the owner, initializing all the behaviors and states within each behavior. It then passes the reference of the owner & change to the initial state for all the behaviors.
change_behavior
It changes the current behavior, runs the exit() function from the previous behavior and then enter() function from the current behavior, acting as some sort of _ready() and exit_tree() for the states.
physics_process & process
It is fueled by the _physics_process & _process from the owner. It won't run, unless the behavior & state is active.
StateManager
The StateManager works similarly to the BehaviorManager, however it controls only states, instead of states & behaviors.
BaseBehavior
BaseBehavior is the base class that any other base behavior can inherit.
Example: The BaseBehavior contains all the variables and functions necessary to work within the BehaviorManager. BaseBehavior > EnemyBaseBehavior > PouncerBehavior
BaseState
BaseState is the base class that any other base state can inherit.
Example: The BaseState contains all the variables and functions necessary to work within the StateManager. BaseState > EnemyBaseState > IdleState
Flow
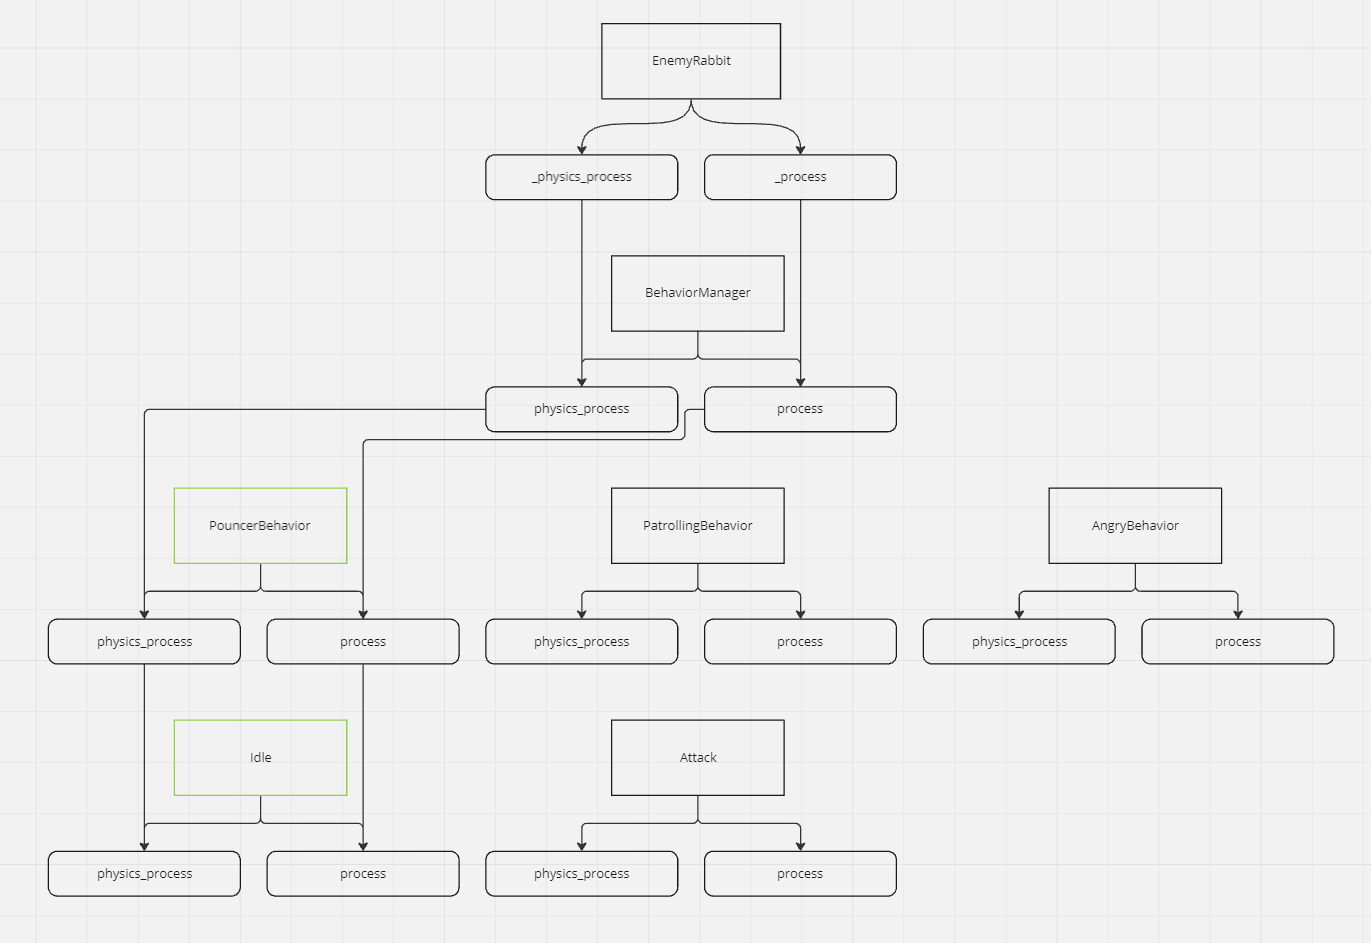
Adding a new base behavior:
To add a new base behavior you need to go through two steps.
1) Add a base behavior script extending BaseBehavior in res://src/AI/BehaviorManager/BaseBehaviors/ and name it NameBaseBehavior.gd, change the "Name" to whatever name your behavior has.
2) Each base behavior must have a new init function to pass the reference of the context. Behaviors must never extend the BaseBehavior directly.
class_name EnemyBaseBehavior
extends BaseBehavior

var enemy

func init(_context) -> void:
	enemy = _context
	state_manager.init(enemy)

func enter() -> void:
	.enter()

func exit() -> void:
	.exit()

func process(_delta: float) -> void:
	pass

func physics_process(_delta: float) -> void:
	pass
Adding a new behavior:
To add a new behavior you need to go through six steps.
1) Add a behavior script extending the base behavior you want in res://src/AI/BehaviorManager/Behaviors/ and name it NameBehavior.gd, change the "Name" to whatever name your behavior has.
2) Add a new Node scene with the behavior script just created in res://src/AI/BehaviorManager/Behaviors/.
3) To the recently created behavior scene, create a new StateManager Node as a child and attach the StateManager.gd to it.
4) Add all the necessary states as children of the StateManager node & attach the state script to each.
5) Set the Starting State NodePath parameter of the StateManager to the desired starting state you want for the behavior.
6) Don't forget to initialize the BehaviorManager from the entity you will be using in the _ready function.
class_name PouncerBehavior
extends EnemyBaseBehavior

export var proximity_distance:int = 80

func enter() -> void:
	.enter()

func exit() -> void:
	.exit()

func process(_delta: float) -> void:
	var state = state_manager.current_state.name
	if state != "Telegraph" and state != "Attack":
		if context.sight_target:
			var distance = context.global_position.distance_to(context.sight_target.global_position)
			if  distance <= proximity_distance:
				context.change_state("Telegraph")


func physics_process(_delta: float) -> void:
	pass
Adding a new base state:
To add a new state you need to go through two steps.
1) Add a base state script extending BaseState in res://src/AI/BehaviorManager/BaseStates/ and name it NameBaseState.gd, change the "Name" to whatever name your base state has.
2) Each base state must have a new init function to pass the reference of the context. States must never extend the BaseState directly.
class_name EnemyBaseState
extends BaseState

var enemy:Enemy
export var animation_name:String

func init(_context):
	enemy = _context

func enter() -> void:
	enemy.animation_player.play(animation_name)
	.enter()

func physics_process(_delta: float) -> void:
	pass

func process(_delta: float) -> void:
	pass

func exit() -> void:
	.exit()
Adding a new state:
To add a new state you need to go through six steps.
1) Add a state script extending the base state you want in res://src/AI/BehaviorManager/States/ and name it NameState.gd, change the "Name" to whatever name your state has.
2) Add a new Node scene with the state script just created in res://src/AI/BehaviorManager/States/.
#Idle State Example
extends EnemyBaseState

func enter() -> void:
	.enter()

func exit() -> void:
	.exit()

func process(_delta: float) -> void:
	.process(_delta)

func physics_process(_delta: float) -> void:
	.physics_process(_delta)
Attack Node Class Overview
The AttackNode is a base class responsible for managing attack actions for any entity that can execute attacks, typically through an attack state. This class can be instantiated by any enemy or entity that performs attacks and provides core functionality for handling damage, knockback, and attack range.
Functions:
init(_enemy, _attack_state)
- Parameters:
_enemy: The entity (enemy, boss or character) executing the attack._attack_state: The current state of the attack execution.
- Description: Initializes the
AttackNodewith the entity and attack state, configuring the base damage and knockback based on the entity’s hitbox.
enter()
- Description: Called when the attack begins. This function temporarily updates the entity’s hitbox damage and knockback strength based on the attack’s multipliers. It also sets these values in the entity's attack hitbox, making it active.
exit()
- Description: Called when the attack ends. It restores the entity's hitbox damage and knockback strength to their base values, deactivating the attack hitbox.
Class Properties:
attack_state: The current state of the attack (e.g., charging, executing, finishing).attack_name: The name of the attack being performed (empty by default).base_damage: The base damage that the entity can inflict with its attack.base_knockback: The base knockback strength of the attack.damage_mp: A damage multiplier applied to the attack (default is 1.0).enemy: The entity performing the attack.attack_range: The range of the attack, which determines how far the attack can reach.telegraph_anim_name: The name of the animation that plays before the attack executes.
Wwise - Centralized Audio System
Wwise is used to manage and control all audio elements across enemies, the player, and NPCs in the project, providing a dynamic and adaptable soundscape.
Goals
The goal of this feature is to centralize audio functionality for all entities within the game, ensuring consistent and efficient management of sound effects (e.g., idle, charge, attack, death) through a unified audio system. By extending from BaseAudio.gd, each entity (Player, Enemy, NPC) has customizable audio behaviors aligned with its unique actions, reducing redundancy and enhancing maintainability.
How it works
The BaseAudio.gd script serves as the foundational audio manager, handling sound playback, stop functions, and real-time parameter controls (RTPC). Each specific entity (e.g., player, NPC, or enemy) inherits from BaseAudio and further defines its unique sounds, such as attack, hurt, or alert. The centralized BaseAudio manages audio events via Wwise, allowing smooth communication with Wwise functions such as post_event for sound playback and set_rtpc for real-time parameter changes.
Each entity-specific script (e.g., EnemyAudio.gd, PlayerAudio.gd, NPCAudio.gd) extends BaseAudio and customizes sounds based on the entity's actions. For example:
- Enemies: The
EnemyAudio.gdscript defines sounds for various enemy actions (e.g., charge, hurt, death). - Player: The
PlayerAudio.gdscript manages unique player sounds, such as footstep sounds affected by terrain, weapon attack sounds, and environmental interactions. - NPCs: The
NPCAudio.gdscript has a basic setup to control general sounds for NPCs, such as idle or footstep sounds based on terrain.
Wwise ensures 2D positional tracking of sounds for spatial coherence and manages object-specific registration for each instance.
With what script it communicates
- Scripts: The
BaseAudio.gdscript communicates with each entity-specific audio script (EnemyAudio.gd,PlayerAudio.gd,NPCAudio.gd). - Autoload: Utilizes Wwise as an autoload, allowing functions such as post_event, set_rtpc, and set_2d_position to be universally accessible within the project.
- Events: Sounds are triggered through Wwise event IDs. For example, the post_event method is called to play a sound, while stop_event halts the sound playback when required.
This centralized audio system ensures a modular and maintainable approach to sound management across all entities. Each entity's unique sounds and behaviors are implemented through inheritance from BaseAudio.gd, centralizing functionality while allowing for customization.
Cutscenes
Cutscenes will be a range of no interaction to very limited interaction. E.g. walking to move the plot forward.
For now, there is only one "placeholder" generic cutscene scene so that I could implement Quest 005 that required it. It plays a simple "loading bar" animation and then, if the current active quest is completed, it will call its respective Quest Announcement.
As a generic placeholder, it should work with whatever is the current active quest.
Goals
The goal of the Cutscenes in this game are primarily used for storytelling and narrative progression. They provide a cinematic means to convey the game's plot, introduce new characters, and establish the setting and context of the game's world. Through cutscenes, we can create emotional impact and deepen the player's immersion in the story. They also serve to reward players, marking the completion of key objectives or levels. Additionally, cutscenes can be used to provide necessary exposition or tutorial information in a more engaging way than simple text or dialogue boxes.
How it works
The placeholder scene
You can find the placeholder scene at res://src/Part_PlaceholderQuestCutscene.tscn. It's script is right beside it and will work automatically doing the following steps:
- It will connect to the Event
screen_change_fade_out_finished, and play themainanimation on its callback. - The
AnimationPlayeris configured to automatically transition from itsmainanimation tofade_outanimation. - The
animation_finishedsignal from theAnimationPlayernode is connected to the script and oncefade_outfinishes, it will try to complete the current active quest, which should show its quest announcement, or an error if there is no active quest- In the case that there was an error, it will stop here and be locked on a black screen
- Once you "accept" the quest completed announcement, it will proceed to the "Next Day"
How the Quest cutscene is triggered
Quest 005 is the only one we have a cutscene so far, so understanding what it asked will help to understand the choices made for this implementation. On Quest 005 description, once we return to Campsite, we should find it empty and a cutscene should start.
But LinearWorld only cares about moving the player between pre-existing levels, so it would just move the player to normal Campsite. From there we would either have to have custom logic on the Campsite scene, to identify that this is Quest 005 final step and change itself, or have some way for Quest 005 to trigger changes on it.
If we start to have more cutscene and Level0_0 scene has to know about all of them, things could get messy. So it would be easier to transition to another "Part_" scene entirely, where we can have a customized Level0_0 and just animate or script the cutscene there the way we want it, but then how do we make LinearWorld understand that this particular transition to Level0_0 should be different?
For that 3 new FuncRef properties were added to RuntimeData.tres (FuncRef are objects that hold a reference to another object and a function name so that it makes it easier to call "remote" functions):
funcref_custom_game_screen_condition-LinearWorldwill use it when changing levels/locations to check if there is a special condition activatedfuncref_custom_game_screen_play- if there is any special condition and it returns true,LinearWorldwill use thisFuncRefinstead of its normal logic.funcref_custom_game_screen_finished- This can be called by the cutscene or custom screen when it finished what it needs to do.
This way, the logic for the custom screen/cutscene/special circumstance can stay encapsulated wherever it makes more sense and in whatever script should be responsible for it. In Quest 005 case, it's in res://src/Quests/Resources/Torion/custom_step_logic/005_step_02_trigger_cutscene.gd. This step will be responsible for injecting the relevant funcrefs in RuntimeData.tres and once the player triggers the condition by trying to go back to Campsite, its funcrefs will take over and control the game to go to the correct cutscene.
This approach allows for the "entity" that is responsible for the "cutscene" to handle everything related to it directly, with a "simple" and expect api. Not all of the funcrefs are needed, and outside of triggers that are "enter level/location X" we can just directly trigger a screen change with Events, but for anything that needs to be triggered on level/location changes, these three properties can be used to highjack control from it.
There are also two helper methods on RuntimeData:
should_use_custom_game_screen_transition()- will do all the relevant checks to see if funcrefs are valid and special condition is passed.custom_game_screen_completed()- will check iffuncref_custom_game_screen_finishedis valid and if it is, call it.
With what script it communicates
RuntimeData.gd- So that it can inject funcrefs in it where LinearWorld can access themLinearWorld.gd- Since it's responsible for navigating between levels/locations and the trigger for the cutscene is "navigating to level/location X"- Specific Quest and/or Cutscene scripts, as needed.
Enemies
Every enemy is unique, and they all will have different mechanics to play around, to the game is more fun and engaging for the player. When exploring the map, the player will face two types of enemies:
- Creatures: Refers to animals of all kinds from mammals to invertebrates,
-
Mammals:
- Bird
- Rabbit
- Deer
- Ibex
- Boar
- Bison
- Rhino
- Mammoth
- Bat
- Snake
- Wolf
- Bear
- Smilodon
-
Invertebrates:
- Ant
- Hornet
- Bee Swarm
- Spider
- Mosquito
- Humans: Refers to human enemies, from tribes that are agressive towards the player
More info TBA
Enemy Creature Stats
-
species: Defines which species a creature belongs to, examples of species: Ant, Hornet, Spider, Bison, Rabbit, Bear, Snake and so on.
-
variant: Defines a variant of a species. The default variant is A. All the other variants are stronger than the default one, and can have: More health, more attack speed, more speed, etc.
-
behaviour: Defines the behaviour of the species. Some are territorial, so if you enter their territory area, they will attack you to make you leave their area. Others are
-
max_health: Max amount of health points this creature can have (For reference, Adira has 100 Health Points). When Health Points == 0, the creature will die.
-
max_poise: Max amount of poise points this creature can have (For reference, Adira has 50 Poise Points). When Poise Points == 0, the creature will enter a staggered state for 2 seconds.
-
health_damage: Determines how much damage an enemy attack will deal to the Health Points.
-
poise_damage: Determines how much damage an enemy attack will deal to the Poise Points
-
walk_speed: Defines how fast a creature will roam when they are in the "idle" state.
-
run_speed: Defines how fast a creature will sprint when they are engaging in combat or fleeing the battle.
-
weight: Defines the creature weight, to determine if when attacking, the target will be knockbacked or not. If the attacker have equal weight, the knockback will be minimal. If the attacker have way more weight, the knockback will be stronger. If the attacker have less weight there will be no knockback.
-
attack_speed: Defines how quickly a creature will initiate their next attack, after the first attack have been completed. Those attacks need to be in the same attack pattern.
-
range: Defines how far this creature attacks will reach.
-
attack_pattern: The number of attack patterns a creature have. Still in the works, may need to be reworked.
-
attach: Defines if a creature will be able to attach to the player. Example: A mosquito attacks the playing, by attaching to them, and then sucking blood, depleting Adira's Health Points. The player will need to engage in a minigame to detach the enemy.
For more information, you can check the following GDDs:
Enemy Humans Stats
Stats TBA
LoadDB
The LoadDB is a standalone scene with the main focus of importing a single file or multiple files with .csv data, the data will then be transformed into multiple resource files that will be utilized by the game for multiple purposes.
At the moment those are the types of files that can be mass imported:
- Enemy stats
- Weapon stats
Importing data
1) You will first need to access the spreadsheet with the values and stats: res://src/CombatData/Data/
Don't forget to navigate through the files to find what you are looking for to edit.

2) After changing everything, you need to export the spreadsheet as a ".csv" file, with the following name structure, formatting and extension: Type + SpreadsheetPage + ".data"
Examples:
"EnemyCreature.data"
"WeaponDagger.data"
Explanation:
- Type: If the data is about "Weapon", "Enemy", etc.
- SpreadsheetPage: The name of the page from the Spreadsheet being exported. For Enemies, for example, there is: "Creature" and "Human".
- The extension: As you can see, the extension MUST BE changed to ".data", otherwise, it won't work.
3) Now move the file to the folder: src/CombatData/Data
4) Next you need to run only the scene LoadEnemyDB: res://helpers/LoadDB/LoadDB.tscn. Now it's done! Every resource file will be created.
5) Now select the type of Data you want to import.
6) Then select which files (you can select multiple) you want to import and press "Start".
7) If you want to import anything else from another type of Data, feel free to click: "Back", then import more files.
Weapons
Weapons play a vital role in a 2D action game, significantly enhancing the player's combat capabilities and aiding in progression through various levels. Each weapon comes with unique attributes such as attack speed, damage output, and range, allowing players to select the most suitable tool for different combat scenarios. This variety not only keeps the gameplay engaging but also allows players to develop and refine their strategies, making the game more immersive and challenging.
Equipping Weapons
Once a weapon is unlocked, it becomes permanently available and visible in the inventory, accessible via the HUD. Players can switch between equipped weapons using specific controller buttons.
For instance, if two weapons are unlocked, using the L2 and R2 buttons rotates the equipped weapon:
- Unarmed (Fist and Kick) is equipped by default.
- Press 'R2' to switch to 'Spear.'
- Attack using the Spear.
- Press 'R2' again to revert to 'Unarmed.'
- Press 'L2' to switch back to 'Spear.'
The choice of weapon persists throughout the game.
Types of Weapons
Weapons are unlocked in the following order:
- Unarmed (Available from the start)\
- Fast attacks with low health and poise damage.
- Spear (Unlocked in the first narrative scene)\
- Long reach with high health damage but slow attack speed.
- Dagger\
- Fast attacks are similar to unarmed but with more damage and low block efficiency. High stealth multiplier but low overall damage compared to other weapons.
- Axe\
- Very slow attack speed with high health damage and average poise damage. Poor stealth multiplier.
- Club\
- Medium attack speed, average health damage, and high poise damage. Medium stealth multiplier.
- Javelin\
- Throwable with good health and poise damage. Long draw time and recoverable from the map.
- Bow\
- Shoots arrows with good health damage. Long draw time and recoverable arrows.
- Slingshot\
- Shoots rocks with low health damage but good poise damage. Quick draw time and high stealth multiplier.
Weapon Upgrades (v2)
Each weapon may have upgrade options that slightly enhance its effectiveness. For example:
- Spear
- Wooden Spear (Basic)
- Stone Spear (Improved)
- Flint Spear (Advanced)
Demo Mode
Goals
To be able to add custom project settings and in game logic to separate "demo" specific behavior from the standard builds.
How it works
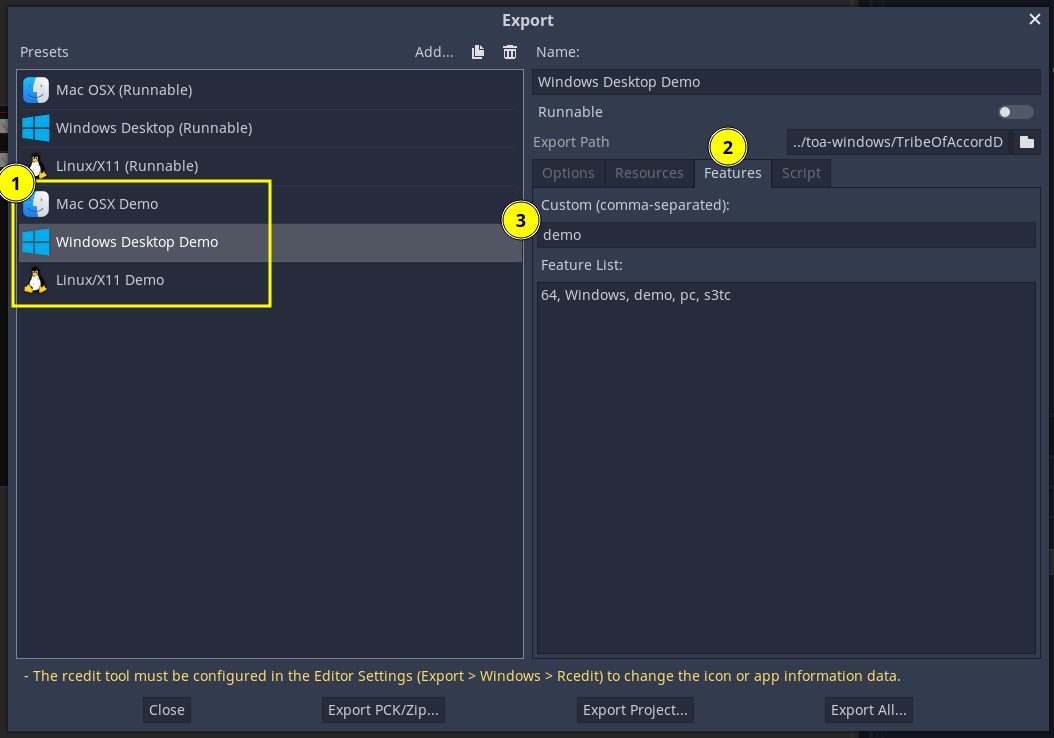 First we need to create extra export presets, click on the "Features" tab, and add the "demo" tag to it, or any other number of tags for this particular export preset.
Then, anywhere on code you can check for the existence of any feature tag to trigger any special logic related to it by using OS.has_feature(Constants.TAG_DEMO)

For adding custom Project Settings options, you'll need to:
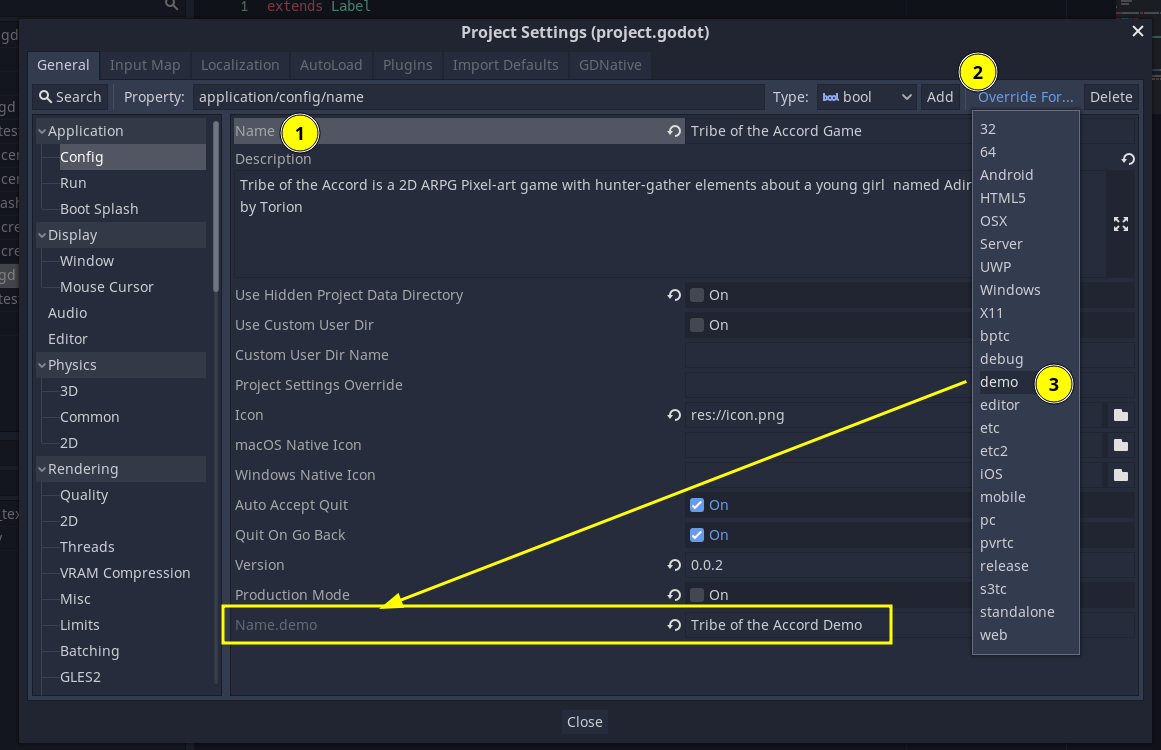
- Click the "name" of the setting you want to override
- Click the button "Override for..." on the top right of the Project Settings screen, to the left of the "Delete" button (be careful not to misclick the "Delete" button)
- Choose the desired "feature tag" from the drop down list
- A new entry will be created in the format "setting_name.feature_tag" and you can change it's value to whatever you want! When a build is exported with this feature tag, the value of that setting will be overriden to this value.
Testing
Unfortunately, it is not possible to test custom feature tags in the editor directly. Running the game in the editor will not apply any custom feature tags, even from export presets marked as "Runnable".
Marking an export preset as "Runnable" only affects what preset will be chosen for one click deploys, and in those, you can test for feature tags normally, but on Godot 3.x they only work for HTML and android builds.
So we need to export the game with the export preset that has the tag we need to test and test it manually.
Alternatively, you can create a custom gut test or scene to forcedly test the functions or logic that will be called in the demo build, but you can't test for the presence of the demo tag triggering this logic on gut or the editor.
With what script it communicates
To find out what is different on "demo" mode, run a project wide search for OS.has_feature(Constants.TAG_DEMO)
For now it is affecting:
- version label - it adds a "demo" to it
- SMKSIntroSplashScreen - makes a "demo" warning label visible
- QuestAnnouncement - Stops game after completing a quest and locks the player in a "Thanks for playing the demo please give feedback" screen. The player can go back to main menu to play the demo from scratch if they want, but can't progress further than this.
For finding all Project Settings that have a custom demo "override", open it in something like visual studio code, and search for .demo
The current overrides are for:
- name - Changes project name to "Tribe of the Accord Demo", which is the name that will appear in the window or task bar icon.
Emotes
Goals
The emote node can be added to any entity to display an emote bubble conveying the emotion of that entity.
![]()
How it works
Add the Emote node to any Node2D scene, to play the animation call the function show_emote() with the appropriate enum values for bubble_type and icon_type.
Emotes
Goals
The emote node can be added to any entity to display an emote bubble conveying the emotion of that entity.
![]()
How it works
Add the Emote node to any Node2D scene, to play the animation call the function show_emote() with the appropriate enum values for bubble_type and icon_type.
Enemies
All enemy scenes inherit from the res://src/EnemiesNew/Enemy.tscn scene
Managing Attributes & Rebalance
enemies have a set of attributes that define how they will behave and how strong they are. below there is a list of all the attributes an enemy will have, they share the name exact formatting as in the code:
Creatures
-
species: Defines which species a creature belongs to, examples of species: Ant, Hornet, Spider, Bison, Rabbit, Bear, Snake and so on.
-
variant: Defines a variant of a species. The default variant is A. All the other variants are stronger than the default one, and can have: More health, more attack speed, more speed, etc.
-
behaviour: Defines the behaviour of the species.
-
Fearful: They will usually avoid the player and may even try and run if the player gets too close to them. But if attacked, they may attack back.
-
Territorial: They will alert Adira if she is in their space, and they will attack the player if the player comes too close or attacks them.
-
Predatory: They will instantly attack Adira the moment they notice her. They have a good sense of smell, and can’t be sneaked upon. If the player gets close enough, they will notice Adira.
-
Reserved: The Enemy - unless attacked - minds its own business and continues to graze/do its own thing. If attacked will go into a ‘Defensive’ mood. When reserved they will walk around the level and graze.
-
Curious: The Enemy will follow the Player out of curiosity. If Adira lets them get too close, attack the animal or run away, they will attack you. If Adira keeps her distance from him and doesn't run, just walk, they will not attack her. They will just return to their original location.
-
Controlling: Used for controlling the enemies in cutscenes.
-
-
max_health: Max amount of health points this creature can have (For reference, Adira has 100 Health Points). When Health Points == 0, the creature will die.
-
max_poise: Max amount of poise points this creature can have (For reference, Adira has 50 Poise Points). When Poise Points == 0, the creature will enter a staggered state for 2 seconds.
-
health_damage: Determines how much damage an enemy attack will deal to the Health Points.
-
poise_damage: Determines how much damage an enemy attack will deal to the Poise Points
-
walk_speed: Defines how fast a creature will roam when they are in the "idle" state.
-
run_speed: Defines how fast a creature will sprint when they are engaging in combat or fleeing the battle.
-
weight: Defines the creature weight, to determine if then attacking, the target will be knockbacked or not. If the attacker have equal weight, the knockback will be minimal. If the attacker have way more weight, the knockback will be stronger. If the attacker have less weight there will be no knockback.
-
attack_speed: Defines how quickly a creature will initiate their next attack, after the first attack have been completed. Those attacks need to be in the same attack pattern.
-
range: Defines how far this creature attacks will reach.
-
attack_pattern: The number of attack patterns a creature have. Still in the works, may need to be reworked.
-
attach: Defines if a creature will be able to attach to the player. Example: A mosquito attacks the playing, by attaching to them, and then sucking blood, depleting Adira's Health Points. The player will need to engage in a minigame to detach the enemy.
For more information, you can check the following GDDs:
How to change enemies attributes
If you need to make heavy changes to their attributes, renaming them, adding new creatures, etc, you first need to delete every folder inside:
For creatures: res://src/CombatData/Resources/Creature/
For humans: res://src/CombatData/Resources/Human/
After that, or if you have simple changes in values, you need to follow the step-by-step guide down below:
1) To change enemy data, you have to access Enemies Spreadsheet, and change the attribute values there.
2) There are two spreadsheets in this document, one for Creatures, and the other for Humans.
3) After changing everything, you need to export the spreadsheet as a ".csv" file, with the following name structure, formatting and extension:
If creature: EnemyCreature.data.
If human: EnemyHuman.data
4) Now move the file to the folder: src/CombatData/Data
5) Next you need to run only the scene LoadEnemyDB, inside: res://src/CombatData/. Now it's done! Every resource file will be created.
AI
Enemy works with a behavior structure, with the help of a behavior manager. Each enemy can have unique behaviors & states within behaviors. Check Behavior Section for more information.
NPC
Goals
Is able to move around the map (walk/run, go to a location).
Can talk and give quests to the player.
How it works
CaveWarps
Goals
Cave Warps are an "entity" used to get out of caves (ProceduralWorld) and get back to LinearWorld.
How it works
They can be placed in any cave scene, but are supposed to go into StartLevel_*.tscn and EndRewardLevel_*.tscn scenes.
Currently they usually start invisible and are "revealed" in two situations:
- On StartLevel scenes, they double as starting points and are revealed once the player moves away from them
- On EndRewardLevel scenes they are revealed once all chests in the scene are opened.
The sprite is currently a placeholder white circle, but once it is changed to it's final art, this "revealing" logic can be replaced for whatever is needed.
Using CaveWarp in StartLevel scenes
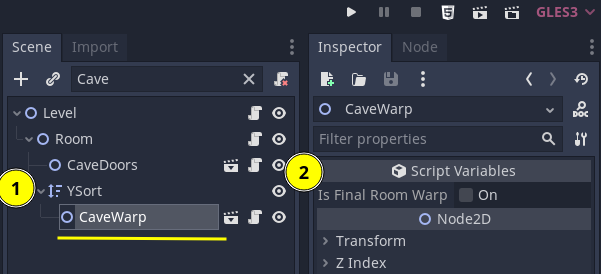
- Place it inside the main YSort of the scene
- Make sure it's property
is_final_room_warpis set to false.
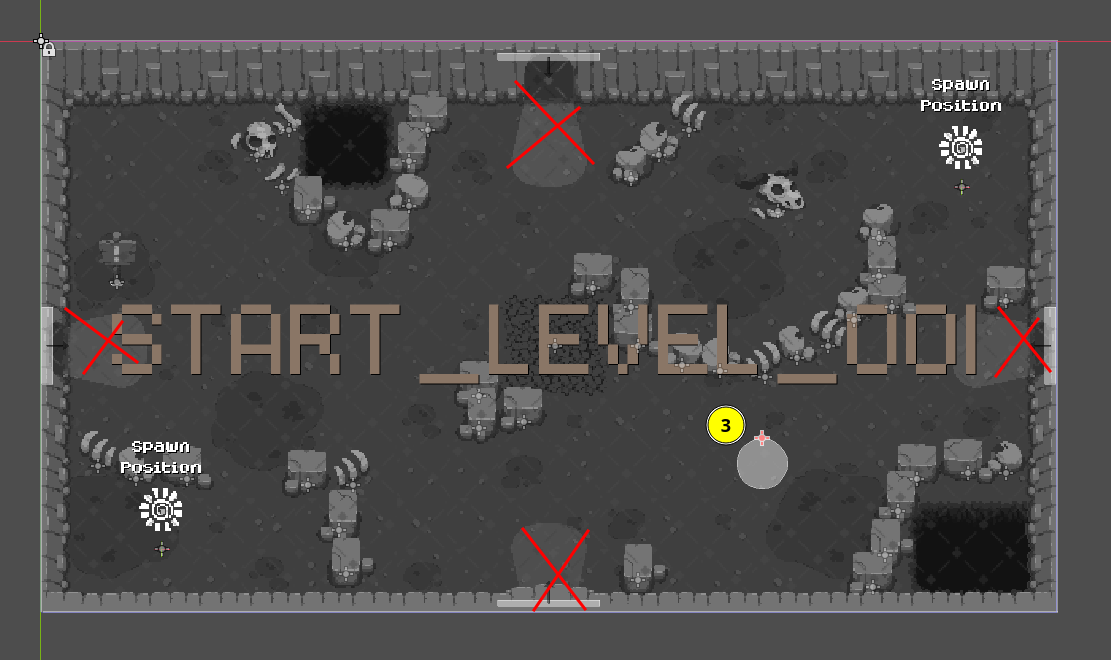 3. Move the warp to whatever position you want, avoiding any space near doors.
It's important to avoid doors so that we don't give the false impression the player came into the Cave through that door.
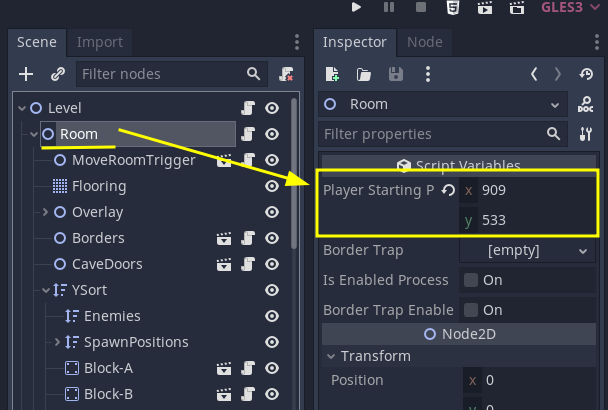
Also, by moving the CaveWarp, it is automatically updating the value of the Room's player_starting_position. To make sure this is working just test the room by pressing F6 or clicking the Play Scene button on the top right.
For more info on debugging options for caves see Testing Caves (Procedural World).
Using CaveWarp in EndLevelReward scenes
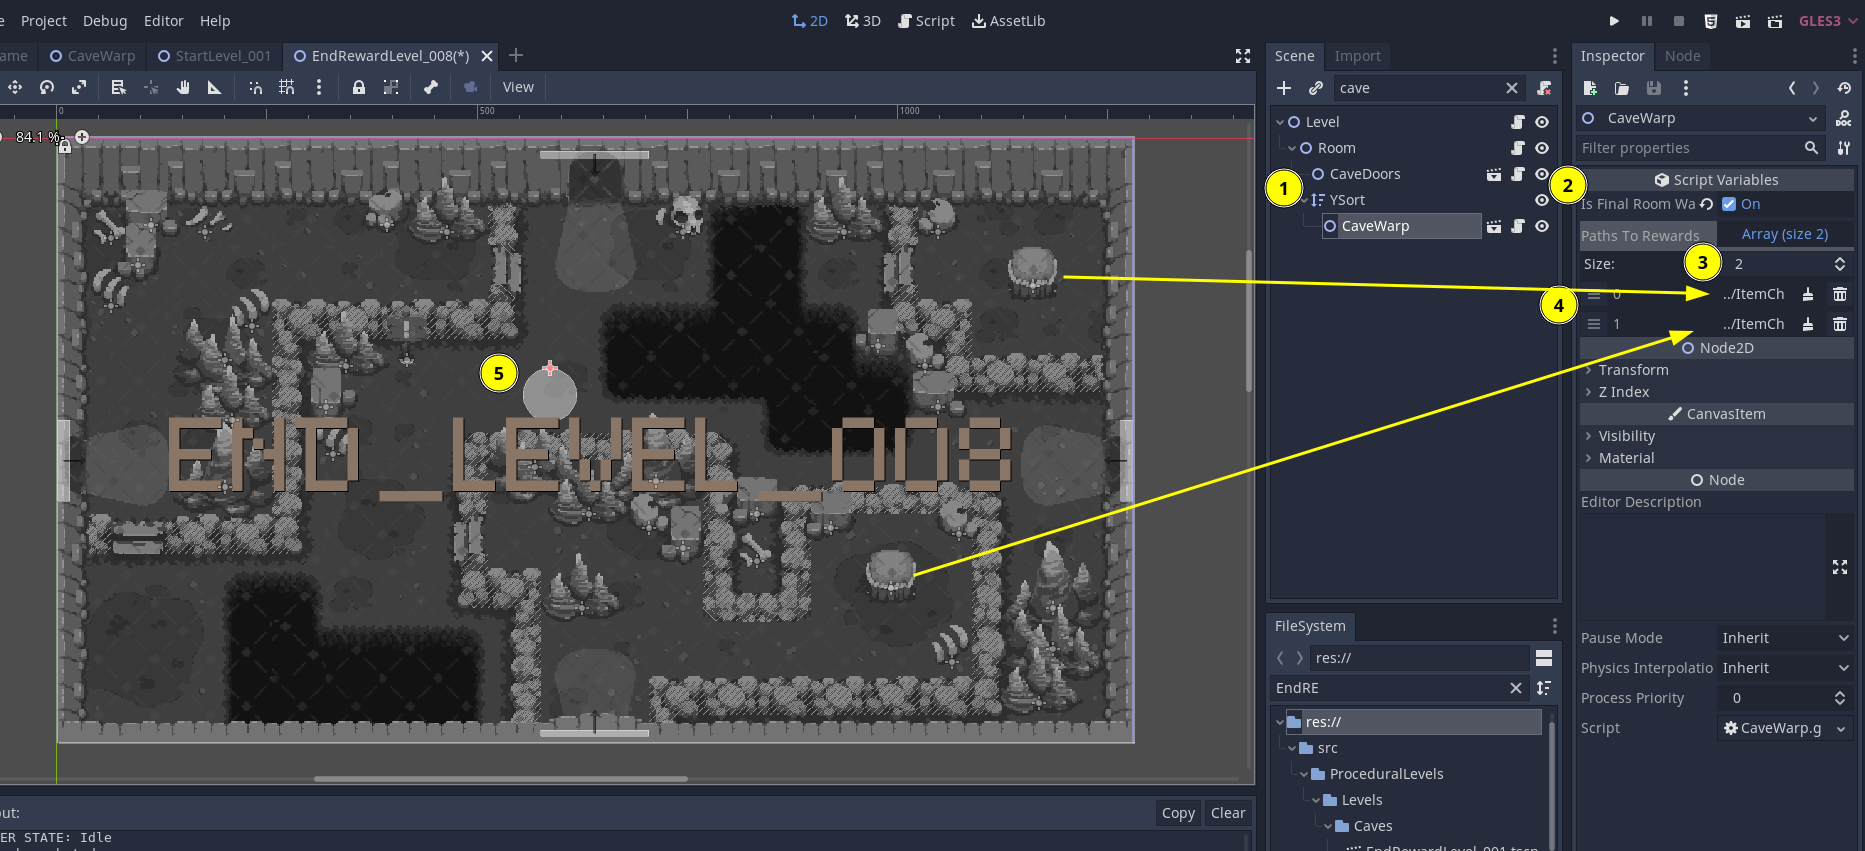
- Place it inside the main YSort of the scene
- Make sure it's property
is_final_room_warpis set to true. - Open "Paths to Rewards" on the inspector and increase its Size to the same amount of "item chests" in the scene.
- For each of the values inside "Paths to Rewards" click on "Assign" and choose one of the
ItemChestnodes. - Move the warp to whatever position you want.
The CaveWarp will reveal once all the listed ItemChests are opened by the player. You can test it with F6 though, they won't drop any items in this case.
With what script it communicates
Only in the Editor it communicates with Room.gd so that it can be used as a tool to set player_starting_position. During runtime, it communicates with the player when the player is in range to show the action tooltip, but other than that it just listens to signals and sends out Events.
CaveWarps
Goals
Cave Warps are an "entity" used to get out of caves (ProceduralWorld) and get back to LinearWorld.
How it works
They can be placed in any cave scene, but are supposed to go into StartLevel_*.tscn and EndRewardLevel_*.tscn scenes.
Currently they usually start invisible and are "revealed" in two situations:
- On StartLevel scenes, they double as starting points and are revealed once the player moves away from them
- On EndRewardLevel scenes they are revealed once all chests in the scene are opened.
The sprite is currently a placeholder white circle, but once it is changed to it's final art, this "revealing" logic can be replaced for whatever is needed.
Using CaveWarp in StartLevel scenes
- Place it inside the main YSort of the scene
- Make sure it's property
is_final_room_warpis set to false.
3. Move the warp to whatever position you want, avoiding any space near doors.
It's important to avoid doors so that we don't give the false impression the player came into the Cave through that door.
Also, by moving the CaveWarp, it is automatically updating the value of the Room's player_starting_position. To make sure this is working just test the room by pressing F6 or clicking the Play Scene button on the top right.
For more info on debugging options for caves see Testing Caves (Procedural World).
Using CaveWarp in EndLevelReward scenes
- Place it inside the main YSort of the scene
- Make sure it's property
is_final_room_warpis set to true. - Open "Paths to Rewards" on the inspector and increase its Size to the same amount of "item chests" in the scene.
- For each of the values inside "Paths to Rewards" click on "Assign" and choose one of the
ItemChestnodes. - Move the warp to whatever position you want.
The CaveWarp will reveal once all the listed ItemChests are opened by the player. You can test it with F6 though, they won't drop any items in this case.
With what script it communicates
Only in the Editor it communicates with Room.gd so that it can be used as a tool to set player_starting_position. During runtime, it communicates with the player when the player is in range to show the action tooltip, but other than that it just listens to signals and sends out Events.
CutsceneVignettes
Goals
Show black bars at the top and bottom of the screen to separate moments that are not playable. Though you still interact with dialogues on them.
How it works
It's a scene with two black ColorRect, that are animated by an AnimationPlayer.
It is inside the HUD scene, but it's not controlled by the Controller and the HUDStates, because it has an incompatibility with the DialogueState. Cutscenes will most likely use dialogue, and can do anything else realy. We can move the player, we might want to animate a menu, and any of these actions, but mainly, starting a dialogue, will change the HUDState and go out of the CutsceneState into DialogueState, making the Vignettes close.
So they live in the HUD scene because this way it's better to place it over or below other HUD elements, for example, above life bar, but below dialogue boxes. But to control them, you have to use two events, and it should be used case by case, depending on each cutscene's needs.
The events are:
cutscene_vignette_openedcutscene_vignette_closed
To change the size of the black bars, just edit the margins in the show and hide animations in the scene's AnimationPlayer.
With what script it communicates
Just the Events script.
Gameplay Camera
Goals
Handle transition from level to level, camera effects like zoom and shake. It also handles navigation through multi screen levels as well as notifying game when level coordinates change inside a multi screen level.
How it works
Setting the camera to levels and level transitions
The Gameplay Camera lives inside LinearWorld and ProceduralWorld and is mostly controlled by them. It has two public functions they can use to set the camera to the initial level of a chunk/world and to move the camera between levels, and two other methods to toggle camera following the player on/off. All of these are being called automatically either in the world initialization or when transitioning between levels.
The GameplayCamera uses SceneTreeTween instead of normal Tween as its animations are simple, and SceneTreeTween is more modern and lightweight and compatible with the updated Tween API in Godot 4.x. Once it's 'move camera' tween ends, it emits the signal tweened_to_next_room so that LinearWorld or ProceduralWorld can continue handling the level transition from there.
Whenever we transition between levels, besides moving the camera, we also set the limits of the camera to the limits of the current level. This is not strictly necessary for single screen levels, but it makes working with multi screen levels easier and seamless.
On multi screen levels, the camera follow the player and emits the Events signal internal_level_coords_changed whenever the player moves to a new level coordinate.
The camera has a CameraAnchorDetector Area2D, which will handle locking the camera whenever it enters a CameraAnchor area. For more details about how to set up CameraAnchor nodes in multi screen levels, see Multi Screen Levels page.
The way they work overall is that CameraAnchorDetector calculates the level coordinate based on the CameraAnchor position, and then changes the limits of the GameplayCamera as if it was a single screen level at that coordinate. Once the player leaves the CameraAnchor, it restores the base limits of the level.
Zoom
They also are connected to two Events signals which control it's zoom level:
camera_zoomedcamera_zoom_reset
It is currently used for the Zoom in/out effect when entering/exiting a Pond.
Camera Shake
There is no way to control the camera shake directly, but whenever the player takes damage and the Event player_taken_damage is emitted, the Camera will shake based on the amount of damage inflicted.
With what script it communicates
It communicates directly with the CameraAnchorDetector which is its child, and mostly with Procedural/LinearWorld as they use the camera directly when setting up the world and when transitioning level, and their respective LevelChunkCoordinators as they handle moving between chunks.
Narrative scenes scripts may use move_camera like Part001_Tutorial for very specific and scripted sequences, while other scripts communicate with it either through sending Events or listening to its signals/Events.
Position and Sit Markers
Goals
PositionMarker and SitMarker are visual aids that can be placed anywhere to help guide the player.
How it works
Both are Area2Ds with a sprite and some animations.
For PositionMarker, it is only connected to the Area2D's body_entered signal, and once the player triggers it, the marker will hide and delete itself.
For SitMarker, it is connected to both body_entered and body_exited signals, once the player enters its area, it will show a tooltip alert to press the Sit button, and when the player sits, the marker will hide and delete itself.
To use them, you just need to instance their scenes and position them where you want. To make it easier, every Level has helper functions that you pass a position to it, and the level itself will place them:
add_position_marker(target_position: Vector2)- returns void.add_sit_marker(target_position: Vector2)- this one returns the sit marker itself, so that you can connect to itstree_exitedsignal if you need to trigger something after the player sits.
For an example of usage of the SitMarker, you can look at Part_NightTime.tscn, we use it there to make Torion start telling the quest completed story once you sit by the fireplace.
With what script it communicates
None, though Room.gd knows how to instance them, and Level.gd forwards this to make it easier to use.
Inventory
TODO
Goals
How it works
The inventory is made up of 5 different scripts:
- Inventory.gd
- InventoryController.gd
- InventoryItemManager.gd
- InventoryModel.gd
- InventoryStateMachine.gd
It is based on the Model View Controller design pattern.
With what script it communicates
Inventory
TODO
Goals
How it works
The inventory is made up of 5 different scripts:
- Inventory.gd
- InventoryController.gd
- InventoryItemManager.gd
- InventoryModel.gd
- InventoryStateMachine.gd
It is based on the Model View Controller design pattern.
With what script it communicates
Weapons in the inventory
Weapons have been redesigned to be a permanent upgrade in the inventory rather than an item.
See:
Goals
To avoid re-coding the inventory system, the weapon system uses the existing inventory system. When an item is collected, if it is a weapon, the weapon system will store and handle the weapon along with the items (InventoryModel.gd > current_weapon_unlocked).
How it works
When an item is collected (InventoryController.gd > add_new_item() > InventoryItemManager.gd > add_new_item()) if the type of the item is "Weapon" then the add_new_weapon() function is called instead of .add_new_item().
The add_new_weapon() function checks if the weapon was already unlocked and if the new weapon we got is stronger than the one we already have. Then it returns a status enum { WEAPON_ADDED, WEAPON_REPLACED, WEAPON_NOT_REPLACED, WEAPON_FAILED } to the InventoryController.gd which prints the status to the output window.
If multiple weapons are unlocked, the user can cycle through them (see controls) (cycle_item_next and cycle_item_previous in the input map).
With what script it communicates
src\DebugItemManager.gdsrc\HUD.gdsrc\Inventory.gdsrc\InventoryController.gdsrc\InventoryItemManager.gdsrc\InventoryModel.gdsrc\ItemResource.gdsrc\NumberLimits.gd
Narrative System
Chapter Events
Chapter Events are scripted sequences that trigger when a Player reaches a certain spot on the map.
Goals
Facilitate the creation of narrative scenes with reusable actions and a flexible structure.
How to create a Chapter Event
The first step to creating a Chapter Event is to create a ChapterEventPlayer and set how it will be triggered (Area, another Player, or Cave). For Area‑based triggers, also add a ChapterEventTrigger.
All levels contain a proposed structure for setting up Narrative nodes:
- Level
- Narrative
- Triggers: where
ChapterEventTriggers should be set - Paths: where
Path2Ds should be set - Players: where
ChapterEventPlayers should be set
- Triggers: where
- Narrative
ChapterEventPlayer
Add a new Node and choose ChapterEventPlayer.
Editor helper: when editing a ChapterEventPlayer, the inspector assists saving the ChapterEventData to its default path and adding it to the NarrativeManager database if needed.
Every child of ChapterEventPlayer must be a type of Event (extend BaseChapterEvent).
Data (ChapterEventData)
Set the data property to a ChapterEventData resource. It holds identity, conditions, and runtime config:
id: unique identifier used for saves. Valid formats includechapter_*/scene_*,chapter_*/arena_*,chapter_*/boss_*(e.g.,chapter_01/scene_02).can_repeat: if true, the event can trigger multiple times.has_seen_event/has_not_seen_event: gating conditions by other event ids.player_can_interact: if true, the Player can move/act during the event.use_cutscene_vignette: show cutscene vignette during the sequence.hide_hud: hide HUD during the sequence.
Triggering a Chapter Event
Set trigger_mode on the ChapterEventPlayer and wire trigger_path accordingly.
AREA
Instantiate res://src/Narrative/ChapterEvent/ChapterEventTrigger.tscn (base collision already configured). Add a CollisionShape2D as a child and size it to define the trigger area. Point trigger_path to this node.
PLAYER
Set trigger_path to another ChapterEventPlayer. This event plays automatically when the other player emits finished (avoid circular chains).
CAVE
Set trigger_path to a Cave. This event plays when the cave emits entered_cave.
NONE
No automatic trigger. Call play() via script or tests to start the sequence.
Adding Events
Events are added as nodes to the ChapterEventPlayer. You can see the full list of Events by opening the Create New Node dialog and searching for Event.
Every class that is a child of BaseChapterEvent can be used:
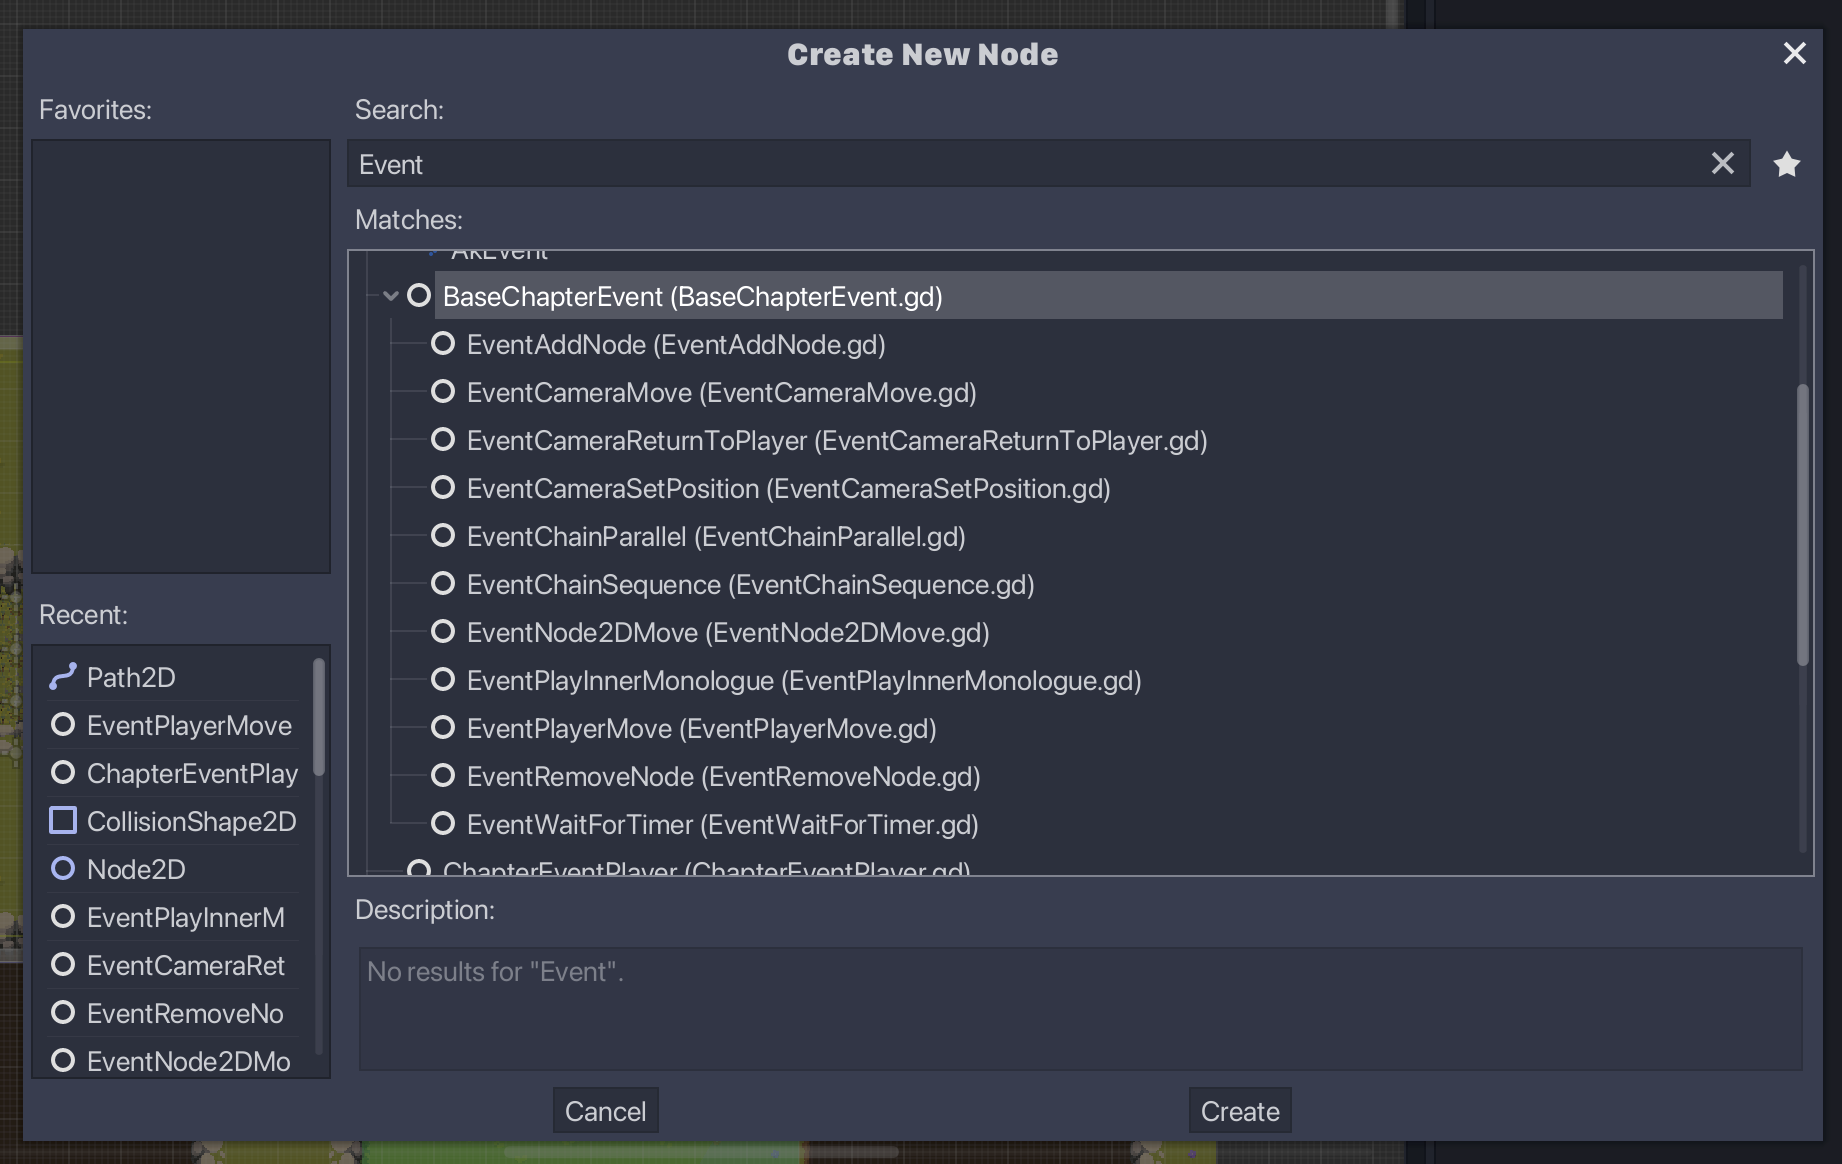
How it works
A ChapterEventPlayer is responsible for executing a sequence of events in order.
Depending on trigger_mode, it listens to an Area trigger (ChapterEventTrigger), another Player's finished, or a Cave's entered_cave to start playback.
When playing, ChapterEventPlayer iterates through its child nodes (each should extend BaseChapterEvent) and executes them.
If an event isn't finished, the system will wait for a finished signal from the event node before proceeding to the next.
Both ChapterEventPlayer and BaseChapterEvent have started and finished signals if you need to track their execution.
All event scripts must have a custom class name - so that they are exposed in the "Create New Node" dialog - and should start with Event....
Creating a Custom Event
To create a new event, extend BaseChapterEvent and implement your _play() method.
This method must return true or false, signaling if the event is completed.
Example of an instantaneous event:
class_name EventRemoveNode
extends BaseChapterEvent

export var node_path: NodePath

func _play() -> bool:
	var node: Node = get_node(node_path)
	node.get_parent().remove_child(node)
	node.queue_free()
	return true
If an event performs an action that takes time (e.g., animations), it must return false and call _finished() when complete.
Example of an asynchronous event:
class_name EventWaitForTimer
extends BaseChapterEvent

export var duration: float = 1.0

func _play() -> bool:
	var timer := get_tree().create_timer(duration)
	timer.connect("timeout", self, "_on_timer_timeout", [], CONNECT_ONESHOT)
	return false

func _on_timer_timeout() -> void:
	_finished()
Additional hooks and utilities:
on_sequence_started()/on_sequence_ended()are called at the start/end of the full sequence.- Implement
_force_finished()in asynchronous events to handle skipping in editor/debug (e.g., using the skip action); call_finished()at the end. - For debug builds,
debug_bypasson an event immediately marks it finished.
Basic flow of an event
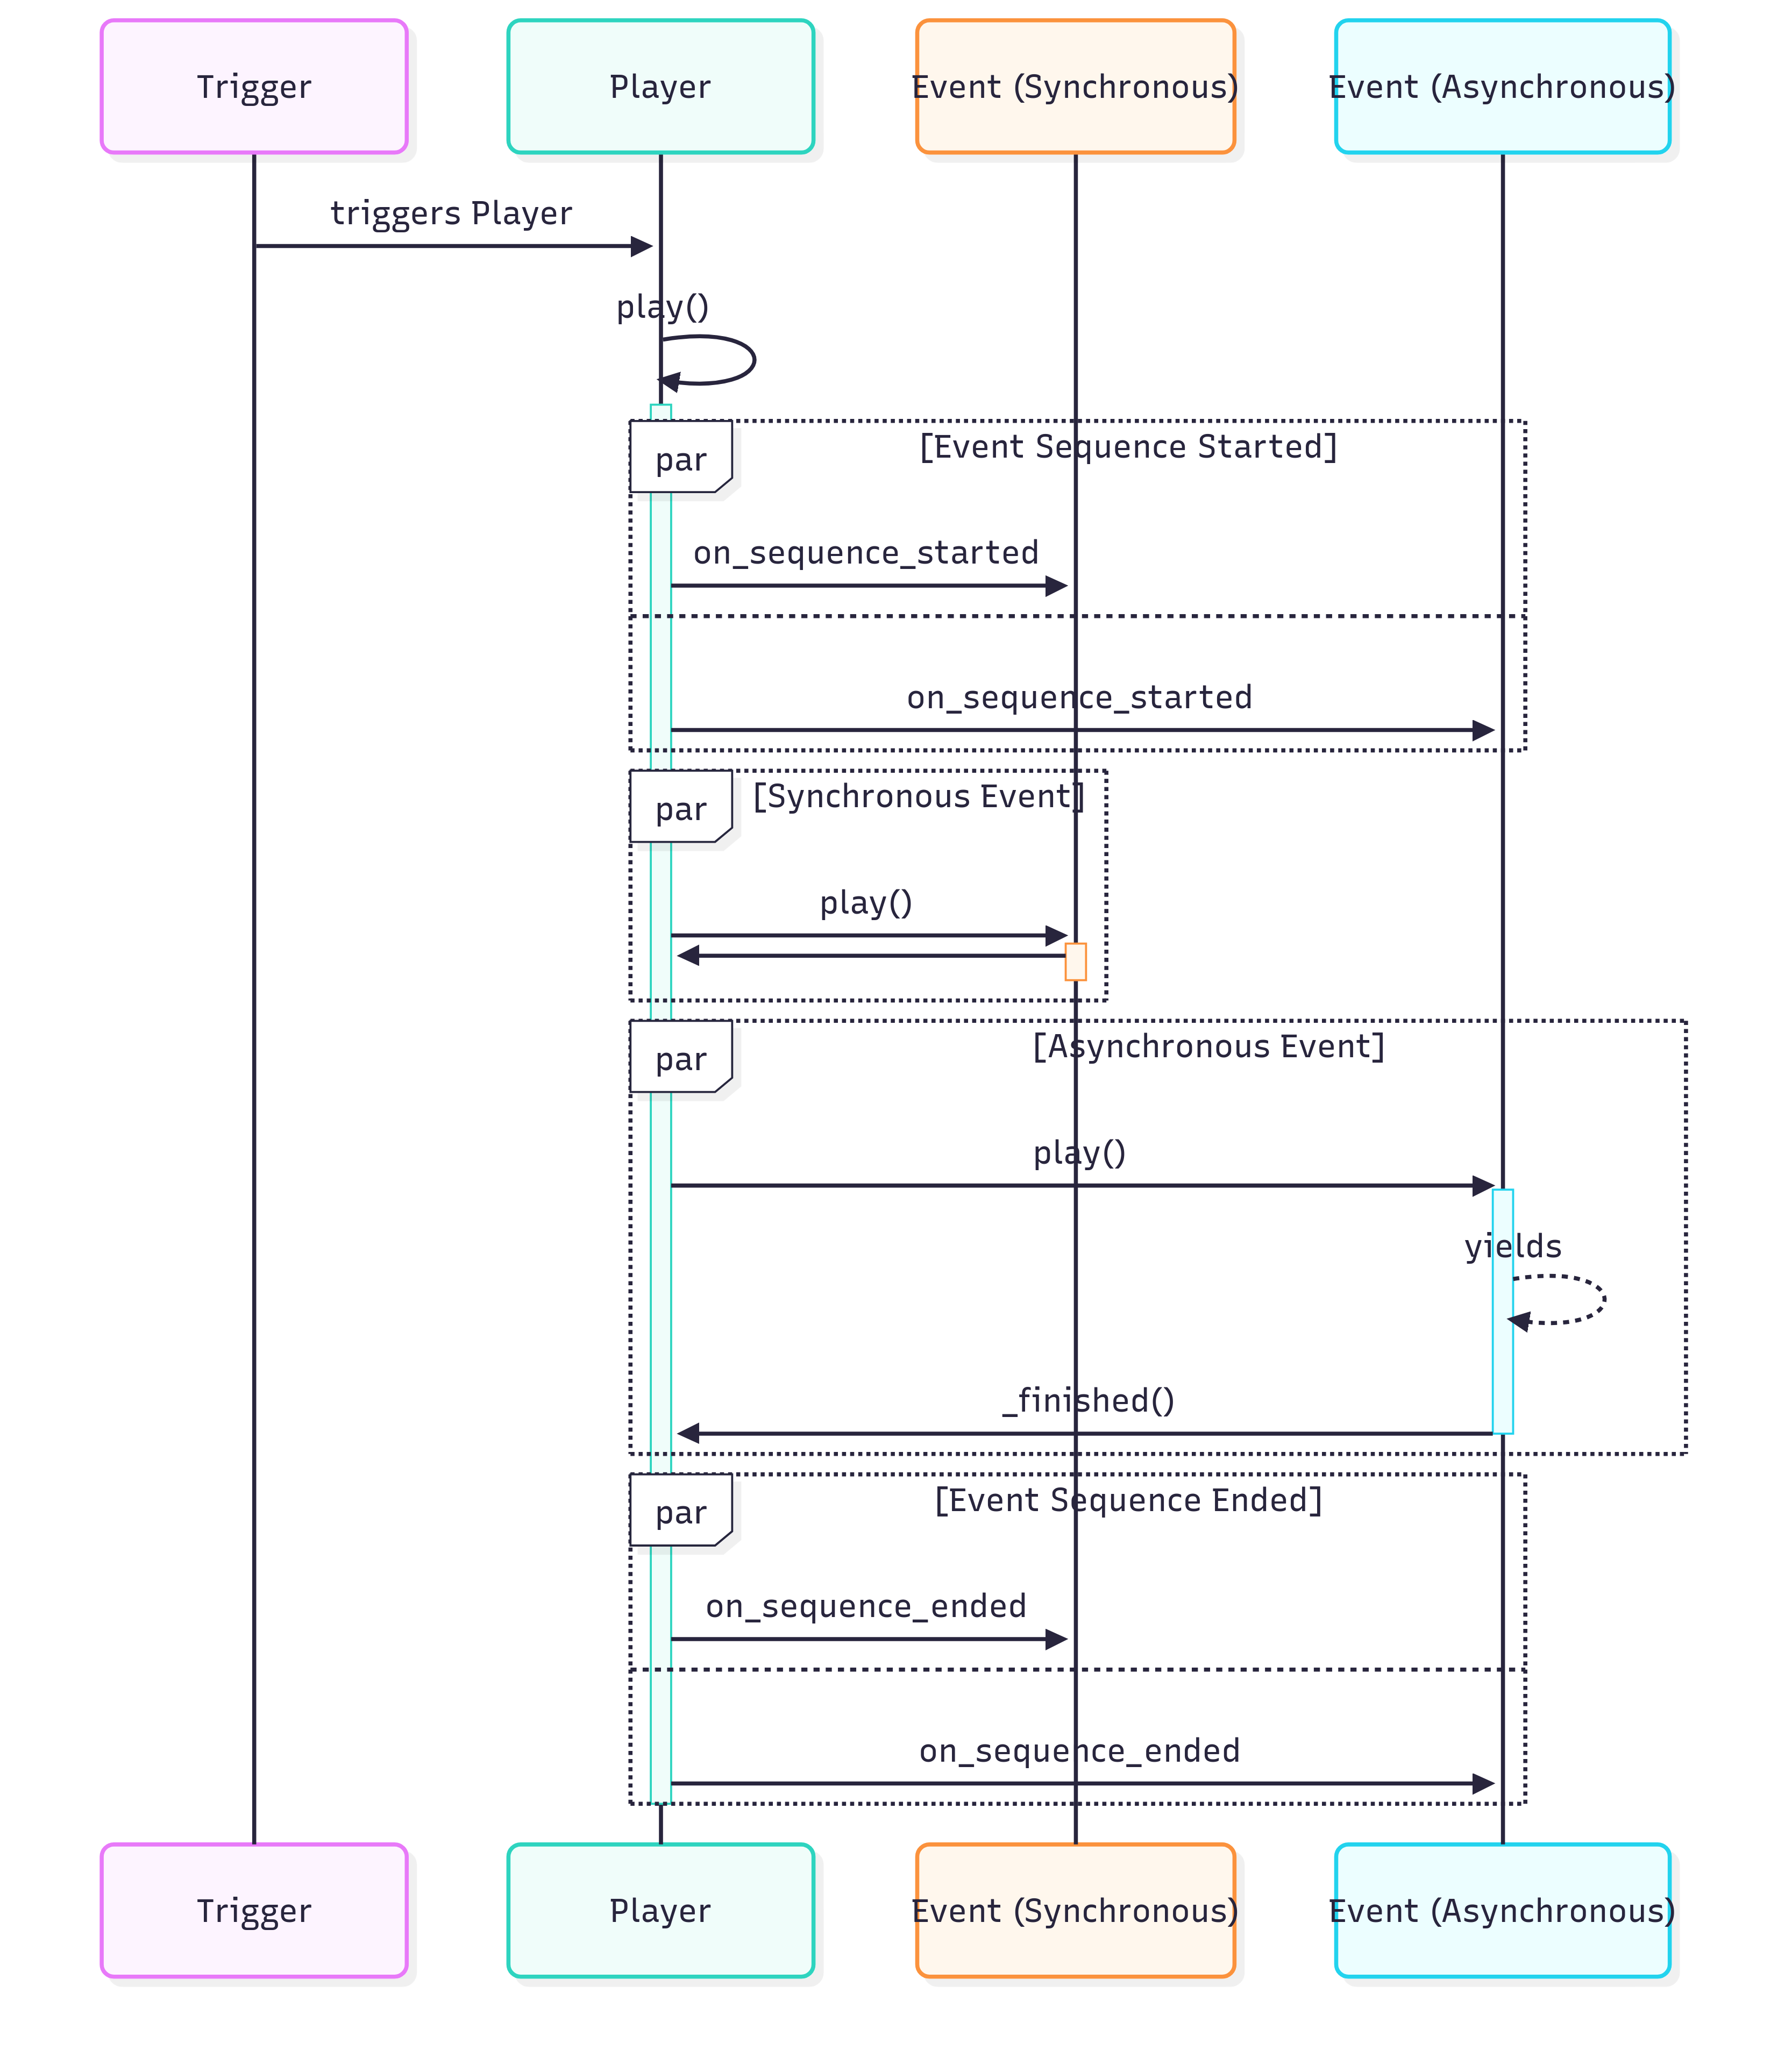
sequenceDiagram
        participant T as Trigger
        participant P as Player
        participant ES as Event (Synchronous)
        participant EAS as Event (Asynchronous)

        T->>P: triggers Player
        P->>P: play()
        activate P
        par Event Sequence Started
            P->>ES: on_sequence_started
        and
            P->>EAS: on_sequence_started
        end
        par Synchronous Event
            P->>ES: play()
            activate ES
            ES->>P:
            deactivate ES
        end
        par Asynchronous Event
            P->>EAS: play()
            activate EAS
            EAS-->>EAS: yields
            EAS->>P: _finished()
            deactivate EAS
        end
        par Event Sequence Ended
            P->>ES: on_sequence_ended
        and
            P->>EAS: on_sequence_ended
        end
        deactivate P
With what script it communicates
Events can control: Player, GameplayCamera, NPCs, Enemies.
Events can trigger: Dialogue, Inner Monologue.
Saving: ChapterEvent data (start/end/last event) is stored via NarrativeManager. After a sequence finishes, the system requests saving the current slot.
Chapter Event Classes
Camera Control
| Class | Usage | Inspector Settings |
|---|---|---|
EventCameraMove | Moves GameplayCamera along a Path2D over a given duration. | path_path2d NodePath – movement pathduration float – seconds (default 1.0)transition_type Transitionease_type Ease |
EventCameraReturnToPlayer | Returns GameplayCamera back to the Player automatically. | |
EventCameraSetPosition | Instantly places GameplayCamera at a fixed position. | path_node2d NodePath – target position |
Player Control
| Class | Usage | Inspector Settings |
|---|---|---|
EventPlayerMove | Moves the Player along a Path2D at their current run/walk speed. | path_path2d NodePath – movement path |
EventPlayerMoveOffset | Moves the Player by an offset relative to current position. | move_offset Vector2 – delta |
EventPlayerMoveAwayFrom | Moves the Player away from a target until reaching a min distance. | avoidance_target_path NodePath – targettarget_distance floatlook_to_target_when_finished bool |
EventPlayerLookTo | Rotates the Player to face a given direction. | direction FacingDirections |
EventPlayerIdle | Forces the Player to the Idle animation/state. | |
EventPlayerSit | Plays the Player sit animation/state. | |
EventPlayerEmote | Shows an emote bubble above the Player. | icon_type Emote.IconTypebubble_type Emote.BubbleType |
NPC Control
| Class | Usage | Inspector Settings |
|---|---|---|
EventNPCMove | Moves an NPC along a Path2D, using the NPC’s own move speed. | path_npc NodePath – NPCpath_path2d NodePath – movement path |
EventNPCLookTo | Rotates an NPC to face a given direction. | direction FacingDirectionspath_npc NodePath – NPC |
EventNPCIdle | Forces an NPC into Idle animation/state. | path_npc NodePath – NPC |
EventNPCSit | Plays an NPC sit animation/state. | path_npc NodePath – NPC |
EventNPCSpearThrust | Plays an NPC spear‑thrust animation and waits for it to end. | path_npc NodePath – NPCdirection ValidDirections (LEFT/RIGHT) |
Enemy Control
| Class | Usage | Inspector Settings |
|---|---|---|
EventEnemyAnimation | Plays an animation on a specific Enemy. | enemy_path NodePath – Enemy nodeanimation_name String |
EventEnemyEmote | Displays an emote bubble above an Enemy. | enemy_path NodePath – Enemy nodeicon_type Emote.IconTypebubble_type Emote.BubbleType |
EventEnemyLeap | Makes an Enemy leap along a Path2D. | path_enemy NodePath – Enemy nodepath_path2d NodePath – leap path |
EventEnemyMove | Moves an Enemy along a Path2D, optionally towards a target. | path_enemy NodePath – Enemy nodepath_path2d NodePath – movement pathpath_target NodePath – optional targetmove_state String ("Walk"/"Charge") |
EventChangeEnemyLayout | Advances the room’s enemy layout and waits until all active enemies are cleared. | delay_between_spawns float – seconds (default 0.0)delay_to_finish float – post‑clear delay in seconds (default 0.0) |
EventBossBattle | Swaps an NPC into a Boss and starts the boss encounter. | npc_path NodePath – NPC to replacepacked_scene PackedScene – Boss scene |
Scene & Environment
| Class | Usage | Inspector Settings |
|---|---|---|
EventAddNode | Instantiates a PackedScene at a placeholder Position2D, replacing the placeholder. | placeholder_path NodePath – placeholderpacked_scene PackedScene |
EventAddEnemy | Instantiates an Enemy at a placeholder and activates it. | placeholder_path NodePath – placeholderpacked_scene PackedScene |
EventAddNPC | Instantiates an NPC at a placeholder and sets its initial state. | placeholder_path NodePath – placeholderpacked_scene PackedSceneinitial_state InitialStates (IDLE/SEATED) |
EventRemoveNode | Removes a node from the scene and frees it. | node_path NodePath |
EventNode2DMove | Moves any Node2D along a Path2D over a set duration. | path_node2d NodePath – nodepath_path2d NodePath – movement pathduration floattransition_type Transitionease_type Ease |
EventChangeBlockadeStatus | Toggles all Blockade props’ blocking state in the room. | is_blocking bool – true to block, false to unblock (default true) |
EventChangeCaveStatus | Grants or restricts access to a Cave, optionally animating. | cave_path NodePath – Cavestatus Status (GRANT_ACCESS/RESTRICT_ACCESS)animate bool |
Narrative & Dialogue
| Class | Usage | Inspector Settings |
|---|---|---|
EventPlayDialogue | Plays a dialogue JSON file through the Dialogue system. | dialogue_path String (*.json) – path to dialogue file |
EventPlayInnerMonologue | Plays an inner‑monologue JSON file. | inner_monologue_path String (*.json) – path to monologue file |
Audio
| Class | Usage | Inspector Settings |
|---|---|---|
EventChangeMusicState | Changes background music via SoundManager (state/RTPC/event). | Optional toggles: • State → is_state bool, music_state_id String (category is fixed to "MUSIC_STATES")• RTPC → is_RTPC bool, RTPC String, RTPC_value int• Event → is_Event bool, Event String |
Game Flow
| Class | Usage | Inspector Settings |
|---|---|---|
EventChangeScreen | Changes the active Game screen (e.g., next level, cut‑scene). | screen_id Constants.Screens – target screen (default AUTO_NEXT) |
EventWaitForTimer | Waits for a specified time before proceeding. | duration float – wait time in seconds (default 1.0) |
Utility & Chains
| Class | Usage | Inspector Settings |
|---|---|---|
EventChainParallel | Runs all child events in parallel and finishes when every child is complete. | |
EventChainSequence | Runs child events sequentially, one after another. |
Combat Arenas
Combat Arenas can be set in rooms using the Chapter Event system.
How to create a Combat Arena
First, setup a Chapter Event: How to create a Chapter Event.
Set
data.player_can_interacttotrueon theChapterEventPlayerso the Player can interact during the arena.
There are two main events that compose a Combat Arena:
- EventChangeBlockadeStatus: Changes the status of all Blockade props. They should wrap all Enemy rounds of the arena, blocking or unblocking the Player in the room they're in.
- EventChangeEnemyLayout: Changes the Enemy layout and waits for all enemies to be dead.
1. Place the blockers
You may use any Blockade scene and place them inside the Props YSort.
Blockade scenes will appear hidden by default, but you can set it to spawn in "blocking mode" by setting Block On Ready as true in the Inspector.
2. Create your blocking events
Add two EventChangeBlockadeStatus to the ChapterEventPlayer:
- The first one should have
Is Blockingastrue - The last one should have
Is Blockingasfalse
Enemy rounds should be added between them.
Note that this event change the status of all Blockade props in scene. We may change that, if we need more control.
3. Place the enemies
You need to create an Enemy layout for each round in the arena.
To create a layout, add a YSort node as child of the main Enemies YSort node. Inside that YSort, put the enemies you want.
The name you set for this node will be used as the layout name.
4. Create the Enemy layout events
Add EventChangeEnemyLayout events to the ChapterEventPlayer. For every event, set a Layout Name matching a layout name of the current scene.
The event will spawn the layout and will only proceed after all enemies are dead.
SpawnPosition
Goals
A scene you can place inside levels to mark possible enemy spawn point.
How it works
You need to place SpawnPosition scenes inside of a Node2D named SpawnPositions, inside the main YSort for the level.
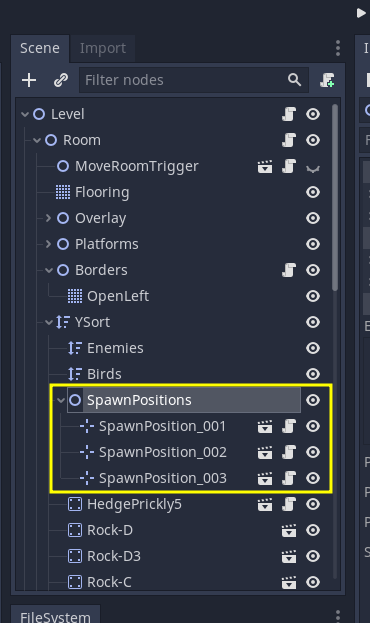
The Room.gd script will identify these nodes and use them to spawn monsters in these starting positions. A SpawnPosition does not guarantee a monster will be spawned and it's also possible to spawn "nothing" according to the time of the day and area. This is normally decided by the WorldDirector script.
But it is possible to bypass the WorldDirector and force any Monster to be spawned using the SpawnPosition exported properties:
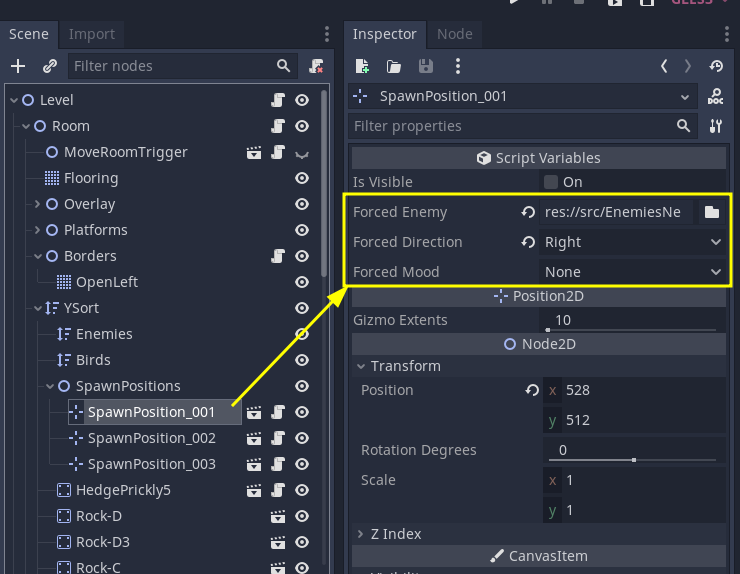
Just use the inspector to find any monster's tscn file you want on the forced_enemy property and that monster will be spawned in that spawn point. You can also use forced_direction and forced_mood to set the initial direction and mood of the monster, or leave them blank to use the monster's default.
This is specially useful for scripted scenes like the Deer tutorial.
With what script it communicates
Doesn't communicate with any other script, is expected by Room.gd
Multi Screen Levels
Levels that are bigger than one screen can be created and mixed with one screen levels.
In them the camera follows the player when you walk around while respecting the limits of the level, and it works seamlessly with the rest of the world when transition between levels, while transitioning from coordinates inside the Multi Screen are handled by a new event signal called internal_level_coords_changed.
Goals
Add more variety and freedom to level design while also giving a fresh perspective and "game feel" to the player, allowing for creating different experiences according to the needs of the game's narrative or gameplay design.
How to create Multi Screen levels
The main structure of a multi screen level is the same as an ordinary level. It should follow the same node hierarchy of single screen levels and same requirements for enemies, navigation, etc.
What needs to be adjusted is:
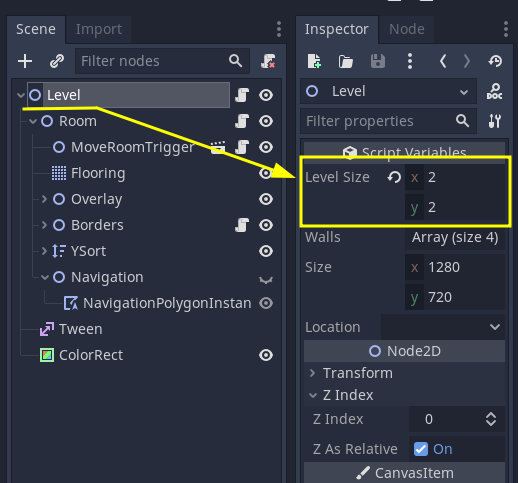
- Set the
level_sizeproperty in the mainLevelnode. It must be set manually, match the actual size of screens that were created in the level and must always be whole numbers.
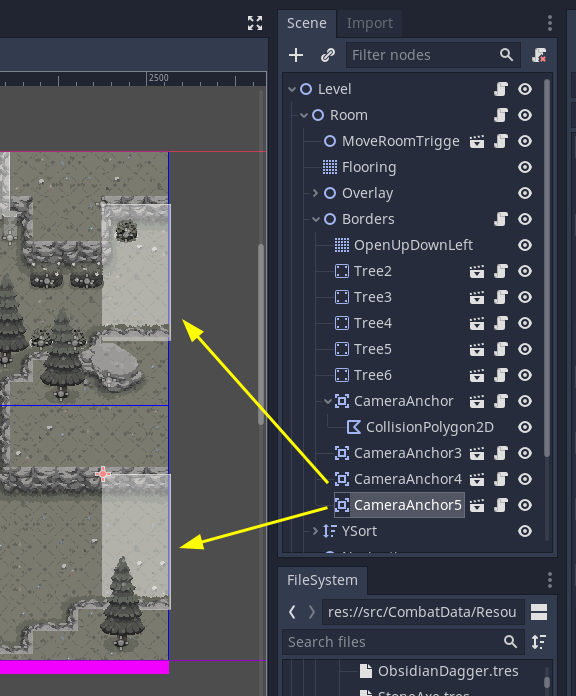
- Setup CameraAnchors around the levels exits/entrances. See more details below.
And that's all. Notice that while you work on the level in the editor, the MoveLevelTriggers will look wrong, and will look like they only cover the first screen of the level:

That is normal and expected, and you don't need to do anything about it, it will calculate its correct dimensions when the game starts running. It will use the level_size property explained above to do it, so if that property has the wrong value, the MoveLevelTriggers will also be wrong on runtime.
Testing Levels
You can test if the level is working and if the camera anchors are setup in a nice way by pressing F6 to run the level scene directly. You will not be able to transition to other leves, but a player and a camera will be automatically added to the scene and you'll be able to walk around, test the camera anchors, fight enemies or test any other challenge the level design proposes.
Setting up Camera Anchors
We need CameraAnchor so that we can lock the screen to the expected "screen coordinate" whenever the player is approaching any exits to prepare for screen transitions or so that the camera doesn't do any weird movements after entering a Multi Screen level.
While the player is inside any CameraAnchor's area, the camera will lock to the coordinates of that screen, as if it were a single screen level. Once the player leaves a CameraAnchor's area the Camera will be freed again and follow the player's position.
ScreenTransitions without CameraAnchor:
ScreenTransitions with CameraAnchor:
To add CameraAnchors, instance the CameraAnchors Scene using Ctrl+Shift+A or drag and dropping it from the filesystem tab. They can live anywhere in the Level hierarchy, but I think it makes sense to but them inside the Borders node.
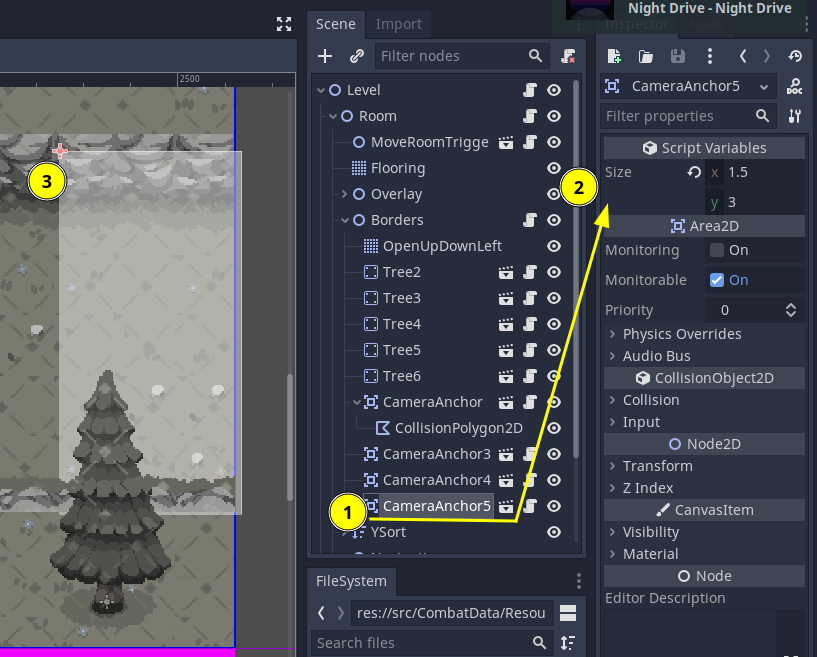
Use the inspector to set their size, and move the node to position them accordingly. Here you can freely use float values for the size, each unit is the size of a tile.
The blue rectangle is a "preview" of where the camera will lock. As you move the node in the editor the "camera preview" will move as the position of the "origin" of the CameraAnchor crosses to a new screen coordinate.
If you need a CameraAnchor with an area that is not a rectangle, you can have it by setting the size to 0 and adding a new CollisionPolygon or CollisionShape node as a child of it. Then you can set your own polygon or any other shape that best applies to the situation.
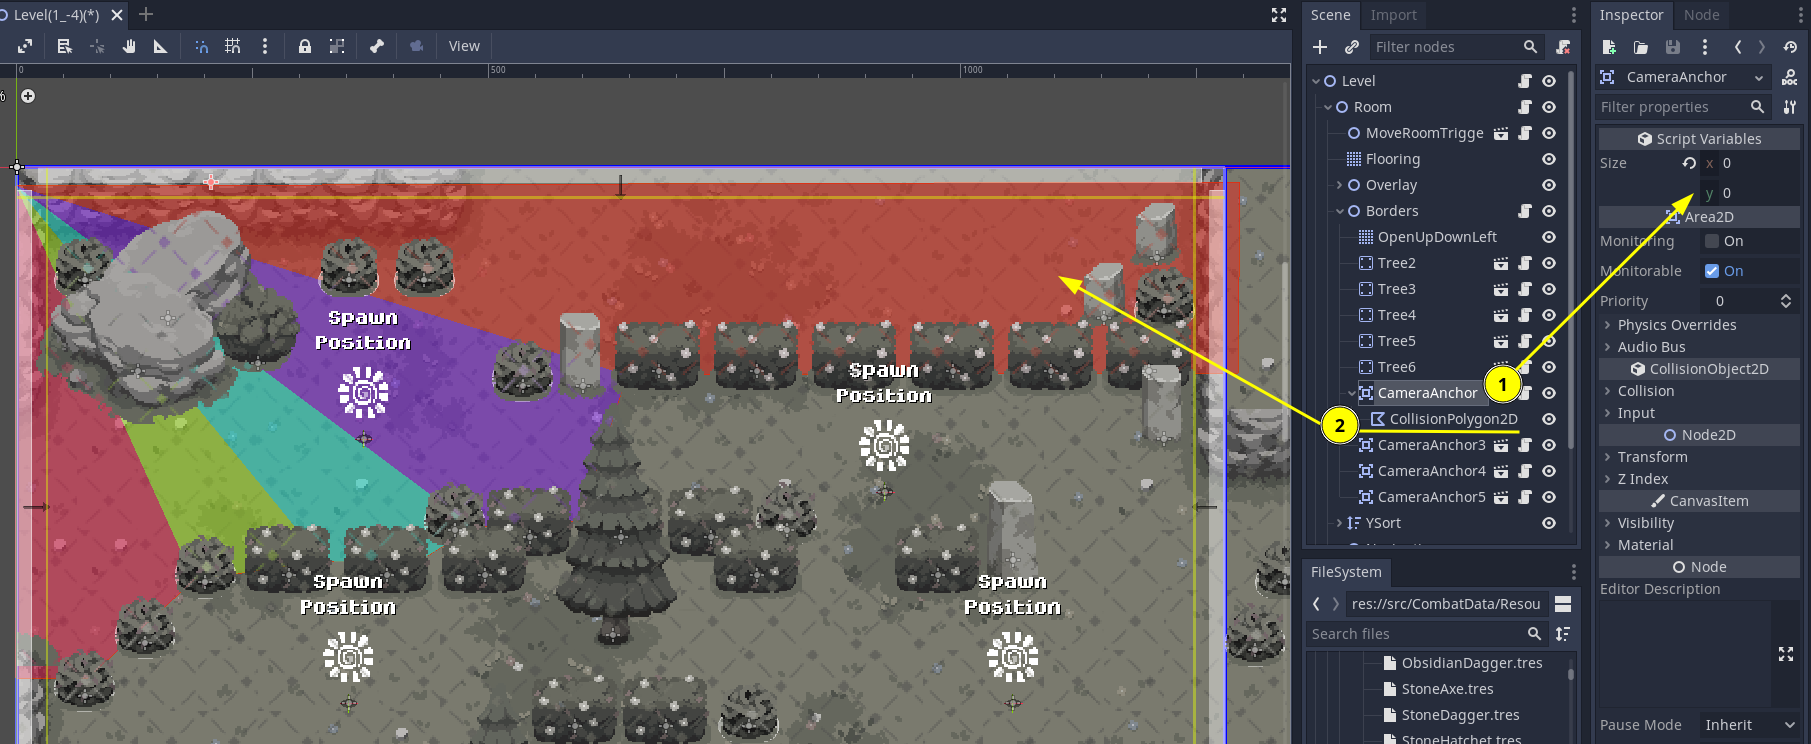
Using Ponds in Multi Screen levels
Do NOT place ponds in intersections between "internal levels", or partially or fully inside camera anchors. Placing them inside or partially inside camera anchors may lead to some weird effects when zooming out when you leave the pond.
Placing them in a way they are in two or more "levels" at the same time doesn't really gives any bugs today, but the player will only be considered as having "changed" levels once it leaves the pond, which might lead to inconsistencies if some code needs to check for player level location or location change.
Here is an image with a few examples of ponds positioning. Ponds marked with a green circle are OK, while ponds marked with a red cross should be avoided:
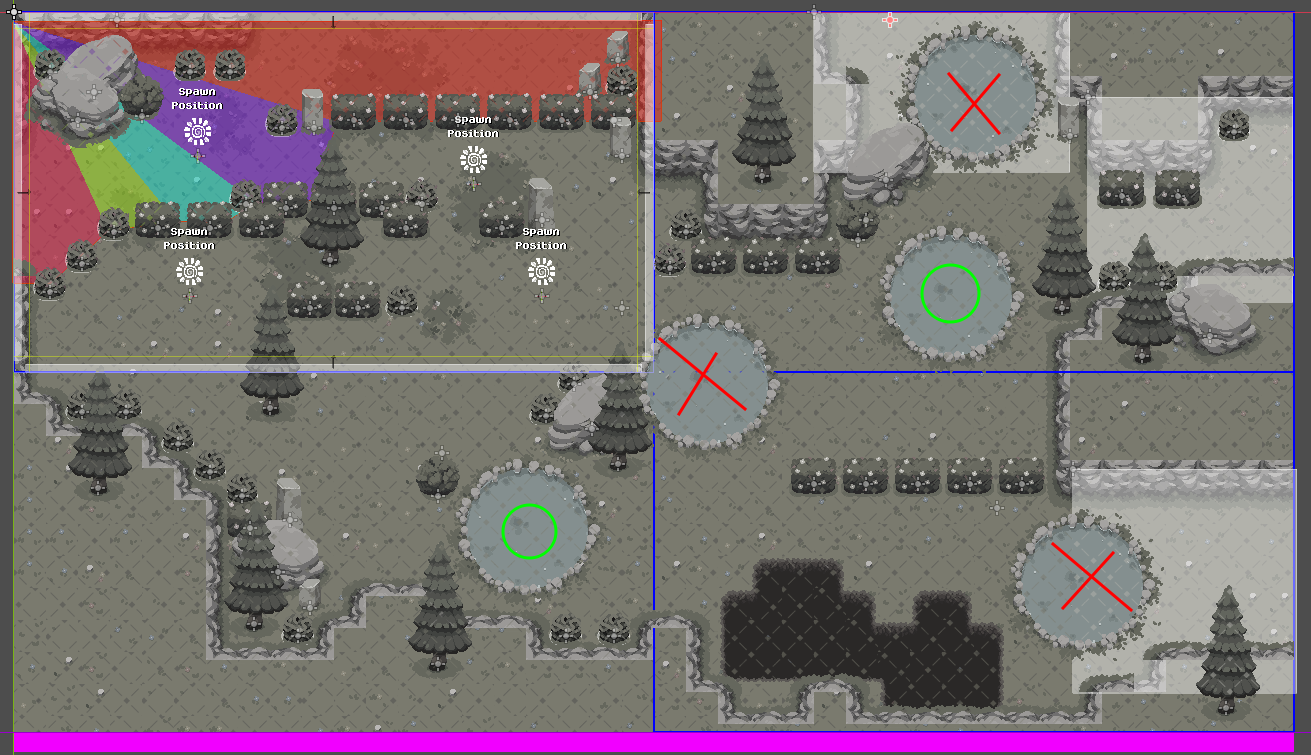
With what script it communicates
This isn't really one specific script, but many changes that were added to Level.gd, Room.gd, MoveLevelTriggers.gd, GameplayCamera.gd and others, as well as new scripts like CameraAnchor.gd and CameraAnchorDetector.gd.
Most noticeably, there were some changes needed to "sanitize" player position as on Multi Screen levels, it can be beyond the base level size, and must be converted to "single screen" position whenever the player is transitioning between levels. And likewise, these "single screen" positions must then be converted back to "multi screen" position when the player is entering into a multi screen level through any "screen" that isn't its "origin" coordinates.
Multi Screen Levels
Levels that are bigger than one screen can be created and mixed with one screen levels.
In them the camera follows the player when you walk around while respecting the limits of the level, and it works seamlessly with the rest of the world when transition between levels, while transitioning from coordinates inside the Multi Screen are handled by a new event signal called internal_level_coords_changed.
Goals
Add more variety and freedom to level design while also giving a fresh perspective and "game feel" to the player, allowing for creating different experiences according to the needs of the game's narrative or gameplay design.
How to create Multi Screen levels
The main structure of a multi screen level is the same as an ordinary level. It should follow the same node hierarchy of single screen levels and same requirements for enemies, navigation, etc.
What needs to be adjusted is:
- Set the
level_sizeproperty in the mainLevelnode. It must be set manually, match the actual size of screens that were created in the level and must always be whole numbers.
- Setup CameraAnchors around the levels exits/entrances. See more details below.
And that's all. Notice that while you work on the level in the editor, the MoveLevelTriggers will look wrong, and will look like they only cover the first screen of the level:
That is normal and expected, and you don't need to do anything about it, it will calculate its correct dimensions when the game starts running. It will use the level_size property explained above to do it, so if that property has the wrong value, the MoveLevelTriggers will also be wrong on runtime.
Testing Levels
You can test if the level is working and if the camera anchors are setup in a nice way by pressing F6 to run the level scene directly. You will not be able to transition to other leves, but a player and a camera will be automatically added to the scene and you'll be able to walk around, test the camera anchors, fight enemies or test any other challenge the level design proposes.
Setting up Camera Anchors
We need CameraAnchor so that we can lock the screen to the expected "screen coordinate" whenever the player is approaching any exits to prepare for screen transitions or so that the camera doesn't do any weird movements after entering a Multi Screen level.
While the player is inside any CameraAnchor's area, the camera will lock to the coordinates of that screen, as if it were a single screen level. Once the player leaves a CameraAnchor's area the Camera will be freed again and follow the player's position.
ScreenTransitions without CameraAnchor:
ScreenTransitions with CameraAnchor:
To add CameraAnchors, instance the CameraAnchors Scene using Ctrl+Shift+A or drag and dropping it from the filesystem tab. They can live anywhere in the Level hierarchy, but I think it makes sense to but them inside the Borders node.
Use the inspector to set their size, and move the node to position them accordingly. Here you can freely use float values for the size, each unit is the size of a tile.
The blue rectangle is a "preview" of where the camera will lock. As you move the node in the editor the "camera preview" will move as the position of the "origin" of the CameraAnchor crosses to a new screen coordinate.
If you need a CameraAnchor with an area that is not a rectangle, you can have it by setting the size to 0 and adding a new CollisionPolygon or CollisionShape node as a child of it. Then you can set your own polygon or any other shape that best applies to the situation.
Using Ponds in Multi Screen levels
Do NOT place ponds in intersections between "internal levels", or partially or fully inside camera anchors. Placing them inside or partially inside camera anchors may lead to some weird effects when zooming out when you leave the pond.
Placing them in a way they are in two or more "levels" at the same time doesn't really gives any bugs today, but the player will only be considered as having "changed" levels once it leaves the pond, which might lead to inconsistencies if some code needs to check for player level location or location change.
Here is an image with a few examples of ponds positioning. Ponds marked with a green circle are OK, while ponds marked with a red cross should be avoided:
With what script it communicates
This isn't really one specific script, but many changes that were added to Level.gd, Room.gd, MoveLevelTriggers.gd, GameplayCamera.gd and others, as well as new scripts like CameraAnchor.gd and CameraAnchorDetector.gd.
Most noticeably, there were some changes needed to "sanitize" player position as on Multi Screen levels, it can be beyond the base level size, and must be converted to "single screen" position whenever the player is transitioning between levels. And likewise, these "single screen" positions must then be converted back to "multi screen" position when the player is entering into a multi screen level through any "screen" that isn't its "origin" coordinates.
TestingCaves
Testing Individual Rooms
Just open any individual Cave scene in res://src/ProceduralLevels/Levels/Caves/ and press F6 or "Play Scene" button.

This works because on Room.gd of the following code for testing any "Level" scene by running them standalone:

if get_tree().current_scene == owner: is a good trick to be able to run special logic to enable these kinds of tests. And since this is in Room.gd it should also work for any LinearWorld levels as well.
This is just useful to walk around the scene, as you won't be able to navigate to other levels, nor there will be any enemies spawned.
Testing entire caves with Sandbox
Open the ProceduralWorldSandbox.tscn scene and press F5.
You can press F10 to toggle between the "Debug Camera" and the "Gameplay Camera". While in the "Debug Camera" you can:
- pan around using the movement keys
- zoom in/out with the mouse's scroll wheel
Testing Caves in game.
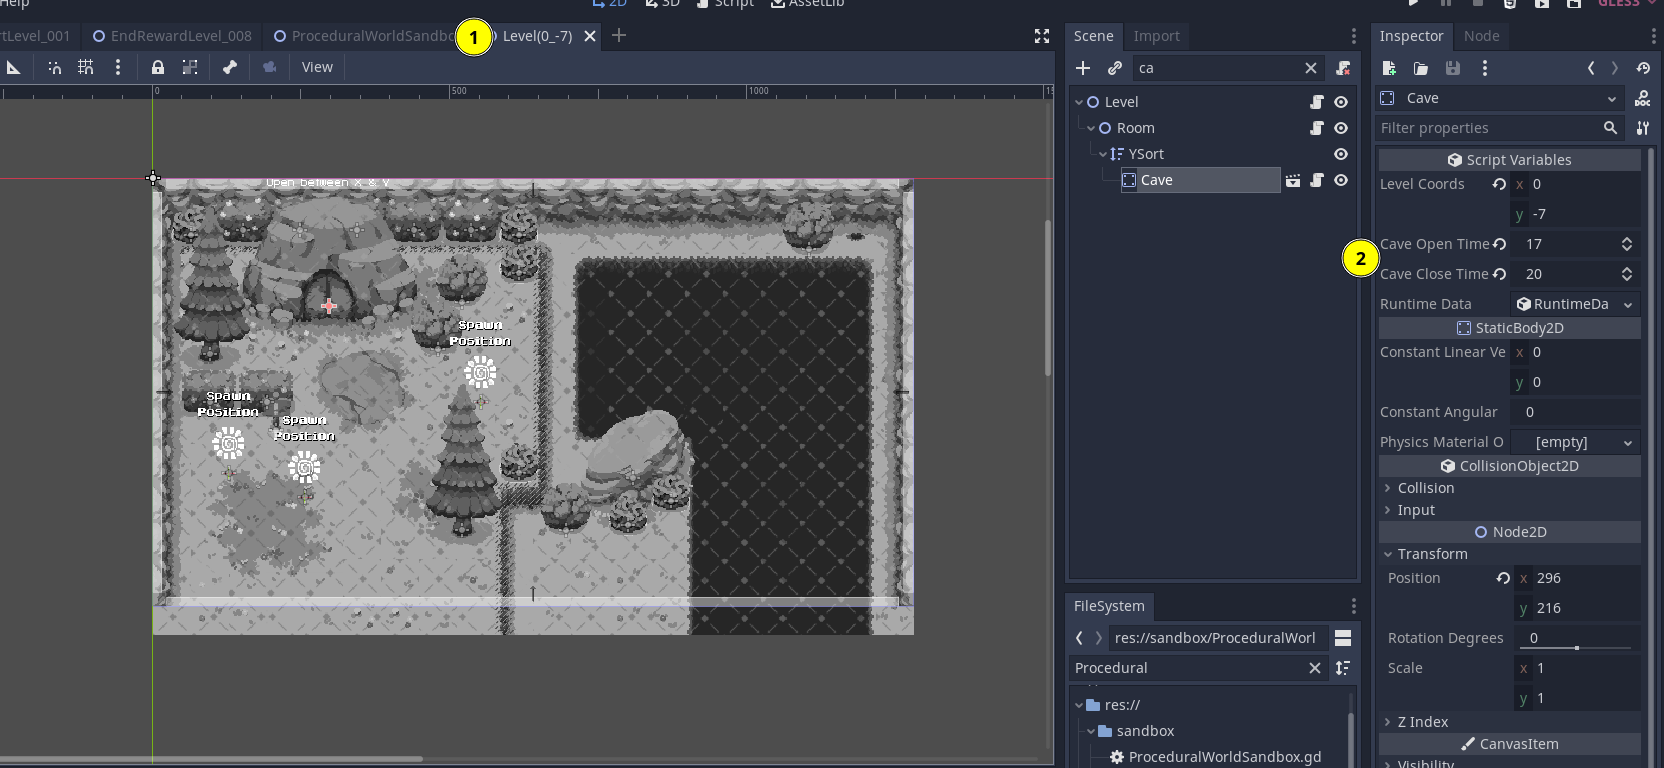
- Find out what is the level that has the cave you want to test
- Find out what the "opening hours" for it are.
- Run the game normally, use the Debug Menu to warp to the desired level and set the time of the day to something inside the cave's opening hours
- Save the game so that you don't need to repeat this setup
- Enter the Cave
Here you can also use F10 to toggle between Gameplay and Debug Camera just as above.
Platforms
Platforms are in-land and are raised levels where a Player can climb/walk up or drop down from.
How to convert the old PlatformWalls to the new PlatformWalls
The old PlatformWalls tilemap relied on a PlatformCollisions tilemap, and you had to manually add the collision tiles to the scene.
The new PlatformWalls integrate the collision box in the tile itself removing the need to manually place collision tiles.
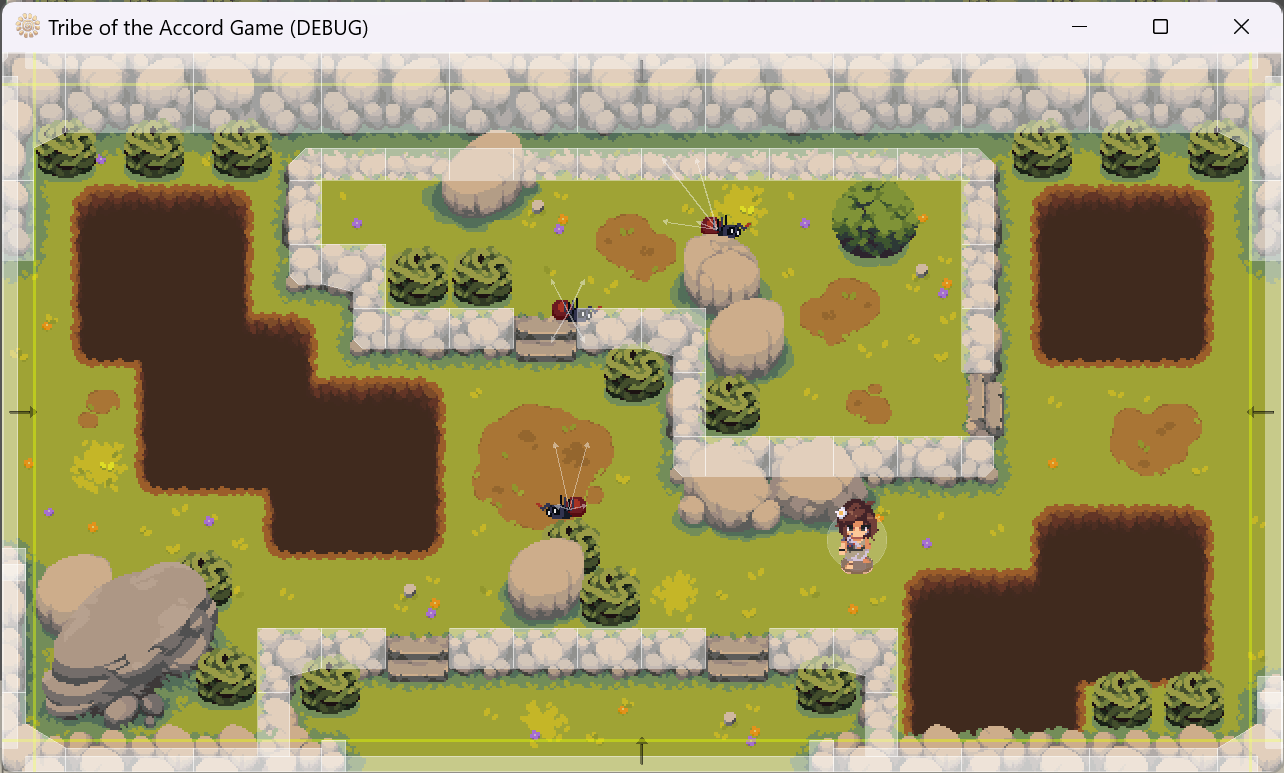
To convert a level:
- Remove the "PlatformCollisions" tilemap node. (Under the "Room > Platforms" node)
That's it!
Pits
Pits (or Chasms) are tilemaps in the level design that the Player can fall down if colliding inside one of the drop zones. When the Player drops down, they lose a bit of health, and they are respawned to the latest entry point of the level they are in. Pits are supported for each Location/Biome.
How to Convert Old Pits to New Pits
In the old pits tilemap, a Pitbox Area2D was used, and you had to manually add CollisionPolygon2D nodes to the scene.
The new pits integrate the collision box directly into the tile itself, eliminating the need to manually place CollisionPolygon2D nodes.

Steps to Convert the Level:
- Remove the "PitBox"
Area2Dnode (located under the "Pits" tilemap). Ensure that the name of the node is "Pits" Otherwise the Player won't get triggered. - Set the "Pits" tilemap's collision layer to 17 (PitsBox).
- Remove all collision masks from the "Pits" tilemap.
That's it!
How to Add Collision to a Tilemap's Tile Set
-
Click on the tile set.
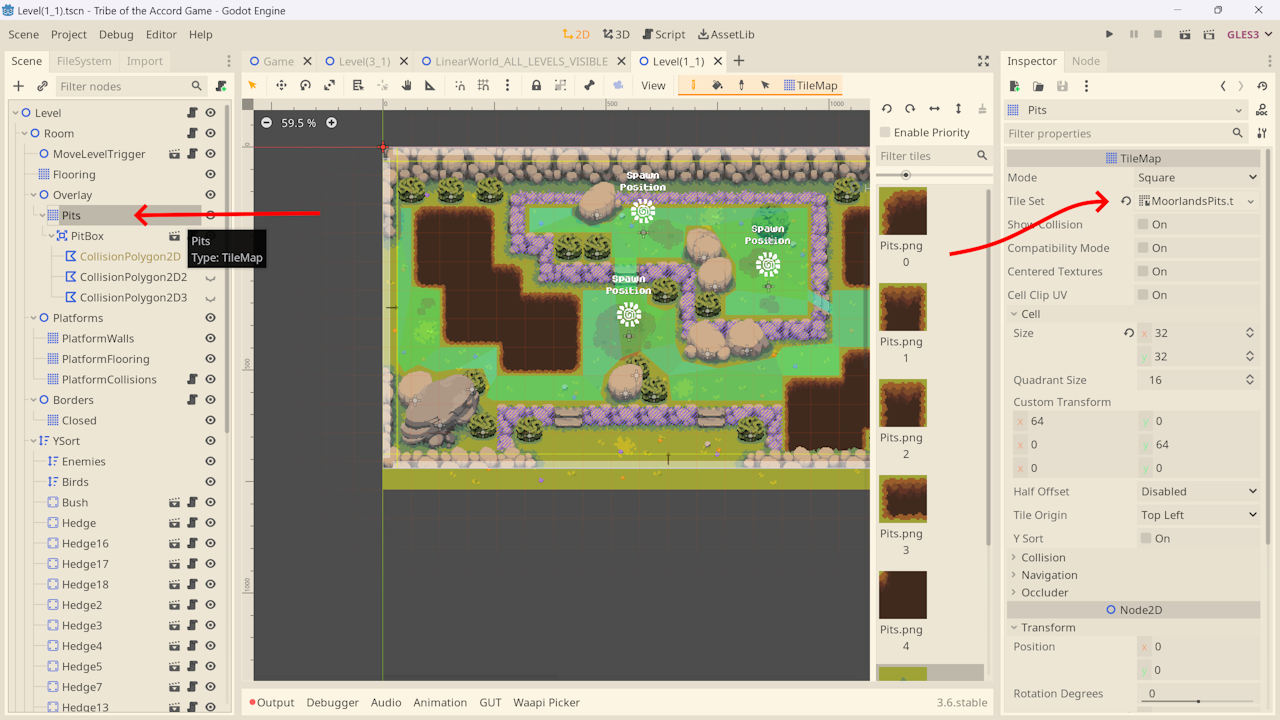
-
Click on the tilemap icon on the left.
-
Select the tilemap in the center.
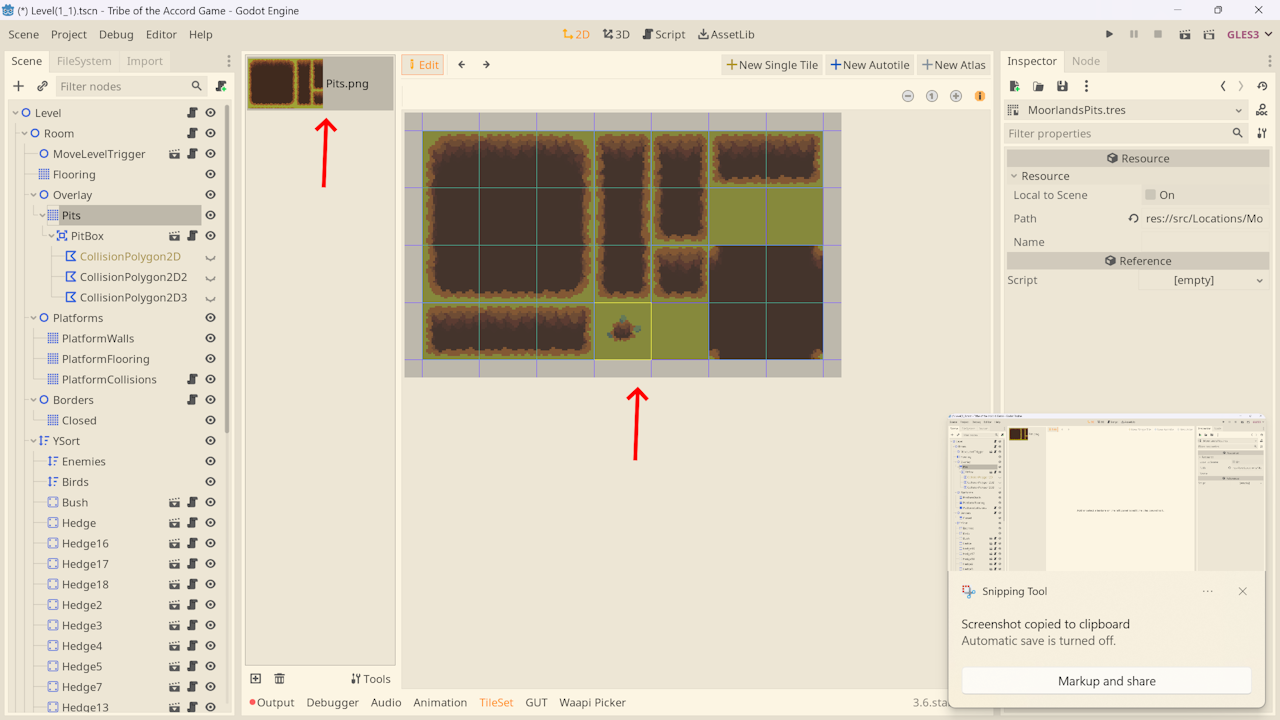
-
Click the snap icon.
-
Change the step size to a small value (e.g., 4x4).
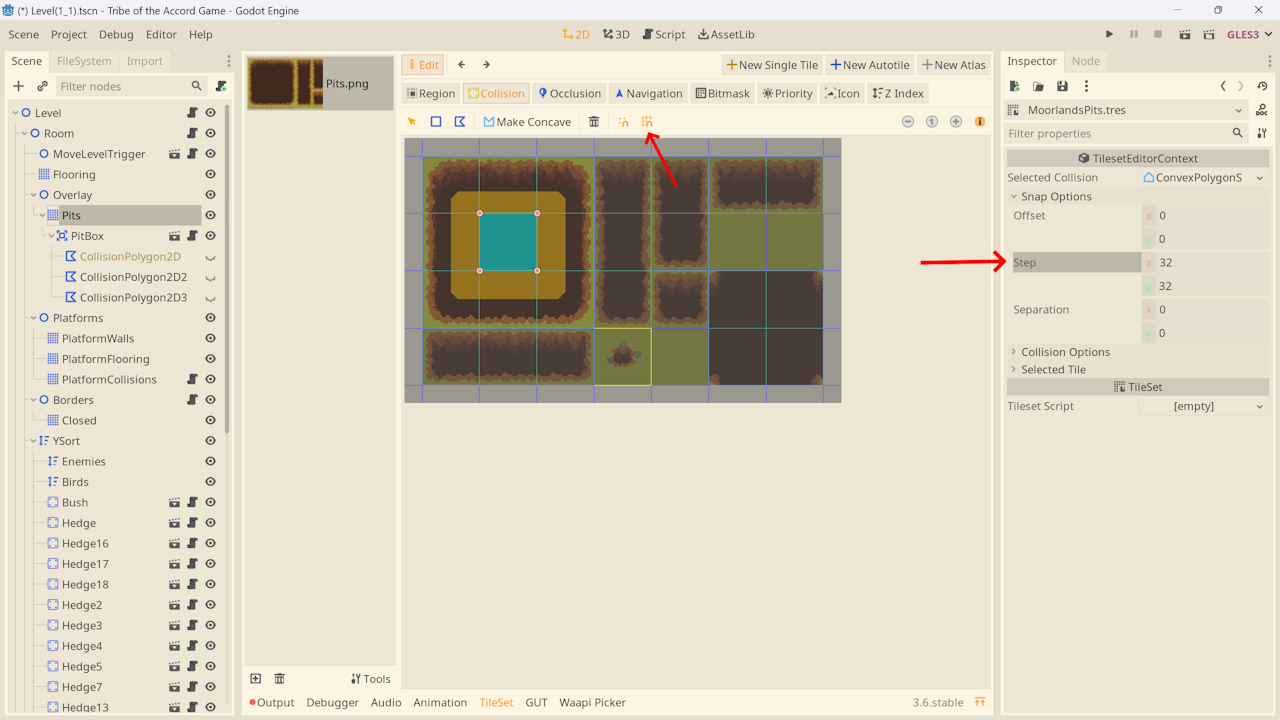
Stairs
How to convert the old PlatformWalls' stairs to the new PlatformStairs
A new PlatformStairs tilemap has been created to simulate depth, it add a force when the player climbing the stairs. It can be used alongside the PlatformWalls tilemap.
If the stairs has been placed with the PlatformWalls tilemap the stairs will not apply a force. To do so please use the new PlatformStairs tilemap.
How to create a PlatformStairs tilemap in a Level
- Duplicate the PlatformWalls tilemap node.
- Rename the duplicated node to
Platform_Stairs - Replace the tile set with
assets/Stairs/PlatformStairs.tres. - Go to the Collision section of the tilemap.
- Remove every layer for the Collision Layer and Collision Mask.
- In the Collision Layer add the
Stairslayer. - You can now add stairs that will apply force automatically to the player.
AnimatedSprite
The player spritesheets are displayed by an animated sprite, it contains an animation for every spritesheet of the player.
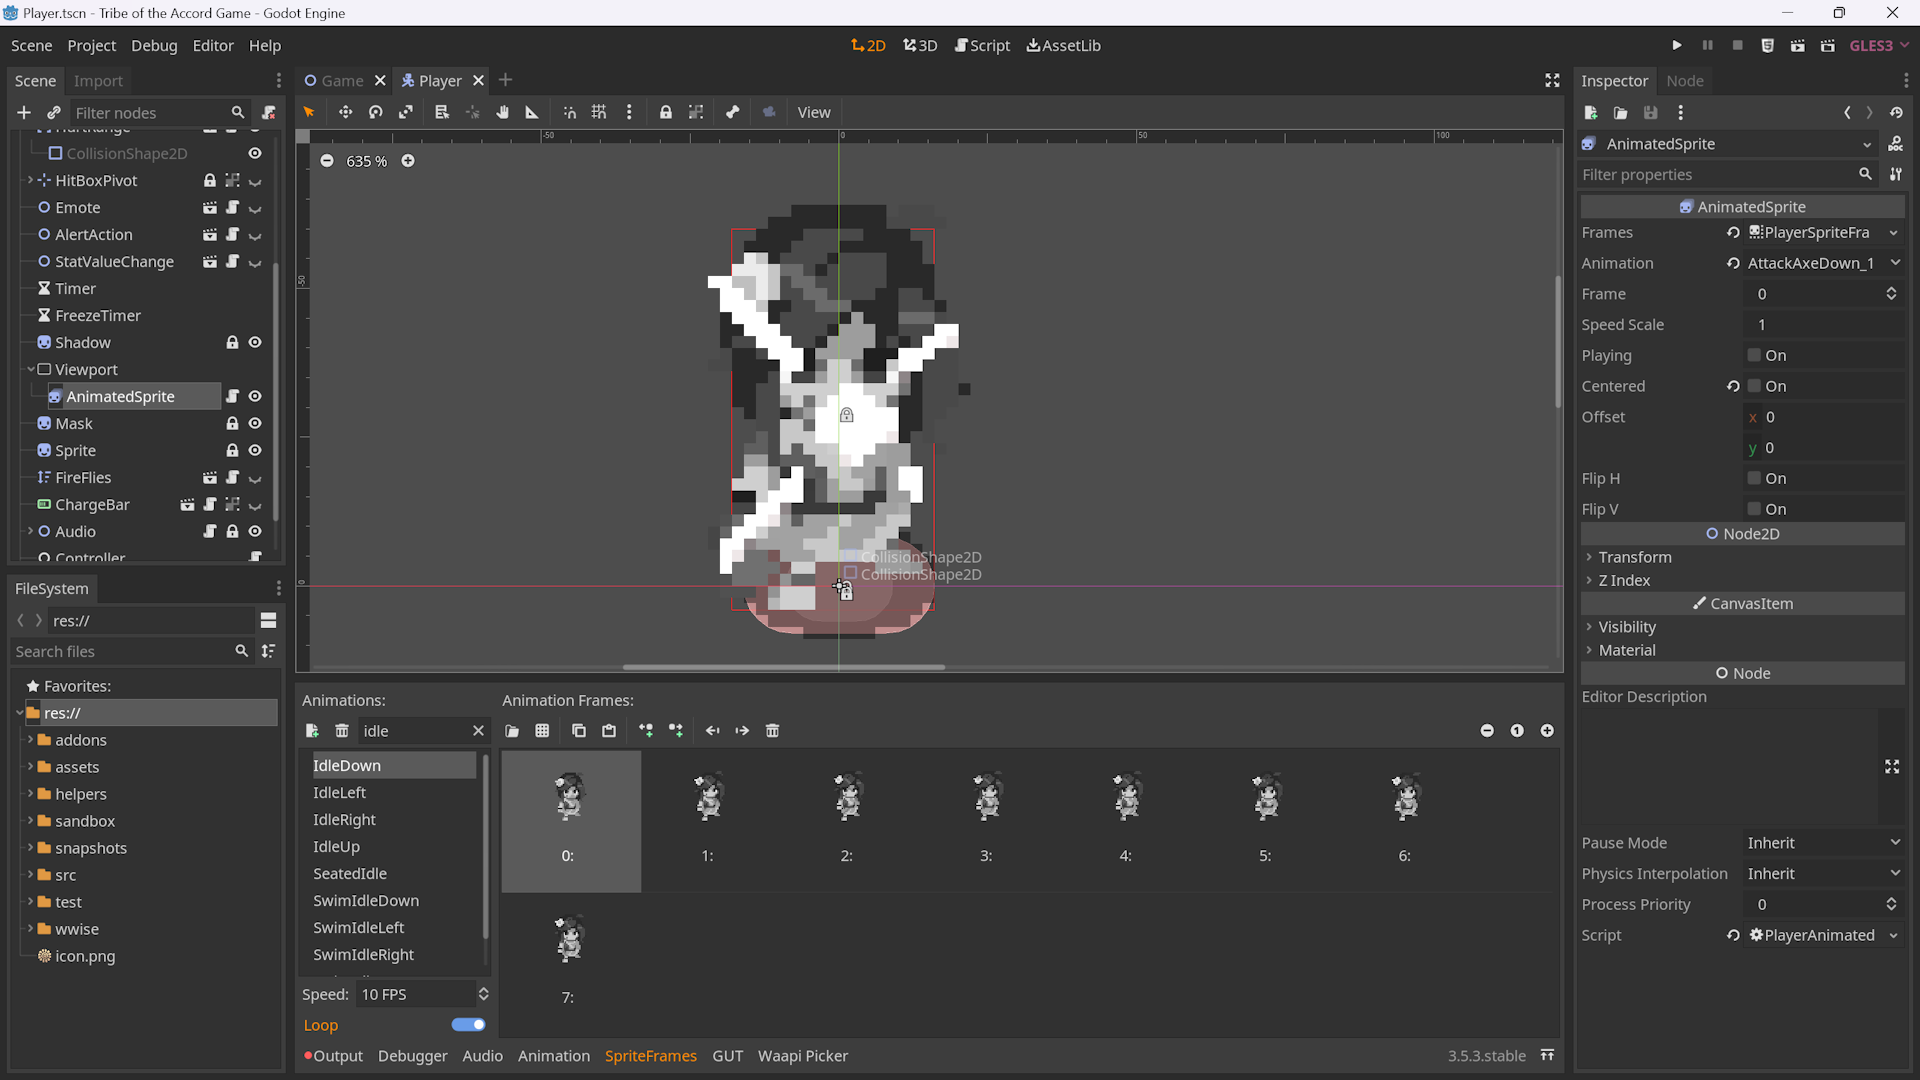
How to add a new spritesheet
Add a new animation in the animation player, then add a callback track to call the method change_spritesheet in the script of the animated sprite (add the animation name as the arg).
Set the new animation in the animation tree.
Lastly, add a new animation in the animated sprite, the animation name must be the same as the one in the animation player (do not forget to set if the animation of the animated sprite loops), then add the frames of the new spritesheet in the animated sprite’s animation.
Why use a method track instead of signals?
Due to a bug (only fixed in Godot 4) the animation player will not send signals if the animation was set by an animation tree.
So, it is a track of the animation player that changes the animated sprite’s animation by calling a method in its script (change_spritesheet)

Why we are doing this?
The previous approach was to have a single spritesheet containing all the player animations.
In the player's animation player, each animation changed the frame index of a sprite.
Every time the spritesheet was changed, we had to change all the values of every frame in every animation. This was unsustainable.
AnimatedSprite
The player spritesheets are displayed by an animated sprite, it contains an animation for every spritesheet of the player.
How to add a new spritesheet
Add a new animation in the animation player, then add a callback track to call the method change_spritesheet in the script of the animated sprite (add the animation name as the arg).
Set the new animation in the animation tree.
Lastly, add a new animation in the animated sprite, the animation name must be the same as the one in the animation player (do not forget to set if the animation of the animated sprite loops), then add the frames of the new spritesheet in the animated sprite’s animation.
Why use a method track instead of signals?
Due to a bug (only fixed in Godot 4) the animation player will not send signals if the animation was set by an animation tree.
So, it is a track of the animation player that changes the animated sprite’s animation by calling a method in its script (change_spritesheet)
Why we are doing this?
The previous approach was to have a single spritesheet containing all the player animations.
In the player's animation player, each animation changed the frame index of a sprite.
Every time the spritesheet was changed, we had to change all the values of every frame in every animation. This was unsustainable.
AimGuide
The AimGuide is a component of the player used in conjunction with ranged weapon, to handle aim preview.
Goals
- Draw a preview of where the player is aiming at.
- Handle aim assist detection.
How it works
The AimGuide has one public method called get_aim_assisted_position_for. Any ranged weapon can call this function passing the vector of the target's global position and a max length that should be the max range.
The AimGuide will first check if it finds anything to collide in that direction so that it can lock into it, and return the final vector any ranged attack/weapon/projectile should use. The AimGuide will already limit this final position to the max length passed in, and update the aim preview to this "assisted" position. If it doesn't find anything to lock on, it will just update the aim preview and return the vector it received.
Setting up AimAssistAreas
Anything that should be "locked on" by ranged weapons should have a AimAssistArea node. Just create this node from the Add Node interface and it will already come configured with the correct physics layers.
Add a collision shape to it, it should be as big as you want it to be easy for the aim assist to lock into this entity. In the editor, select the path to the collision shape or polygon of the HurtBox for this entity. The AimAssistArea will redirect the aim to the position of the collision of the HurtBox, to ensure the projectile is headed to where it will actually deal damage.
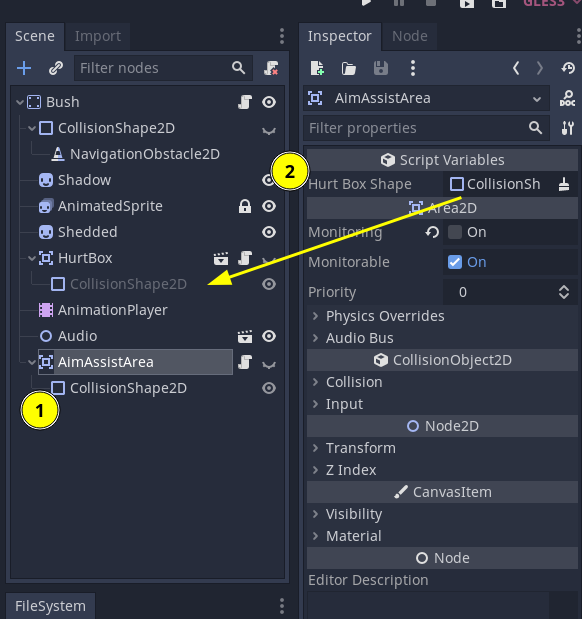
With what script it communicates
AimGuide only communicate directly with AimAssistAreas, to detect them and get the correct aim position from them. Any "Projectile" or "Ranged" State/Weapon can and should use it to get assisted aiming and automate showing the aim preview.
Save Game
This guide explains how to save and persist data.
Goals
- Allow persistance in the Game through Save Slots
How it works
The Save system works around two main "concepts":
- A single "SaveDataHandler" resource
- A common "Save Integration Interface" that any node or resource that needs to save their own data uses.
Overview
The SaveDataHandler.tres resource is responsible for serializing and saving the data in the user:://save_slots/ folder.
For debug builds is will save as .json so that we can explore them and find problems/bugs/modify them. For release builds it will save as a binary file with a .save extension, but it's contents are formatted the same.
It is also responsible for loading save slots, updating any resources and existing nodes with the loaded data, and holding this data so that nodes that are instanced at any other time after slot loading can request their own data from it.
How it works and Save "Interface"
SaveDataHandler expects a minimum "interface" in Resources or Nodes that need to save data:
get_save_data_key()- returns a unique string id that will be used as key in the json to identify that node/resourceget_data_to_save()- returns a dictionary with all the data that node/resource needs save, in whatever structure fits best for that particular node/resourceload_data_from_save(saved_data: Dictionary)- sends the saved data back to the resource/node so that they can update themselves.
This way SaveDataHandler only deals with "Handling" the data from game to disk and from disk to game, not having to know about how they are serialized/deserialized, or which data in each resource/node needs saving or not. Each Resource/Node implements the interface as it's best for its own context.
There is a basic "snippet" for the "interface" that needs to be implemented in each node/resource that needs saving in the script SaveDataUtils.gd that you can copy and uncomment wherever needed
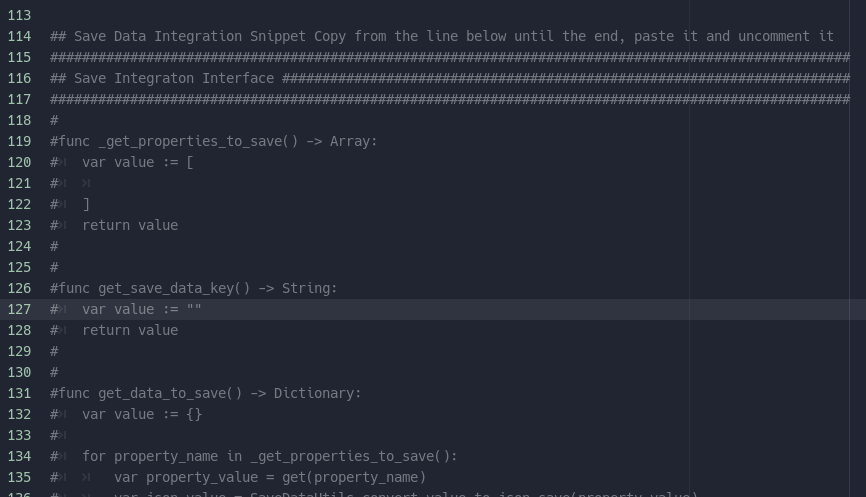
It has some comments with instructions where needed and specially for the one function that is only needed in Nodes

Adding Resources to SaveDataHandler
SaveDataHandler.tres has a property for an array of Resources, just drag and drop the resource that needs to be saved/loaded in it, and implement the "Save Integration Interface" in the script for that particular resource.

Adding Nodes to SaveDataHandler
After implementing the "Save Integration Interface" snippet on the node, make sure to call _setup_saved_data() on the node's _ready() function or somewhere else if it makes sense for this particular node. Avoid calling it on _init(), it will probably be too soon, unless you know this node will always be created after loading a slot. But better to avoid it anyway, _ready() is usually a much better place.
_setup_saved_data() will take are of adding the node to the correct group, so that if the player saves the game, this node will be called by SaveDataHandler when it grabs all the nodes in the group.
Quest Exceptions
The save for Quests work a bit differently. Instead of each QuestLine, Quest, or QuestStep having their own unique id and saving their data, SaveDataHandler only handles QuestManager, and QuestManager will call the interface on each QuestLine and in any active Quest.
This way QuestManager can take care of the details of loading questlines first, activating quests or resuming them, initializing whatever is needed.
Also Quests are responsible for doing the same for their own QuestSteps. This way responsibility is always closer to the best entity to know how to handle these decisions and each one can handle it in the best way.
We don't need this for things like inventories which are simpler systems with less moving parts. If we have any other complex system like quests in the future, this can be used as a starting point, or reference.
SaveDataUtils and Json
Saving to Json and loading back has it's problems. Json only has a few data types, and converts any int into float, it expects every dict key to be a string, which is not always true, and Vector2 that get converted with to_json() or JSON.print() are not converted back to Vector2 by JSON.parse(), they just become strings.
So SaveDataUtils.gd is there to be a helper in this cases. It has the following static functions that can be called from anywhere:
convert_value_to_json_save(value)- this uses duck typing intentionally, to be able to receive any type and convert the ones that are incompatible into something we can later convert back into the original value.convert_json_save_to_value(json_value)- expects values after a json parse, and will convert back the incompatible types to their original types.add_to_save_nodes_group(node: node)- what the save interface uses to add nodes to the correct group, this way if we need to refactor this further up, we can change it here.
Besides this all, it also holds the "save integration interface" snippet, as described above.
How to use it in the editor or for debugging
On the Game scene, there is now a new user_editor_save property:
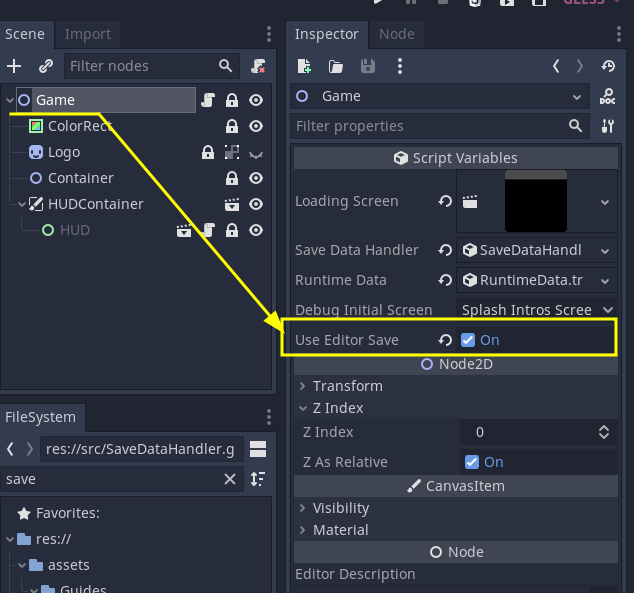
By default it is off, turn it on whenever you want the game to save to an "editor_slot" and whenever you press F5 to run the game it will automatically load it and continue from there.
When it is on it will also ignore the debug_initial_screen property right above it. So if you want to test things like the splashscreen or the Main menu by setting the initial screen, disable use_editor_save
You can choose which slot to use in SaveDataHandler.tres
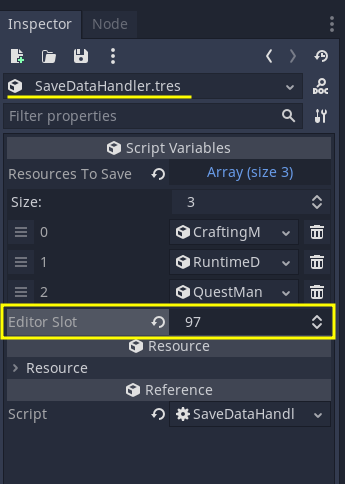
I left a high number so that I wouldn't overwrite actual save slots whenever that screen is integrated. You can use whichever number you want, but DON'T USE 100
Slot 100 is reserved for unit tests, whatever is there will be overwritten and deleted by GUT runs.
Also, if you want to see the save itself, or open it on visual studio code to check out something, just go to "Project > Open User Data Folder"
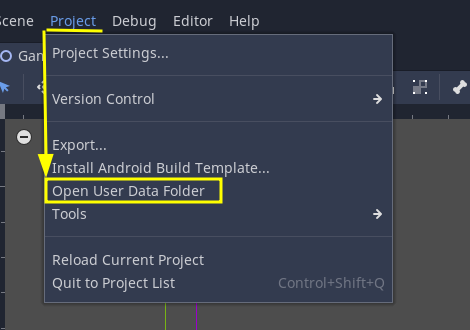
They will be in the "save_slots" folder in a human readable json file.
To Load a Slot
There are two Events for loading a save slot through code in the game:
save_slot_chosen- used bySaveSlotsScreento choose a slot and load it.load_current_slot_requested- used byPauseScreento reload the current slot.
Emitting any of these Event signals will trigger Game to properly handle a transition to a "Loading" screen and continue the game property from the scene the save tells it to go to.
Debug Menu
A scene that holds other scenes which are tools to help debug the game.
Goals
The Goal of the Debug Menu is to be the main HUD for other scenes that allow us to quickly cheat, change aspects of the game, or whatever else helps testing/debugging.
How it works
The scene itself is located at res://src/DebugMenu.tscn and since it is just a "Container" of other scenes that are the debug tools themselves, this scene and its logic is pretty simple.
It listens to input and reacts to the action "ui_debug_levels". Whenever this action is released it will toggle the debug menu to either _open() or _close(). These functions already take care of pausing the game and handling keyboard/controller focus.
It is dynamically instanced by Game.tscn when it recognizes that the current build is a "debug" build.
Accessing other nodes from the DebugMenu
Many times some tool inside the DebugMenu will have to access specific nodes, like LinearWorld, Player, or DayNightCycle.
An "easy" solution for that is using find_node on the root.
var _player = get_tree().root.find_node("Player", true, false) as Player
It is usually frowned upon and discouraged to use find_node as it is and expensive function and might make some weird couplings, but since this is just a debug menu and not actual gameplay logic, and if it's not something that will run on a loop or on process, then it can be used.
It might be good to try to cache the reference to avoid having to find the node every time a button is pressed. But, since the DebugMenu lives on Game and is persistent through scene changes, a "player" or "world" node that you've cached might not be valid anymore. This is an how PlayerDebugTool deals with it:

This way I run _is_player_valid() at the start of any functions that needs a reference to the player. If it has no reference it will grab one and check that it is valid. If it already has one and it's still valid, it will just return true. And if it can't find a valid reference it will return false and let me exit the function that needs the player.
Setting up the Debug Menu export vars
DebugMenu has one export vars:
_path_first_focusis an "internal" export var, as in, it's not meant to be edited from outside of the scene. It's just to choose which of the debug tools will receive the keyboard/controller focus whenDebugMenuis first opened.
Making DebugMenu "sections" keyboard/controller friendly
Godot is usually pretty good at understanding focus between control nodes and navigating through them with a controller/keyboard. What happens sometimes is that when you are navigating focus goes to a "container" control that shows no feedback.
To make any scene keyboard/controller friendly inside the current scenes from the DebugMenu, I had to connect the focus_entered signal of the root control node of the scene to itself, and then make a desired first button grab the focus:

With just that in each of the "child" scenes from the DebugMenu it's enough for Godot itself to handle navigation between the buttons of each section and not "lose" focus when navigating between sections.
With what script it communicates
With LinearWorld, DayNightCycle, Player and possibly whatever tool is inside it and what they require.
Debug Menu
A scene that holds other scenes which are tools to help debug the game.
Goals
The Goal of the Debug Menu is to be the main HUD for other scenes that allow us to quickly cheat, change aspects of the game, or whatever else helps testing/debugging.
How it works
The scene itself is located at res://src/DebugMenu.tscn and since it is just a "Container" of other scenes that are the debug tools themselves, this scene and its logic is pretty simple.
It listens to input and reacts to the action "ui_debug_levels". Whenever this action is released it will toggle the debug menu to either _open() or _close(). These functions already take care of pausing the game and handling keyboard/controller focus.
It is dynamically instanced by Game.tscn when it recognizes that the current build is a "debug" build.
Accessing other nodes from the DebugMenu
Many times some tool inside the DebugMenu will have to access specific nodes, like LinearWorld, Player, or DayNightCycle.
An "easy" solution for that is using find_node on the root.
var _player = get_tree().root.find_node("Player", true, false) as Player
It is usually frowned upon and discouraged to use find_node as it is and expensive function and might make some weird couplings, but since this is just a debug menu and not actual gameplay logic, and if it's not something that will run on a loop or on process, then it can be used.
It might be good to try to cache the reference to avoid having to find the node every time a button is pressed. But, since the DebugMenu lives on Game and is persistent through scene changes, a "player" or "world" node that you've cached might not be valid anymore. This is an how PlayerDebugTool deals with it:
This way I run _is_player_valid() at the start of any functions that needs a reference to the player. If it has no reference it will grab one and check that it is valid. If it already has one and it's still valid, it will just return true. And if it can't find a valid reference it will return false and let me exit the function that needs the player.
Setting up the Debug Menu export vars
DebugMenu has one export vars:
_path_first_focusis an "internal" export var, as in, it's not meant to be edited from outside of the scene. It's just to choose which of the debug tools will receive the keyboard/controller focus whenDebugMenuis first opened.
Making DebugMenu "sections" keyboard/controller friendly
Godot is usually pretty good at understanding focus between control nodes and navigating through them with a controller/keyboard. What happens sometimes is that when you are navigating focus goes to a "container" control that shows no feedback.
To make any scene keyboard/controller friendly inside the current scenes from the DebugMenu, I had to connect the focus_entered signal of the root control node of the scene to itself, and then make a desired first button grab the focus:
With just that in each of the "child" scenes from the DebugMenu it's enough for Godot itself to handle navigation between the buttons of each section and not "lose" focus when navigating between sections.
With what script it communicates
With LinearWorld, DayNightCycle, Player and possibly whatever tool is inside it and what they require.
HUD
Work in progress
Notifications
Goals
Show a message to the player that pops up on the lower right of the screen. It can be a message that disappears after some time is elapsed or a message that stays visible until it is dismissed by completing some objective in the game.
How it works
Regular Messages
Use the notification_requested event to send your notifications!
This event needs three parameters, the message itself, the type of message, and the duration it should be displayed for before being dismissed. ex:
Events.emit_signal("notification_requested", "Hello World", "warning", 3)
The code above will make a notification pop up in the lower right of the game's window saying "Hello World", it will stay visible for 3 seconds and then hide.
You can also send -1 in the duration to make it stay on screen permanently. Then, you'll need to later dismiss it manually by sending the notification_dismissed event:
Events.emit_signal("notification_dismissed")
Valid Message Types
Message "types" change the icon that is displayed to the left of the notification. You must send a string in the event and valid options are:
- "success" - uses a checkmark as icon
- "warning" - uses an exclamation mark as icon
- "failure" - uses a "x" as icon

- "" (or any other string) - uses an "i" as icon
"Special" Messages
These are used when we need to create messages that have button prompts or any other special requirements.
How to add a new "Special" Notification
- Create a and format the message as you want, inside the Notifications scene. If it has any Button Prompts, make sure to add the correct "action" to it in the inspector.
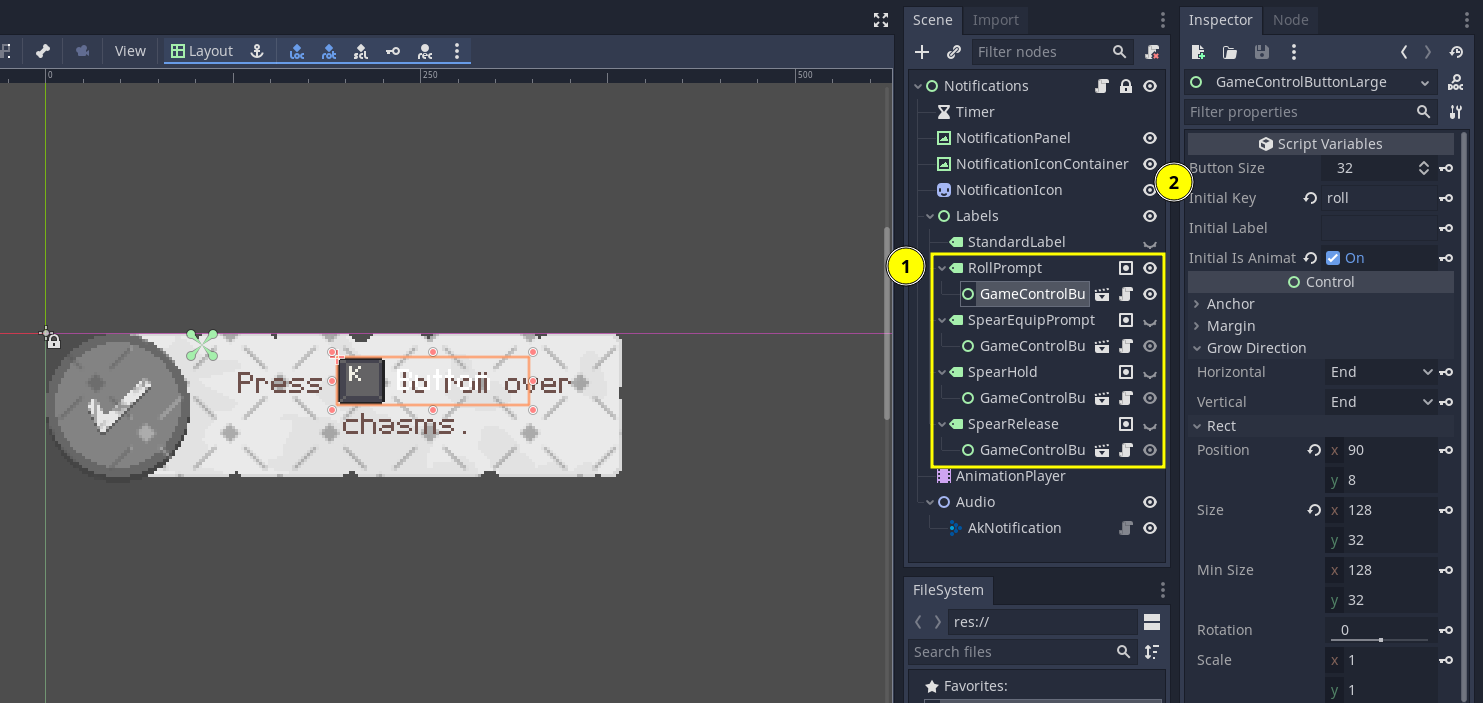
- Make sure to add the Label to the group
special_prompt_label.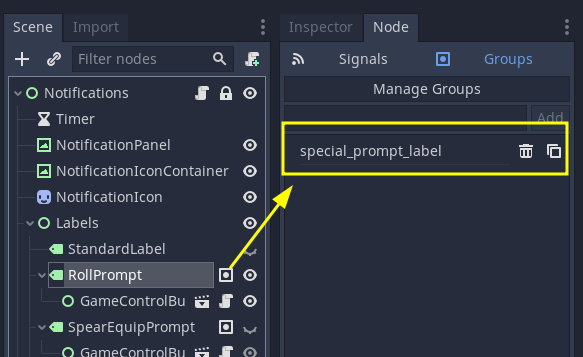
- Add a constant with the Node Name of the new prompt.

How to use special prompts
You send the event notification_special_requested, which has the same three parameters as a regular notification.
Events.emit_signal(
		"notification_special_requested",
		Notifications.SPECIAL_PROMPT_ROLL,
		"warning",
		-1
)
The "type" and "duration" parameters work the same. In the "message" parameter you must send the name of the Node that should be visible, that's why having the constants are useful as they serve as an autocomplete for which special notifications are available.
With what script it communicates
No external scripts. Other scripts communicate with this one through Event signals.
Version Label
Goals
This is a really simple label script that works on it's own and shows the version and if we are in a debug, release or demo build.
How it works
Add this script to any label you want. It will override the label text automatically to show the version label and build info:
- release builds - will show only the version text.
- debug builds - will show the word "debug" besides the version text.
- demo builds - will show the word "demo" besides the version text.
Visibility Modes
It has two "visibility" modes that can be chosen:
- RELEASE - always visible.
- DEMO_DEBUG - only visible in either demo or debug versions.
With what script it communicates
It doesn't interact with any other scripts but it is present in the scenes:
- HUD.tscn - only visible in demo or debug
- PauseScreen.tscn - Always visible
World
Work in progress
Goals
Create a reusable shader for procedurally drawing VFX for a slash/circular strike.
How it works
Maps a texture to rotate around in a circle. The width of the shape from start to end is the curve width, modulated by width mod Start/End range from 0 - 1, and define where the start and end of the shape should be along the circle. Scroll amount rotates the circle's start/end ranges UVmod multiplies the UV after it has been converted to -1 to 1, and can be used to stretch the image. Pixellate scale should be such that it matches some factor of the scale of the vfx, such that it matches the pixel ratio of the game. This will depend on the size of the base texture. Using MissingTexture.png, this is 2x of the scale. For instance, setting the scale to 10,10, means pixellate scale should be 20,20.
Texture should be a black/white map value map, and gradient maps it to colors.
With what script it communicates
Material of canvasitems.
Team
| Name | Role |
|---|---|
| Smks | Project Founder |
| Acetrologer | Marketing & Game Design |
| Daan | Music/Audio |
| Renato | Level Designer |
| Daniel | Developer |
| JP | Developer |
| Marty | Social Media Manager / Marketing |
| Sociales | Artist/Animator |
| Marcelo | Narrative Designer |
Previous Contributors
Thanks for all their contributions
| Name | Role |
|---|---|
| Andrew | Level Designer |
| Flytrap | Developer (VFX/Shaders) |
| Phnix | Developer |
| pixelrogue | Developer (Enemy AI) |
| Shoyguer | Game Designer & Developer |
Priority List
Settings
These are the following settings configurable in the game:
- Music Volume
- Sound FX Volume
- Full Screen
- V Sync
Links
Here you will find useful link and the game's other documents
- Official Documentation
- Notion Kanban
- Game Design Document
- Github Repository
- Itch.io Page
- Steam Page
- Game Landing Page
- Markdown Guide
- VSCode Markdown Viewer
- VSCode Markdown Table Prettifier
FAQs
Work in progress